If you’ve ever stood in the kitchen craving something cozy and exciting at the same time, Japanese recipes are calling your name!
There’s just something about the combination of salty miso, crispy veggies, smooth tender noodles, and brothy rice bowls that turns dinner into a little moment of magic.
I remember the first time I prepared homemade onigiri from scratch—it looked wonky but tasted like a dream.
From crispy tempura to soul-soothing miso soup and those adorable bento-style lunches, Japanese recipe ideas bring that perfect blend of flavor, balance, and fun.
And best of all, you don’t need to graduate from culinary school or spend money on special kitchen tools to make them in the comfort of your own kitchen.
If you’re already a fan of comforting bowls, you’ll definitely want to check out these cozy Rice Bowl Recipes to go with your Japanese cooking spree!
Weeknight-friendly meals – Many Japanese dishes are surprisingly quick to make, so you can whip up something delish even on a busy Tuesday.
Clean and balanced flavors – Think of light soups, raw vegetables, grilled fish, and pickled vegetables that make you feel full and indulgent.
Tons of variety – With veggie-filled stir-fries, sushi rolls, and udon soups, there’s something for every kind of craving.
Great for prepping ahead – Bento-style recipes and make-ahead broths make meal prepping actually enjoyable (who knew?).
Vegetarian-friendly options galore – Don’t worry, it’s not all seafood and pork! There are plenty of veggie-friendly meals that complement these Vegetarian Side Dishes too.
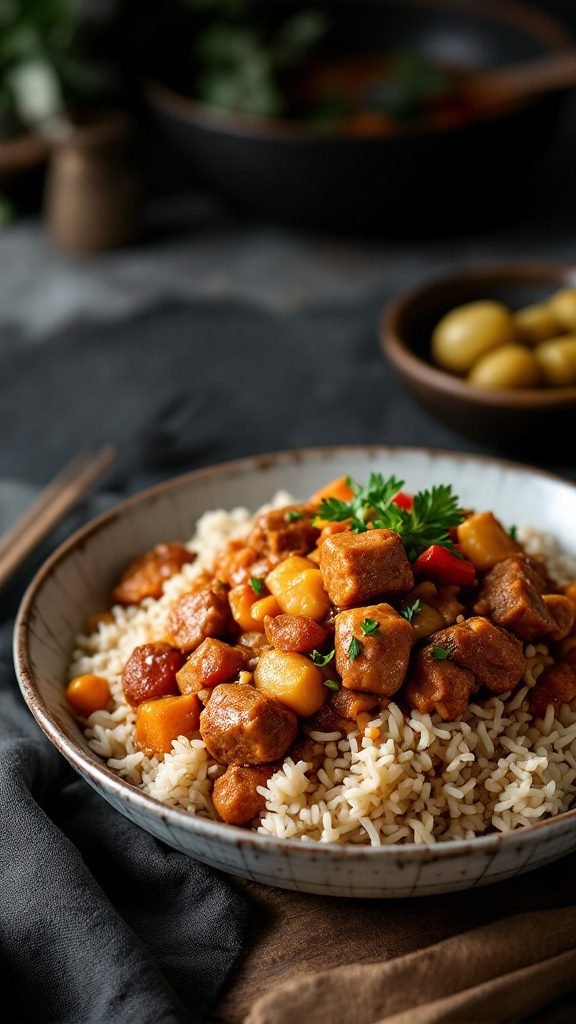
Japanese Curry Rice
Japanese Curry Rice is a warm and comforting dish that combines tender meat, vegetables, and a rich curry sauce served over steaming rice. The flavors are mild yet satisfying, making it a favorite among both adults and kids. It’s simple to prepare, perfect for busy weeknights, and can easily be adapted to fit vegetarian or low-carb lifestyles.
This dish is often made with a homemade or store-bought curry roux, which provides a convenient way to introduce the delightful combination of spices. You can customize it with your choice of protein, such as chicken, beef, or tofu, and a variety of vegetables like carrots, potatoes, and peas for a nutritious meal.
Ingredients
2 tablespoons vegetable oil
1 onion, chopped
2 carrots, sliced
2 potatoes, cubed
1 lb (450g) chicken thighs, cubed (or tofu for a plant-based option)
3 cups water
1 package Japanese curry roux (medium or mild)
2 cups cooked rice (white or brown)
Green onions, chopped (for garnish)
Instructions
Heat the vegetable oil in a large pot over medium heat. Add the chopped onion and sauté until translucent.
Add the chicken (or tofu) and cook until browned on all sides.
Stir in the carrots and potatoes, cooking for a few minutes.
Pour in the water and bring to a boil. Reduce the heat and let it simmer for about 15 minutes until the vegetables are tender.
Break the curry roux into pieces and add it to the pot, stirring until fully dissolved. Simmer for another 10 minutes until the sauce thickens.
Serve the curry over a bed of rice and garnish with chopped green onions.
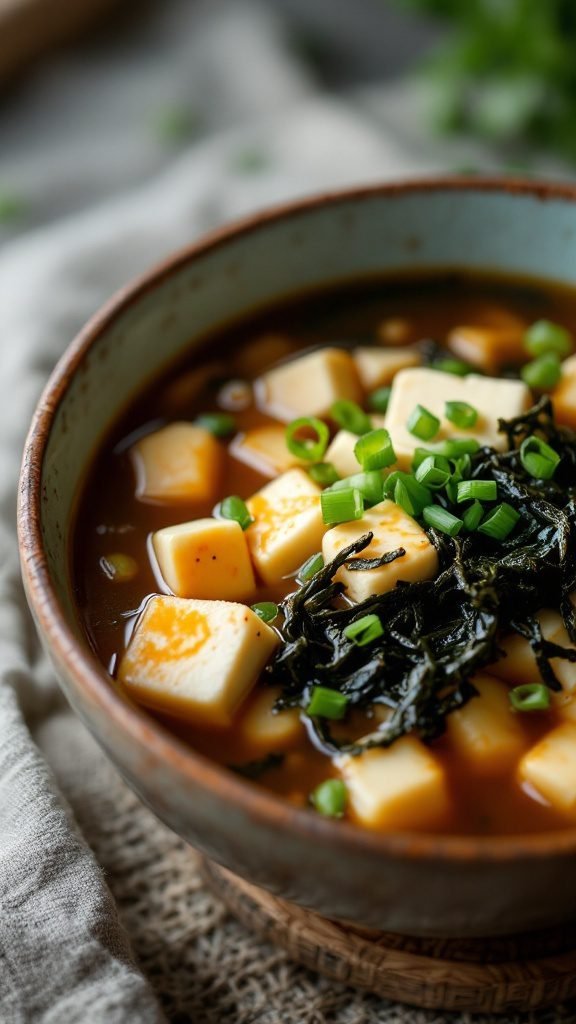
Miso Soup with Tofu and Seaweed
Miso soup is a comforting Japanese dish that combines the rich umami flavors of miso paste with soft tofu and nutrient-packed seaweed. This soup is not only flavorful but also simple to prepare, making it a go-to meal for busy weeknights or a light lunch. The balance of savory miso and the creaminess of tofu creates a delightful experience in every spoonful.
This recipe is perfect for anyone looking for a healthy, low-carb, and dairy-free meal. It fits well into various lifestyles, including vegetarian and vegan diets. Plus, with its nutritious ingredients, it makes for a great addition to any bento box or sushi night. Let’s get cooking!
Ingredients
4 cups vegetable broth
3 tablespoons miso paste
1 cup firm tofu, cubed
1 cup dried seaweed (wakame or similar)
2 green onions, sliced
1 tablespoon soy sauce (optional)
1 teaspoon sesame oil
Instructions
Heat the vegetable broth in a pot over medium heat until simmering.
In a small bowl, mix the miso paste with a ladle of hot broth to dissolve it, then stir it back into the pot.
Add the cubed tofu and seaweed to the pot, cooking for another 5 minutes.
Stir in the soy sauce and sesame oil for extra flavor, if desired.
Remove from heat, garnish with sliced green onions, and serve warm.
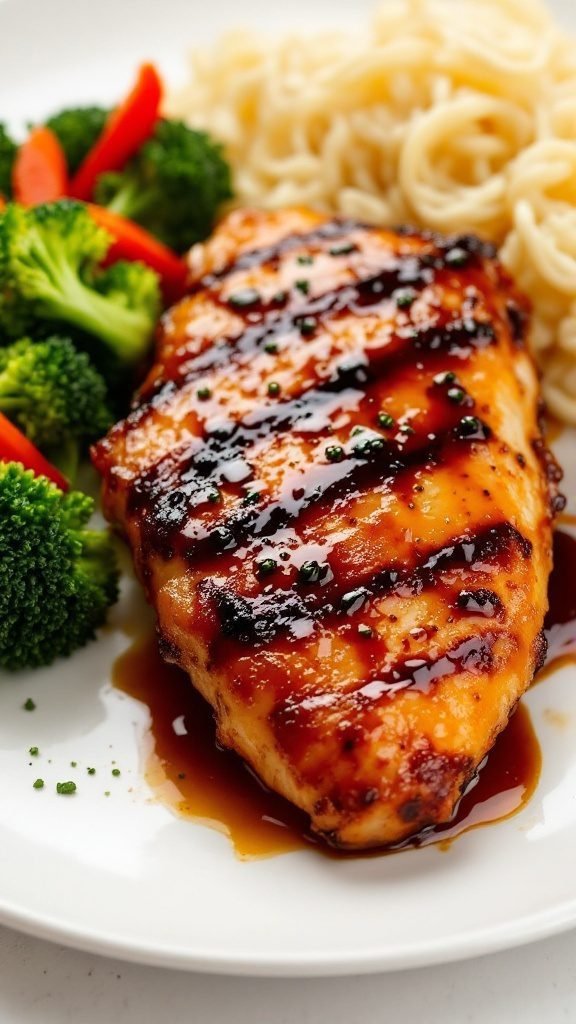
Teriyaki Chicken with Glaze
Teriyaki chicken is a deliciously sweet and savory dish that brings a taste of Japan right to your dinner table. The rich glaze, made from soy sauce, mirin, and sugar, creates a sticky, mouth-watering coating that pairs perfectly with tender chicken. It’s simple to make and perfect for a weeknight meal, whether you’re a cooking novice or a culinary enthusiast.
This dish is not only flavorful but also versatile. You can serve it with rice, steamed vegetables, or even as part of a bento box. Plus, it’s easy to customize to fit dietary needs, making it great for those following a gluten-free or low-carb lifestyle. Here’s a tasty recipe to try:
Ingredients
1 lb chicken breast, boneless and skinless
1/2 cup soy sauce (or tamari for gluten-free)
1/4 cup mirin
1/4 cup brown sugar or a sugar-free alternative
2 cloves garlic, minced
1 teaspoon grated ginger
2 tablespoons vegetable oil
Sesame seeds for garnish
Chopped green onions for garnish
Instructions
Marinate the Chicken: In a bowl, mix soy sauce, mirin, brown sugar, garlic, and ginger. Add the chicken and let it marinate for at least 30 minutes, or up to 2 hours for more flavor.
Cook the Chicken: Heat vegetable oil in a skillet over medium heat. Remove chicken from the marinade (reserve marinade) and cook for about 5-7 minutes on each side until browned and cooked through.
Prepare the Glaze: In a small saucepan, bring the reserved marinade to a boil and then reduce heat to simmer for about 5-10 minutes until it thickens slightly.
Glaze the Chicken: Drizzle the glaze over the cooked chicken in the skillet and cook for another minute to caramelize.
Serve: Garnish with sesame seeds and green onions. Enjoy your teriyaki chicken with rice or veggies!
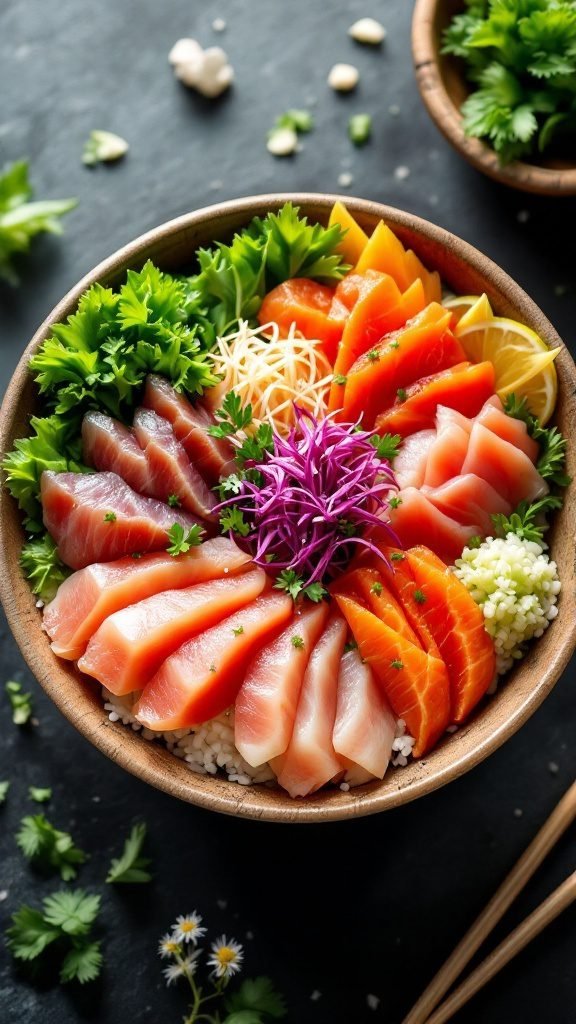
Chirashi Sushi Bowls
Chirashi sushi bowls are a delightful and vibrant way to enjoy sushi without the hassle of rolling it. This Japanese meal features a base of fluffy sushi rice topped with a colorful assortment of sashimi, vegetables, and garnishes. The combination of fresh fish and crunchy veggies creates a refreshing taste that is both satisfying and nutritious. Plus, it’s simple to make, making it perfect for a quick dinner or a special occasion.
Creating your own chirashi sushi bowl allows for plenty of customization. You can select your favorite proteins, whether it’s salmon, tuna, or plant-based options, to suit your diet. This dish is also great for those following a low carb or gluten-free lifestyle, as it can easily be adapted. The final touch often includes a drizzle of soy sauce or a dollop of wasabi for an extra kick.
Ingredients
2 cups sushi rice
2 1/2 cups water
1/4 cup rice vinegar
2 tablespoons sugar
1 teaspoon salt
200g assorted sashimi (salmon, tuna, etc.)
1/2 cucumber, julienned
1 small carrot, julienned
1 avocado, sliced
Pickled ginger
Sesame seeds
Microgreens or cilantro for garnish
Soy sauce for serving
Instructions
Prepare the Sushi Rice: Rinse the sushi rice under cold water until the water runs clear. Combine rinsed rice and water in a pot and bring to a boil. Reduce the heat to low, cover, and simmer for 18 minutes. Remove from heat and let it sit for 10 minutes.
Season the Rice: In a small saucepan, heat rice vinegar, sugar, and salt until dissolved. Gently fold this mixture into the cooked rice, being careful not to mash the grains.
Assemble the Bowl: In a large bowl, spread a generous layer of sushi rice at the bottom. Arrange sashimi, cucumber, carrot, and avocado on top in a visually appealing manner.
Garnish and Serve: Sprinkle sesame seeds and add microgreens or cilantro for garnish. Serve with pickled ginger and soy sauce on the side for dipping.
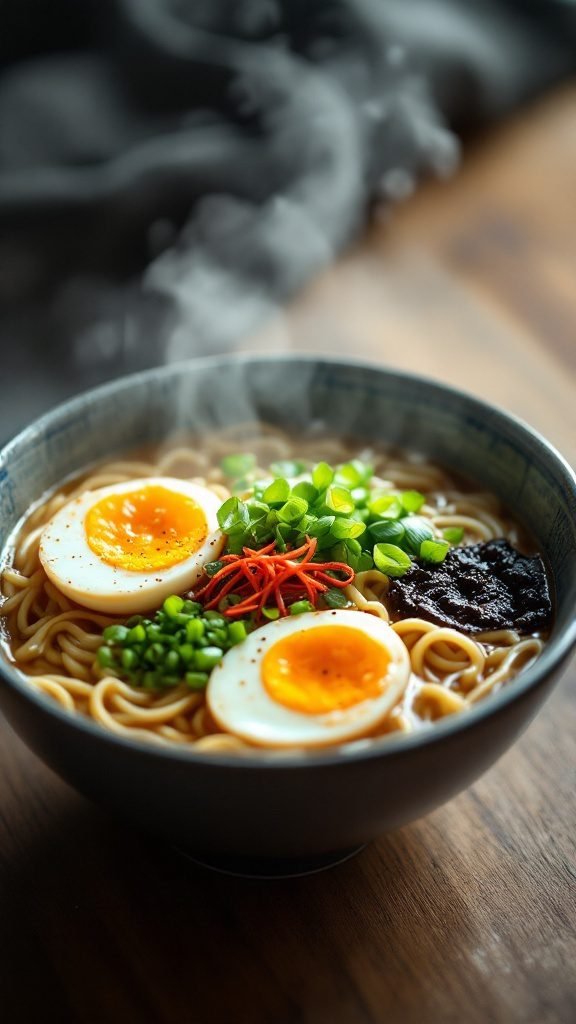
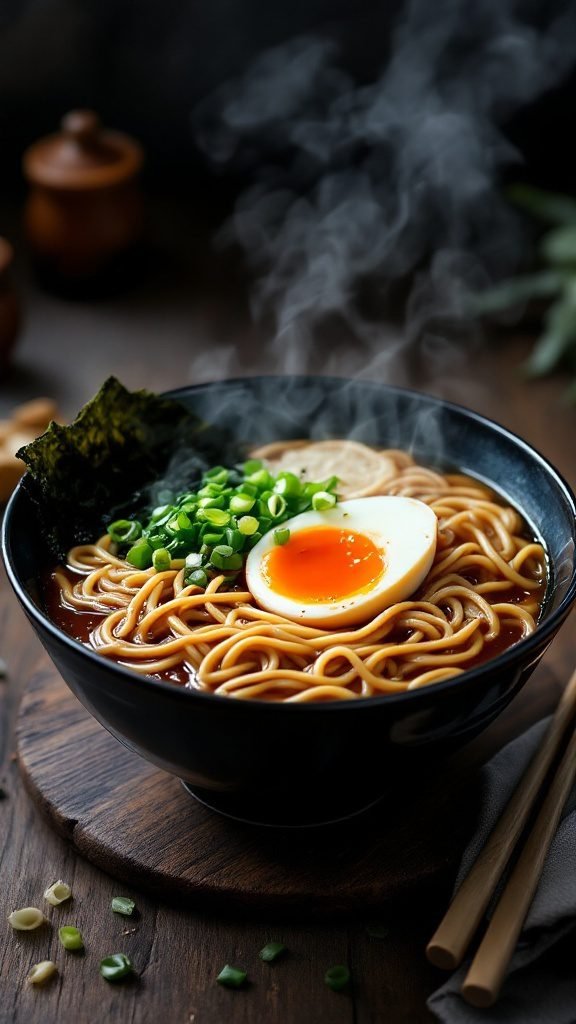
Ramen Noodle Soup with Toppings
Ramen noodle soup is a comforting and flavorful dish that has captured hearts around the world. With its rich broth and the perfect balance of textures, it’s a delightful meal that satisfies any craving. Plus, it’s quite simple to make, making it a great option for both beginners and seasoned cooks.
This recipe showcases a classic ramen preparation, featuring tender noodles, a savory broth, and a variety of toppings to add extra flavor and nutrition. You can easily customize it to fit your dietary needs, whether you’re looking for a low-carb option or a hearty vegetarian meal. It’s a delicious way to enjoy a slice of Japanese cuisine right at home!
Ingredients
4 cups chicken or vegetable broth
2 servings of ramen noodles
2 boiled eggs, halved
1 cup green onions, chopped
1 tablespoon soy sauce
1 teaspoon miso paste
1 tablespoon sesame oil
Pickled ginger for garnish
Optional: Sriracha or wasabi for spice
Instructions
Prepare the Broth: In a pot, combine the chicken or vegetable broth, soy sauce, and miso paste. Heat over medium heat until simmering.
Cook the Noodles: In a separate pot, cook the ramen noodles according to package instructions. Drain and set aside.
Combine Ingredients: Add the cooked noodles to the simmering broth, allowing them to soak up the flavors for a minute.
Assemble the Bowl: Pour the ramen and broth into serving bowls. Top each bowl with sliced boiled eggs, chopped green onions, and pickled ginger. Drizzle sesame oil for extra flavor.
Serve: Enjoy your ramen hot, adding Sriracha or wasabi for an extra kick if desired.
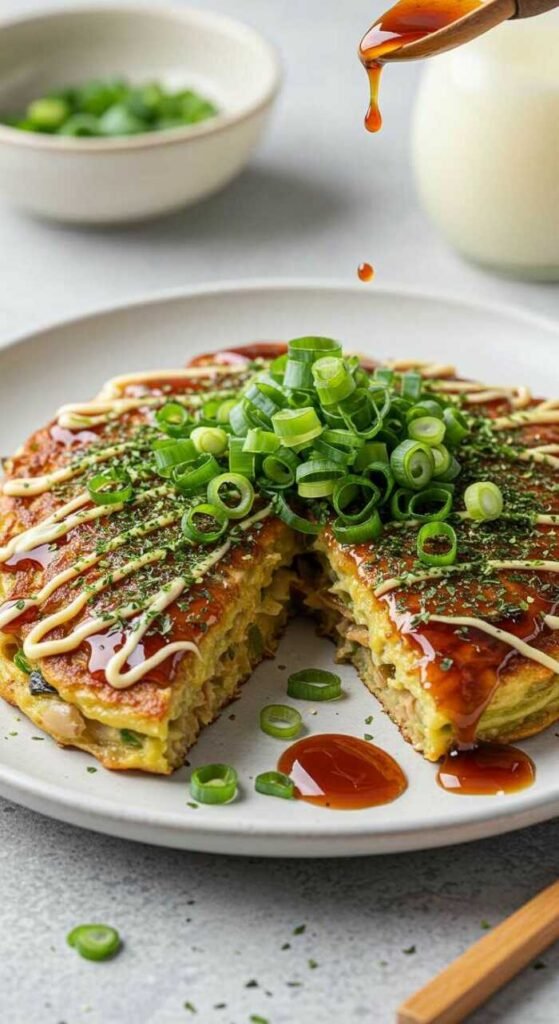
Okonomiyaki Savory Pancake
Okonomiyaki is a delightful Japanese savory pancake that combines a variety of ingredients into a delicious meal. Known for its flexibility, you can customize it with your favorite fillings like shredded cabbage, meats, or even make it vegetarian by adding mushrooms and greens. The taste is a perfect balance of savory and slightly sweet, with a hint of umami from the toppings.
This dish is not only easy to prepare but also a fun way to involve friends and family in cooking. Whether it’s a casual weekday meal or a special gathering, Okonomiyaki makes for a nutritious and satisfying option, fitting well into various dietary preferences, including plant-based or gluten-free lifestyles.
Ingredients
1 cup all-purpose flour
1 cup dashi stock (or water)
2 cups shredded cabbage
1/2 cup chopped green onions
1/2 cup cooked shrimp or bacon (optional)
2 large eggs
Salt and pepper to taste
Okonomiyaki sauce
Japanese mayonnaise
Bonito flakes (optional)
Chopped parsley for garnish
Instructions
Mix the Batter: In a bowl, combine the flour, dashi stock, eggs, and a pinch of salt. Stir until smooth.
Add Vegetables: Fold in the shredded cabbage, green onions, and any additional ingredients like shrimp or bacon.
Cook the Pancake: Heat a non-stick skillet over medium heat and lightly grease it. Pour half of the batter into the skillet, spreading it into a round shape. Cook for about 3-4 minutes on each side until golden brown and cooked through.
Add Toppings: Once cooked, transfer to a plate. Drizzle with Okonomiyaki sauce and mayonnaise on top. Sprinkle with bonito flakes and parsley for extra flavor.
Serve: Cut into wedges and enjoy your homemade Okonomiyaki!
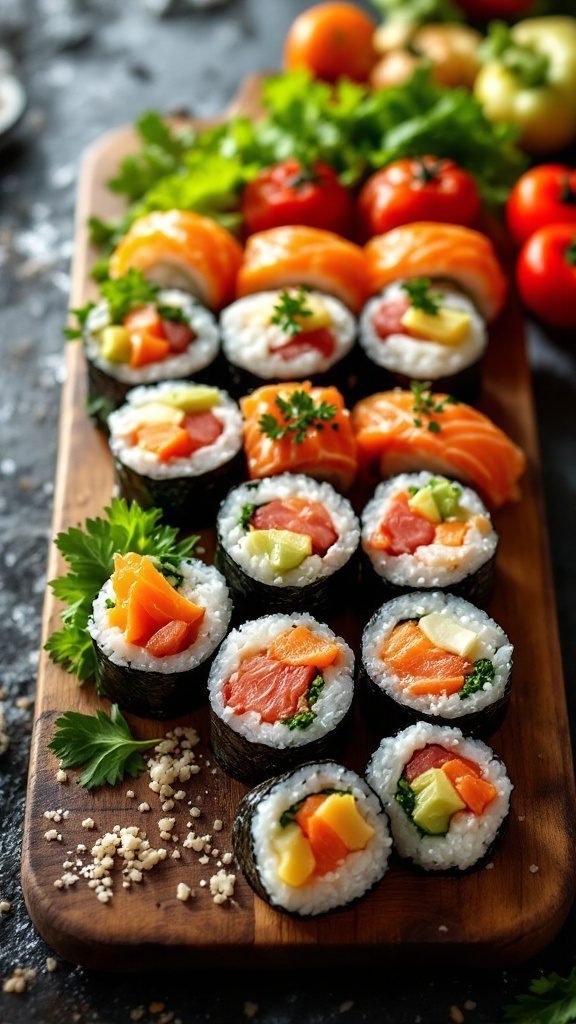
Sushi Rolls with Fresh Ingredients
Sushi rolls are a delicious way to enjoy fresh ingredients in a fun and healthy meal. The combination of seasoned rice, fresh fish, and colorful vegetables creates a balanced dish that’s both satisfying and nutritious. Plus, making sushi rolls at home is simple and can be customized to suit your taste preferences.
With a variety of fillings like avocado, cucumber, and even pickled vegetables, sushi rolls can cater to different dietary needs, whether you’re looking for something vegan or protein-packed. Whether you’re a novice or a seasoned sushi lover, rolling your own sushi is a great way to unleash your creativity in the kitchen!
Ingredients
2 cups sushi rice
2 1/2 cups water
1/3 cup rice vinegar
2 tablespoons sugar
1 teaspoon salt
4 sheets of nori (seaweed)
1 cucumber, julienned
1 avocado, sliced
1 carrot, julienned
4 ounces sushi-grade fish (like salmon or tuna), sliced
Wasabi and soy sauce for serving
Instructions
Cook the Rice: Rinse the sushi rice under cold water until the water runs clear. Combine the rice and water in a rice cooker and cook according to the manufacturer’s instructions. Once done, let it cool.
Season the Rice: In a small bowl, mix rice vinegar, sugar, and salt until dissolved. Gently fold this mixture into the cooled rice, being careful not to mash the grains.
Prepare the Rolls: Place a sheet of nori on a bamboo sushi mat. Wet your hands to prevent sticking, then spread about 1/2 cup of rice evenly over the nori, leaving a small border at the top.
Add Fillings: Layer slices of cucumber, avocado, carrot, and fish across the center of the rice.
Roll it Up: Starting from the bottom, use the mat to roll the sushi tightly away from you. Press gently as you roll to ensure it holds together. Use a sharp knife to slice the roll into bite-sized pieces.
Serve: Arrange the sushi rolls on a platter with wasabi and soy sauce for dipping. Enjoy your fresh homemade sushi!
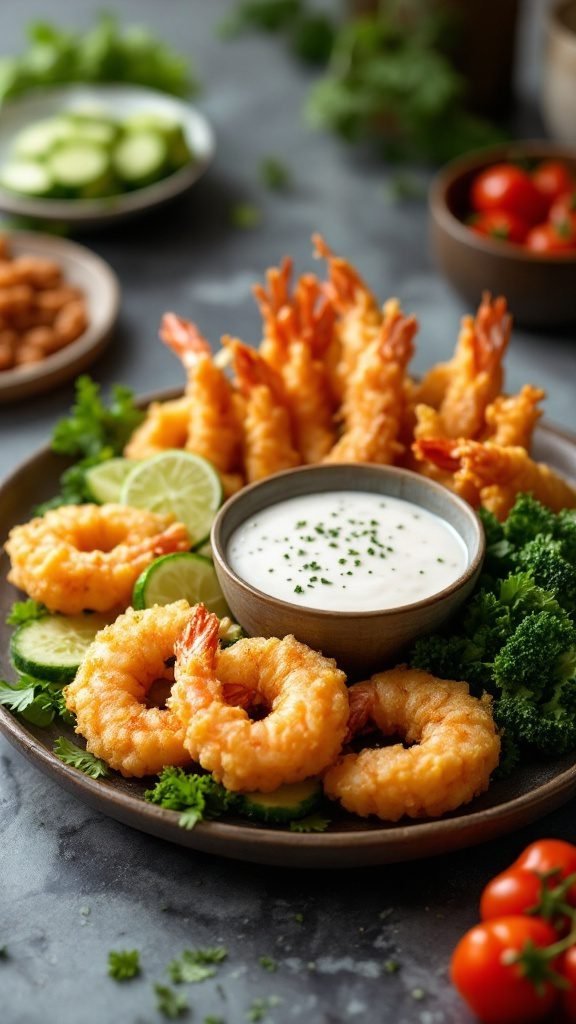
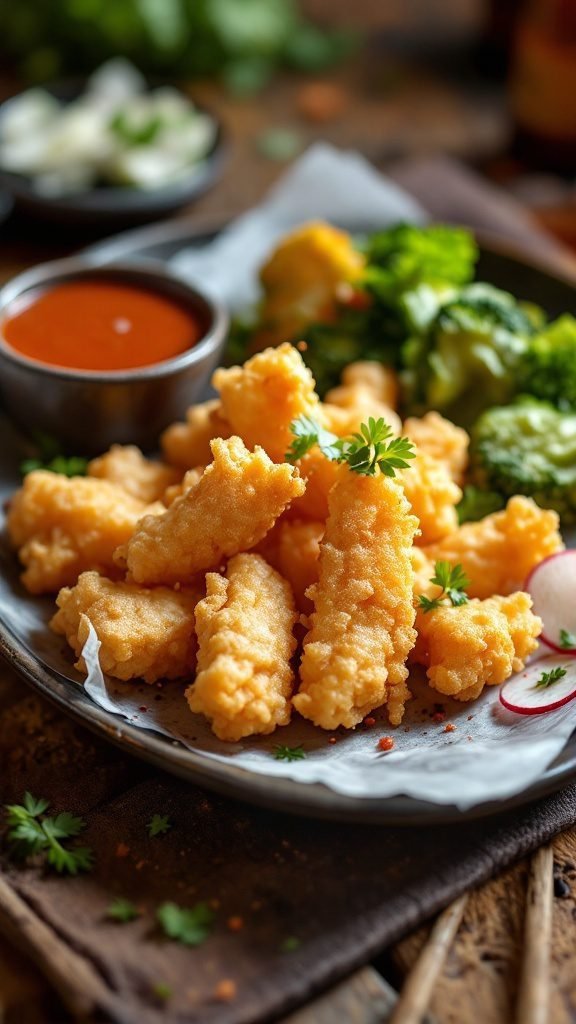
Tempura Vegetables and Shrimp
Tempura is a beloved Japanese dish that features a light and crispy batter enveloping a variety of vegetables and shrimp. The combination of textures and flavors makes it a delightful treat. The lightness of the batter allows the natural flavors of the ingredients to shine through, offering a satisfying crunch with every bite. Not only is it delicious, but it’s also quite simple to make at home, making it a perfect dish for both beginners and seasoned cooks.
This recipe can be a great addition to your meal plan. Whether served as an appetizer or a main course, tempura pairs wonderfully with a dipping sauce and can easily fit into a healthy lifestyle. Enjoy this tasty and nutritious option that’s vegetarian and gluten-free when using appropriate flour. Let’s dive into the recipe!
Ingredients
1 cup all-purpose flour (or gluten-free flour)
1/2 cup cold water
1 large egg
1 teaspoon baking powder
1 cup shrimp, peeled and deveined
1 cup assorted vegetables (such as sweet potatoes, bell peppers, and green beans)
Oil for frying
Salt, to taste
Dipping sauce (soy sauce or tempura sauce)
Instructions
Make the Batter: In a bowl, whisk together the flour, cold water, egg, and baking powder until just combined. Be careful not to overmix; it’s okay if there are lumps.
Prep the Ingredients: Cut the vegetables into bite-sized pieces and ensure the shrimp are clean and dry. Season lightly with salt.
Heat the Oil: In a deep pan, heat oil over medium-high heat. You’ll want enough oil to cover the tempura once added.
Fry the Tempura: Dip the shrimp and vegetables in the batter, allowing excess to drip off, then carefully place them in the hot oil. Fry in small batches for about 2-3 minutes or until golden brown. Remove and drain on paper towels.
Serve: Arrange the tempura on a serving plate and enjoy with your favorite dipping sauce!
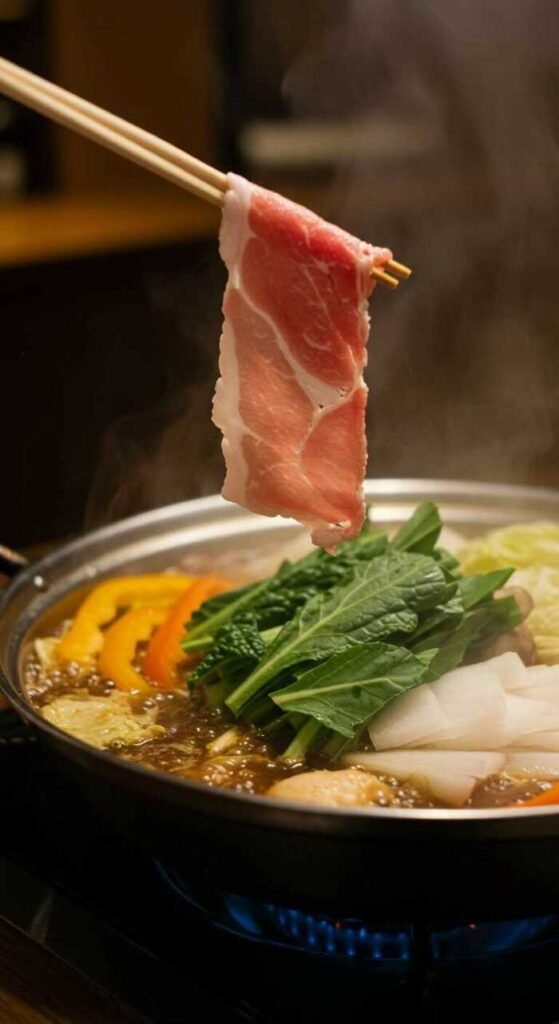
Shabu-Shabu Hot Pot
Shabu-Shabu is a delightful Japanese hot pot dish that brings together thinly sliced meat, fresh vegetables, and a flavorful broth. The name ‘Shabu-Shabu’ refers to the sound made when the ingredients are swished around in the pot. This dish is not only tasty but also simple to prepare, making it perfect for gatherings with family and friends.
The meal is healthy and can cater to various dietary preferences, allowing for protein options like beef, chicken, or tofu, alongside a mix of colorful veggies. Serve it with dipping sauces like ponzu or sesame, and you’ve got a nutritious and delicious experience that everyone can enjoy. Ready to try making Shabu-Shabu at home? Here’s a tasty recipe to get you started!
Ingredients
8 oz thinly sliced beef, chicken, or tofu
4 cups vegetable broth
1 cup Napa cabbage, chopped
1 cup carrots, sliced
1 cup mushrooms, sliced
1 cup green onions, chopped
1 cup bean sprouts
2 tablespoons soy sauce
2 tablespoons sesame oil
Wasabi and ponzu sauce for dipping
Instructions
Prepare the Broth: In a large pot, bring the vegetable broth to a gentle simmer over medium heat.
Add the Veggies: Toss in the Napa cabbage, carrots, mushrooms, and green onions. Let them cook for about 5 minutes until they are slightly tender.
Cook the Protein: Add the thinly sliced beef, chicken, or tofu to the pot. Cook for about 2-3 minutes, swishing around until fully cooked.
Serve: Use chopsticks or a slotted spoon to serve the cooked ingredients into bowls. Drizzle with soy sauce and sesame oil. Enjoy with wasabi and ponzu sauce on the side!
Gyoza Dumplings with Dipping Sauce
Gyoza dumplings are a delightful treat that combines a crispy exterior with a juicy filling, making them a fantastic addition to any meal. These savory dumplings have a unique flavor that’s both comforting and satisfying. Plus, they’re simple to make, perfect for a cozy night in or for impressing guests at a gathering.
These dumplings can be customized with various fillings, making them a great option for vegan, vegetarian, or meat lovers alike. Pair them with a tangy dipping sauce for an extra kick. Enjoy them alongside a bowl of ramen or soba for a complete meal that’s both nutritious and delicious.
Ingredients
1 cup all-purpose flour
1/2 cup warm water
1/2 pound ground pork or plant-based protein
1 cup finely chopped cabbage
2 green onions, finely chopped
1 tablespoon minced garlic
1 tablespoon grated ginger
2 tablespoons soy sauce
1 tablespoon sesame oil
Salt and pepper to taste
Oil for frying
1/4 cup soy sauce (for dipping)
1 tablespoon rice vinegar (for dipping)
Instructions
Make the Dough: In a bowl, mix the flour with warm water until a dough forms. Knead for about 5 minutes until smooth. Cover and let it rest for 30 minutes.
Prepare the Filling: In a separate bowl, combine ground pork or plant-based protein, chopped cabbage, green onions, garlic, ginger, soy sauce, sesame oil, salt, and pepper. Mix well.
Form the Dumplings: Roll the rested dough into small balls, then flatten each ball into a round wrapper. Place a spoonful of filling in the center, fold, and pinch to seal.
Cook the Dumplings: Heat oil in a non-stick skillet over medium heat. Add dumplings and fry until the bottoms are golden. Pour in a little water (about 1/4 cup), cover, and let steam for 5 minutes until cooked through.
Prepare the Dipping Sauce: In a small bowl, mix soy sauce and rice vinegar. Serve alongside the gyoza.
Zaru Soba Cold Buckwheat Noodles
Zaru Soba is a refreshing dish perfect for hot days. Made with chilled buckwheat noodles, it’s light yet satisfying. The taste is nutty and slightly earthy, thanks to the buckwheat, making it a unique addition to your meal rotation. Plus, it’s super easy to prepare, which is always a bonus!
This dish can be enjoyed on its own or paired with various toppings like green onions, wasabi, or even some tempura for extra crunch. It’s a great choice for those looking for a nutritious, low-carb meal that fits well into a healthy lifestyle, whether vegetarian or vegan.
Ingredients
200 grams soba noodles
2 tablespoons soy sauce
1 tablespoon mirin
1 teaspoon wasabi (optional)
Chopped green onions for garnish
Tempura or sashimi for serving (optional)
Instructions
Cook the soba noodles according to the package instructions, usually about 5-7 minutes. Drain and rinse under cold water to stop the cooking process.
In a small bowl, mix together soy sauce and mirin. Adjust to taste.
Serve the chilled noodles on a plate, drizzled with the soy sauce mixture. Garnish with chopped green onions and a side of wasabi if you like some heat.
For a complete meal, pair with tempura or sashimi for added protein.
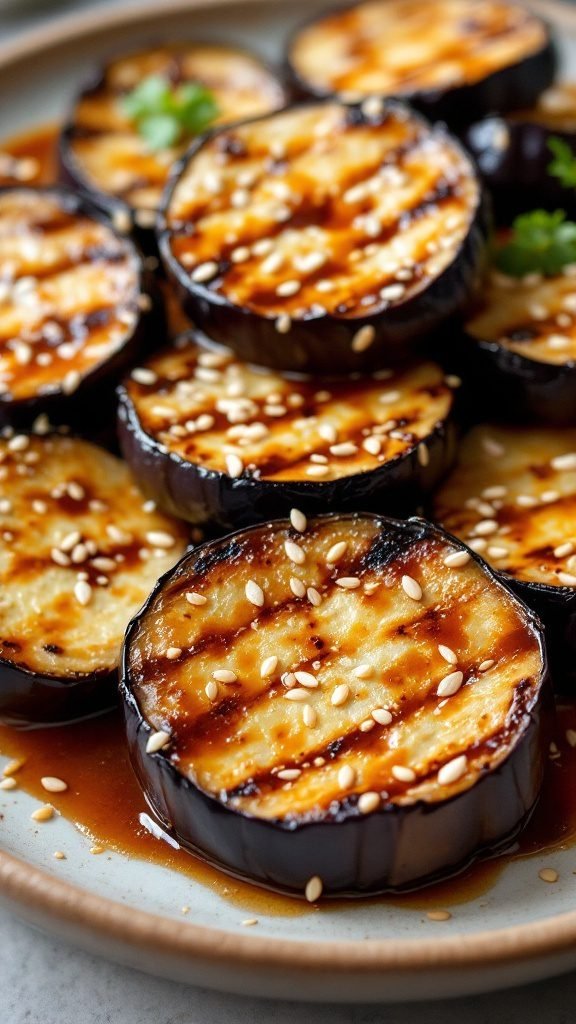
Nasu Dengaku Grilled Eggplant
Nasu Dengaku is a deliciously simple Japanese dish that celebrates the rich flavors of grilled eggplant. The eggplant is brushed with a sweet and savory miso glaze, giving it an irresistible taste that balances perfectly with its smoky char. This plant-based recipe is not just easy to make but also offers a nutritious meal option that fits well within a vegetarian or vegan lifestyle.
Ideal for a side dish or even a light main, Nasu Dengaku is low in carbs and high in flavor. It pairs wonderfully with steamed rice or can be enjoyed on its own as a satisfying snack. The combination of the tender, grilled eggplant and the umami-rich miso glaze makes for a delightful experience that you’ll want to share with friends and family.
Ingredients
2 medium eggplants
3 tablespoons white miso paste
2 tablespoons mirin
1 tablespoon sugar
1 tablespoon soy sauce
1 tablespoon sesame oil
Sesame seeds for garnish
Instructions
Preheat your grill or grill pan over medium-high heat.
Slice the eggplants in half lengthwise and score the flesh in a criss-cross pattern.
In a bowl, mix miso paste, mirin, sugar, soy sauce, and sesame oil until smooth.
Brush the miso mixture generously over the eggplant halves.
Place the eggplant on the grill, cut side down, and grill for about 4-5 minutes until they are tender and have nice grill marks.
Flip the eggplant, brush with more miso glaze, and grill for another 3-4 minutes.
Remove from the grill, sprinkle with sesame seeds, and serve warm.
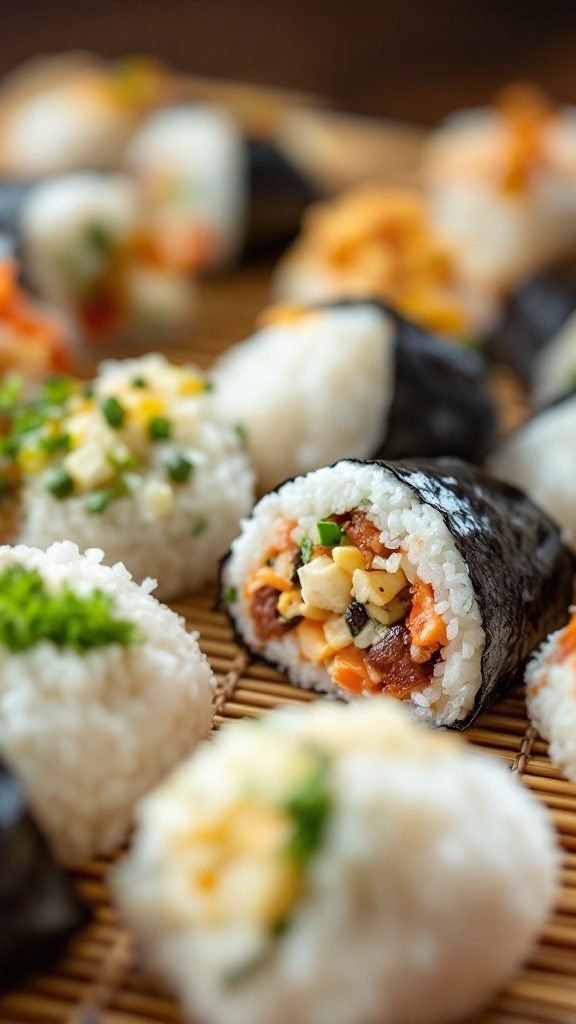
Onigiri Rice Balls with Fillings
Onigiri, or Japanese rice balls, are not only fun to make but also versatile and delicious. They can be filled with a variety of ingredients like pickled vegetables, salmon, or even spicy tuna. These little bundles of joy are perfect for a quick snack, a lunchbox treat, or even a picnic. Plus, they’re nutritious and can easily fit into a healthy lifestyle.
Making onigiri is pretty straightforward, so anyone can give it a try! The taste is a delightful blend of savory and slightly sweet, especially when you incorporate ingredients like teriyaki or wasabi. You can customize them based on your dietary needs too, whether you prefer vegetarian options or something more protein-packed. Enjoy these delightful rice balls as part of a bento meal or on their own!
Ingredients
2 cups short-grain Japanese rice
2 1/2 cups water
1 tsp salt
1 tbsp rice vinegar
Filling options (e.g., grilled salmon, pickled plum, or spicy tuna)
Nori (seaweed sheets), cut into strips
Instructions
Rinse the rice under cold water until the water runs clear. This helps remove excess starch.
Combine the rinsed rice and water in a rice cooker and cook according to the manufacturer’s instructions. Alternatively, bring to a boil in a pot, then reduce heat, cover, and simmer for about 20 minutes.
Once cooked, let the rice sit, covered, for 10 minutes. Then, mix in the salt and rice vinegar gently.
When the rice is cool enough to handle, wet your hands to prevent sticking. Take a handful of rice and create a small indentation in the center.
Add your desired filling, then reshape the rice into a triangle or ball. Wrap with nori for added flavor.
Serve immediately, or store in a bento box for later enjoyment.
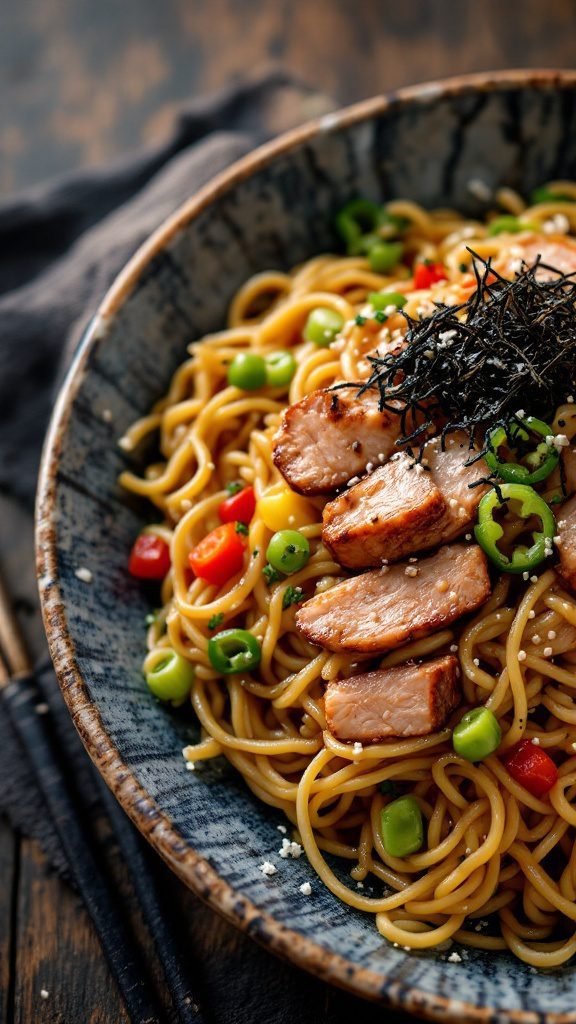
Yakisoba Stir-Fried Noodles
Yakisoba, a popular Japanese stir-fried noodle dish, is a delightful fusion of flavors and textures. It’s savory, slightly sweet, and filled with colorful vegetables and proteins, making it a satisfying meal for any occasion. This dish is simple to prepare and can easily be customized to suit your taste, whether you prefer it vegetarian or packed with meat.
Perfect for a quick dinner or a hearty lunch, yakisoba is not just a meal; it’s a comfort food that brings warmth to the table. The combination of chewy noodles, fresh vegetables, and your choice of protein all coated in a delicious sauce makes for an enjoyable dining experience. Plus, it’s great for meal prep, ensuring you have nutritious options ready throughout the week.
Ingredients
2 servings of yakisoba noodles (or any noodle of your choice)
1 tablespoon vegetable oil
1 cup sliced cabbage
1/2 cup sliced bell peppers
1/4 cup chopped green onions
1/2 cup cooked chicken, pork, or tofu (for a vegetarian option)
2 tablespoons soy sauce
1 tablespoon Worcestershire sauce
1 tablespoon oyster sauce (optional)
Salt and pepper to taste
Seaweed or bonito flakes for garnish
Instructions
Prepare the Noodles: Cook the yakisoba noodles according to package instructions. Drain and set aside.
Stir-Fry the Vegetables: In a large skillet or wok, heat vegetable oil over medium-high heat. Add sliced cabbage and bell peppers, and stir-fry for about 3-4 minutes until softened.
Add Protein: If using meat or tofu, add it to the pan and stir-fry for another 2-3 minutes until heated through.
Combine Noodles and Sauce: Add the cooked noodles to the skillet. Pour in the soy sauce, Worcestershire sauce, and oyster sauce (if using). Toss everything together until the noodles are evenly coated and heated through.
Season and Serve: Taste and adjust seasoning with salt and pepper. Garnish with chopped green onions and seaweed or bonito flakes before serving.
Kinpira Gobo Stir-Fried Burdock
Kinpira Gobo is a traditional Japanese dish that highlights the earthy flavors of burdock root. Known for its crunchy texture and distinctive taste, burdock adds a unique twist to any meal. This recipe is not only simple to make but also nutritious, making it a great addition to a plant-based lifestyle.
The dish balances the natural sweetness of the burdock root with soy sauce and sesame, creating a delightful umami flavor. It’s often served as a side dish or can be included in a bento box. Perfectly paired with rice or noodles, Kinpira Gobo is a delicious way to incorporate healthy vegetables into your diet.
Ingredients
1 large burdock root
1 tablespoon sesame oil
2 tablespoons soy sauce
1 tablespoon mirin
1 teaspoon sugar
1 tablespoon sesame seeds
1 carrot, julienned
1 green onion, chopped
Instructions
Prepare the Burdock: Scrub the burdock root under running water. Peel it lightly and cut it into thin matchstick-sized strips. Soak the strips in water with a splash of vinegar to prevent browning.
Sauté the Vegetables: Heat sesame oil in a pan over medium heat. Add the burdock and carrot strips. Stir-fry for about 5-7 minutes until they start to soften.
Add Seasonings: Pour in the soy sauce, mirin, and sugar. Stir well and continue to cook for another 5 minutes until the burdock is tender and the sauce is absorbed.
Finish and Serve: Sprinkle sesame seeds and chopped green onion on top before serving. Enjoy warm or at room temperature as part of a meal or a healthy snack.
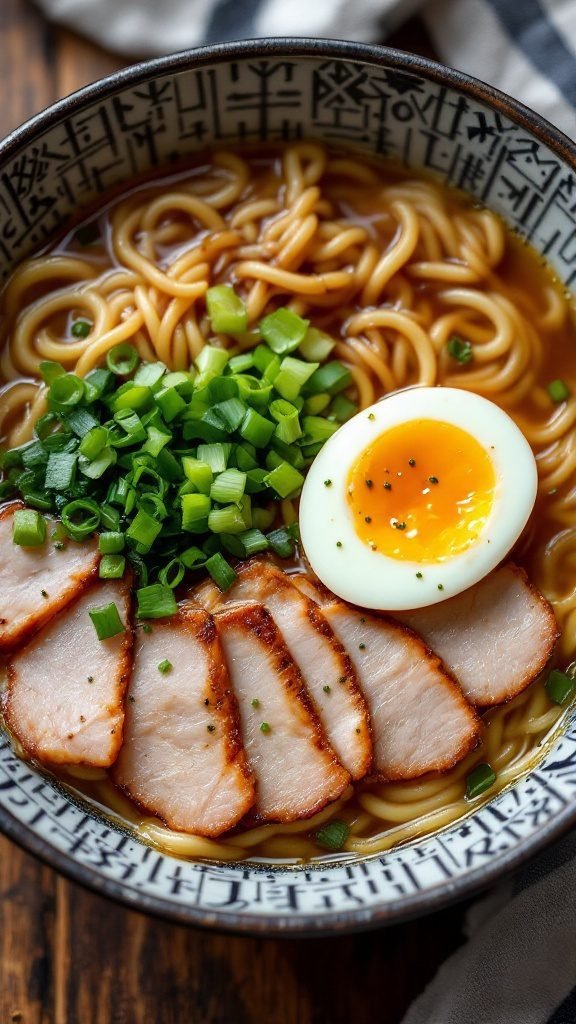
Shio Ramen with Pork and Scallions
Shio ramen is a delightful dish featuring a savory broth seasoned primarily with salt, making it lighter and more refreshing than its richer counterparts. The combination of tender pork slices and fresh scallions brings depth and flavor to each bowl. This recipe is not only simple to make but also perfect for a cozy meal at home.
The balanced flavors and comforting texture make this ramen a favorite. Whether you’re looking for a hearty meal or simply want to enjoy a taste of Japanese cuisine, this shio ramen fits the bill!
Ingredients
4 cups chicken broth
2 tablespoons soy sauce
1 tablespoon miso paste
1 teaspoon salt
2 packs fresh ramen noodles
1 cup cooked pork belly, sliced
2 soft-boiled eggs
1/2 cup scallions, chopped
Black pepper, to taste
Instructions
Prepare the Broth: In a pot, combine chicken broth, soy sauce, miso paste, and salt. Bring to a simmer over medium heat.
Cook the Noodles: In a separate pot, boil water and cook the ramen noodles according to package instructions. Drain and set aside.
Assemble the Bowl: Divide the cooked noodles between two bowls. Pour the hot broth over the noodles.
Add Toppings: Top each bowl with slices of pork, a soft-boiled egg, and a generous sprinkling of scallions.
Season: Finish with a dash of black pepper and serve hot for a comforting meal.
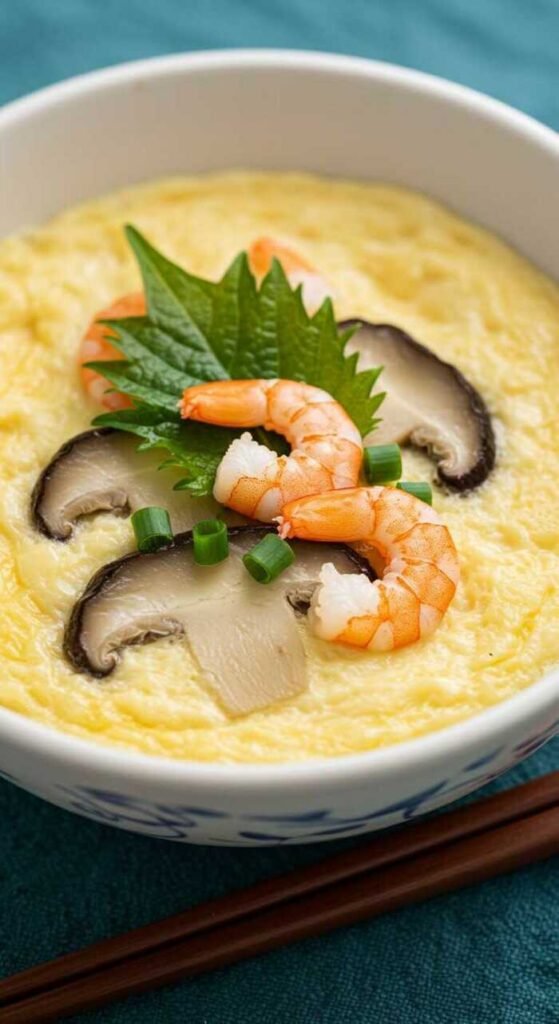
Chawanmushi Savory Egg Custard
Chawanmushi is a delightful Japanese dish that presents a silky, savory egg custard, usually steamed to perfection. It boasts a delicate texture and is often enhanced with ingredients like shrimp, mushrooms, and scallions, making it both nutritious and satisfying. This dish is simple to make and can be a great addition to a meal or served as a light snack.
With its umami-rich flavor profile, it pairs wonderfully with rice and can be a comforting choice for lunch or dinner. Plus, you can easily make it dairy-free and low-carb, fitting various dietary lifestyles including keto and plant-based options. Give it a try for a taste of authentic Japanese cuisine!
Ingredients
4 large eggs
2 cups dashi stock
2 tablespoons soy sauce
1 teaspoon mirin
1/2 teaspoon salt
1/2 cup cooked shrimp
1/4 cup shiitake mushrooms, sliced
2 tablespoons green onions, chopped
1 tablespoon mitsuba or parsley for garnish
Instructions
Prepare the Mixture: In a bowl, whisk the eggs, then gently mix in the dashi stock, soy sauce, mirin, and salt until well combined.
Add Fillings: Divide the shrimp and mushrooms between serving cups or bowls, then pour the egg mixture over the top.
Steam: Place the cups in a steamer basket over simmering water. Cover and steam for about 15-20 minutes, or until the custard is set.
Garnish and Serve: Remove from heat and let cool slightly. Garnish with green onions and mitsuba or parsley before serving warm.
Saba Sushi with Mackerel
Saba sushi, featuring mackerel, is a delightful dish that brings together the flavors of fresh fish and seasoned rice. The fatty richness of mackerel pairs beautifully with the subtle tang of vinegared rice, creating a harmonious balance that’s both satisfying and nutritious. Making this sushi at home is easier than it may seem, and it’s a great way to impress family and friends with your culinary skills.
This recipe is not only protein-packed but also low-carb, making it ideal for various dietary preferences, including those seeking a healthy meal. Serve it as part of a bento box or enjoy it on its own for a light lunch or dinner.
Ingredients
2 cups sushi rice
2 1/2 cups water
1/4 cup rice vinegar
2 tablespoons sugar
1 teaspoon salt
4 pieces of mackerel fillet
2 tablespoons soy sauce
Wasabi and pickled ginger, for serving
Instructions
Prepare the Rice: Rinse the sushi rice under cold water until the water runs clear. Combine the rice and water in a rice cooker or pot and cook according to the instructions.
Make the Sushi Vinegar: In a small bowl, mix the rice vinegar, sugar, and salt until dissolved. Once the rice is cooked, transfer it to a large bowl and gently fold in the vinegar mixture. Allow it to cool slightly.
Cook the Mackerel: Season the mackerel fillets with soy sauce. Grill or pan-sear them over medium heat for about 3-4 minutes on each side until cooked through.
Assemble the Sushi: Once the rice is at room temperature, take a handful in your hand and shape it into a small oval mound. Place a piece of grilled mackerel on top.
Serve: Enjoy your saba sushi with wasabi and pickled ginger on the side for an extra kick of flavor.
Kushiyaki Grilled Skewers
Kushiyaki grilled skewers are a delightful and savory Japanese dish that highlights the rich flavors of grilled meat and vegetables. They are easy to make and perfect for gatherings. The combination of tender meat, colorful vegetables, and a delicious glaze makes each bite satisfying and packed with flavor.
This recipe is not only tasty but also versatile. You can switch up the ingredients to suit your diet, making it vegan or gluten-free. Enjoy these skewers with rice, in a bento box, or as a stand-alone meal!
Ingredients
1 lb chicken breast (or tofu for a plant-based option)
1 bell pepper, cut into squares
1 onion, cut into squares
2 tablespoons soy sauce (or tamari for gluten-free)
1 tablespoon mirin
1 tablespoon sake (optional)
1 tablespoon sugar (or a sugar-free substitute)
Skewers (soaked in water if wooden)
Sesame seeds for garnish
Instructions
Prepare the Marinade: In a bowl, mix together soy sauce, mirin, sake, and sugar. Stir until the sugar dissolves.
Marinate the Chicken: Cut the chicken into bite-sized pieces and add to the marinade. Let it sit for at least 30 minutes.
Assemble Skewers: Thread marinated chicken, bell peppers, and onions onto the skewers, alternating vegetables and meat.
Grill the Skewers: Preheat the grill or grill pan over medium heat. Cook the skewers for about 10-15 minutes, turning occasionally until the chicken is cooked through.
Garnish and Serve: Sprinkle with sesame seeds and serve hot with dipping sauce or over rice.
Takoyaki Octopus Balls
Takoyaki is a popular Japanese street food that brings together delicious flavors and fun textures. These savory octopus balls are crispy on the outside and soft on the inside, typically served with a drizzle of takoyaki sauce and topped with bonito flakes. They offer a delightful umami punch, making them a favorite among food lovers. The best part? Making takoyaki at home is simpler than you might think!
To create this tasty treat, you’ll need a special takoyaki pan to shape the batter into those iconic round balls. The recipe is versatile too; you can add other fillings like green onions, tempura scraps, or cheese to make it your own. Serve them as an appetizer or a fun snack during gatherings!
Ingredients
1 cup all-purpose flour
1 1/4 cups dashi broth
1 large egg
1 cup cooked octopus, chopped
1/4 cup green onions, chopped
1/4 cup tenkasu (tempura scraps)
Takoyaki sauce (for drizzling)
Mayonnaise (optional, for drizzling)
Bonito flakes (for garnish)
Seaweed flakes (for garnish)
Instructions
Make the Batter: In a bowl, whisk together flour, dashi broth, and egg until smooth.
Preheat the Takoyaki Pan: Heat the takoyaki pan over medium heat and brush with oil.
Cook the Balls: Pour batter into each mold, filling them halfway. Add chopped octopus, green onions, and tenkasu. Top off with more batter.
Turn the Balls: After a minute, use a skewer to turn each ball 90 degrees to cook evenly. Cook until golden brown and crispy on the outside, about 4-5 minutes.
Serve: Remove from the pan and serve hot with takoyaki sauce, mayonnaise, bonito flakes, and seaweed flakes on top.
Yaki Imo Roasted Sweet Potatoes
Yaki Imo, or roasted sweet potatoes, is a delightful and simple Japanese snack that captures the essence of comfort food. These sweet potatoes are naturally sweet, with a creamy texture and a subtly smoky flavor when roasted. Perfect for any time of the year, they are a nutritious addition to your diet, whether you’re looking for a healthy snack or a side dish.
The process of making Yaki Imo is straightforward and requires minimal ingredients. Simply roast the sweet potatoes until they’re tender and caramelized, enhancing their natural sweetness. These delicious treats are often enjoyed warm, making them a cozy snack option for both adults and kids alike.
Ingredients
4 medium Japanese sweet potatoes
1 tablespoon olive oil (optional)
Sea salt, to taste
Instructions
Preheat your oven to 400°F (200°C).
Wash the sweet potatoes thoroughly and pat them dry. You can leave the skin on for added texture and nutrients.
If desired, lightly coat the sweet potatoes with olive oil and sprinkle with sea salt.
Place the sweet potatoes directly on the oven rack or on a baking sheet lined with parchment paper.
Roast for about 45-60 minutes, or until they are soft and the skin is slightly crispy. You can tell they are done when a fork easily pierces through the flesh.
Remove from the oven and let them cool slightly before serving. Enjoy warm!
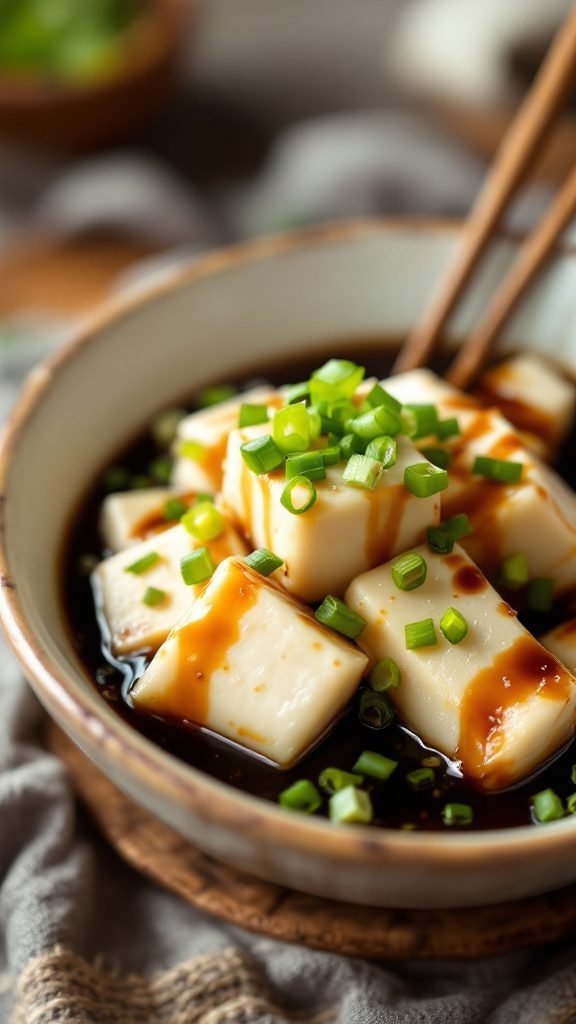
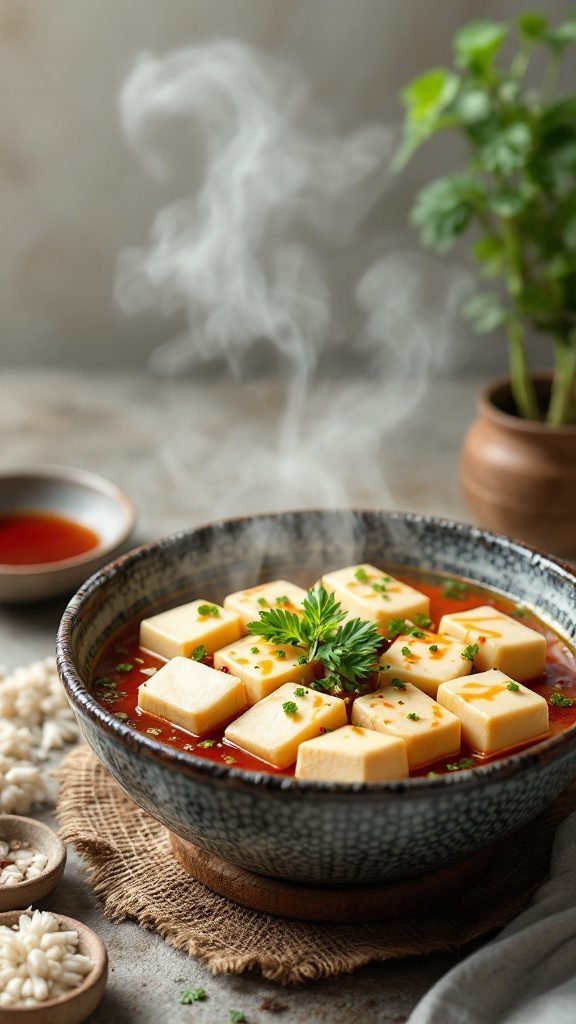
Hiyayakko Chilled Tofu
Hiyayakko is a refreshing Japanese dish featuring chilled tofu, making it a perfect light meal or side. This recipe highlights the delicate flavor of tofu, complemented by fresh toppings and a savory sauce. It’s incredibly simple to prepare, taking just a few minutes to assemble, which makes it ideal for a quick dinner or a healthy snack.
This dish is not only vegetarian but also low in carbs and rich in protein, fitting well into a plant-based or healthy lifestyle. With its creamy texture and mild taste, it can be served as a summer appetizer or a nutritious addition to any meal. So, whether you’re enjoying it alongside sushi or a hot bowl of ramen, Hiyayakko is a delightful way to savor tofu.
Ingredients
1 block of firm or silken tofu
2 tablespoons soy sauce
1 tablespoon mirin (optional)
Chopped green onions
Grated ginger (optional)
Wasabi (optional)
Sesame seeds (for garnish)
Instructions
Prepare the Tofu: Gently drain the tofu and pat it dry with a paper towel. Cut it into cubes or slices as preferred.
Make the Sauce: In a small bowl, mix soy sauce and mirin (if using). Adjust the flavor to your liking.
Assemble the Dish: Place the tofu on a serving plate or bowl. Drizzle the sauce over the tofu.
Add Toppings: Sprinkle chopped green onions, and if desired, add grated ginger, wasabi, and sesame seeds for extra flavor.
Serve Cold: Enjoy immediately or chill in the refrigerator for a short while to enhance the refreshing taste.
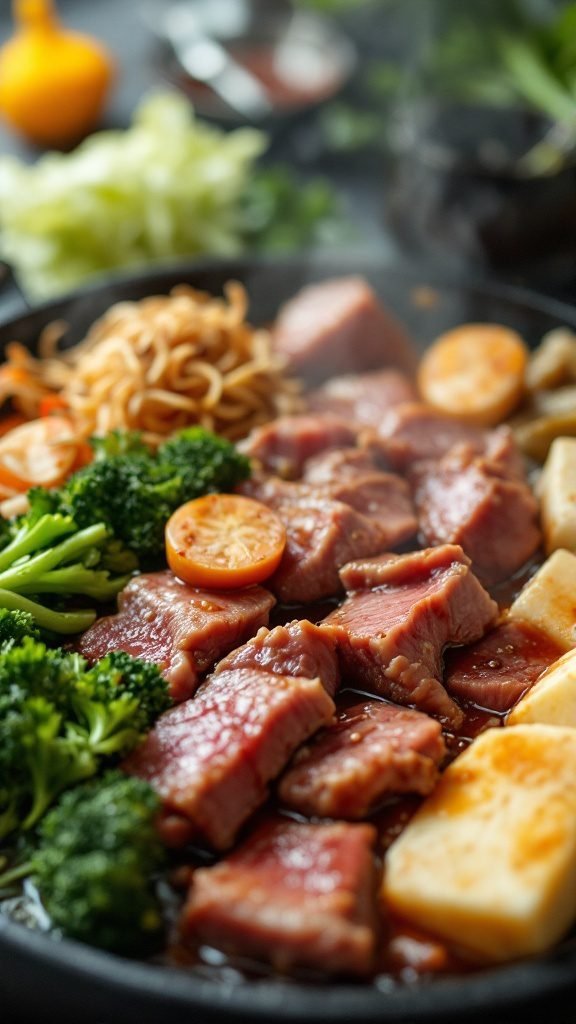
Sukiyaki Beef Hot Pot
Sukiyaki is a delightful Japanese hot pot dish that’s both savory and comforting. Featuring tender beef, fresh vegetables, and a flavorful broth, it offers a warm embrace that’s perfect for family meals or gatherings with friends. The combination of umami-rich flavors from soy sauce and sugar creates a unique taste that’s hard to resist. Plus, it’s pretty simple to prepare, making it an ideal choice for those new to cooking Japanese cuisine.
This dish not only satisfies your taste buds but also packs a nutritious punch with various vegetables. You can easily adapt it to fit different diets, whether you want it low carb, plant-based, or gluten-free. Enjoy it with a side of rice, or for a more traditional experience, try it with some gyoza for a complete meal.
Ingredients
1 lb thinly sliced beef (ribeye or sirloin)
1 cup shiitake mushrooms, sliced
1 cup napa cabbage, chopped
1 cup broccoli florets
1/2 cup tofu, cubed
1/2 cup onions, sliced
1/4 cup soy sauce
1/4 cup mirin (sweet rice wine)
2 tablespoons sugar
1 tablespoon sesame oil
2 cups dashi or beef broth
Cooked udon noodles (optional)
Instructions
Prepare the Broth: In a pot, combine soy sauce, mirin, sugar, and dashi or beef broth. Bring it to a simmer over medium heat.
Cook the Beef: In a large skillet or hot pot, heat sesame oil over medium-high heat. Sear the beef slices until browned, then remove and set aside.
Add Vegetables: In the same skillet, add onions, mushrooms, napa cabbage, and broccoli. Sauté for a few minutes until slightly tender.
Combine: Return the beef to the skillet and pour the broth over everything. Let it simmer for about 10 minutes, allowing the flavors to meld.
Serve: If desired, add cooked udon noodles to the pot. Serve hot, and enjoy with some wasabi on the side!
Dorayaki Sweet Pancakes
Dorayaki is a delightful Japanese treat that combines fluffy pancakes with a sweet filling, often red bean paste. These pancakes are soft and slightly chewy, making them a joy to eat. They’re perfect for a quick snack or dessert, and surprisingly easy to make at home!
This recipe is not only simple but also customizable, allowing you to use various fillings like matcha or chocolate. Whether you’re new to cooking or an experienced chef, making dorayaki will be a satisfying experience. Let’s get started!
Ingredients
1 cup all-purpose flour
1/2 cup sugar
1 teaspoon baking powder
1/4 teaspoon salt
1 large egg
1/2 cup milk
1 teaspoon vanilla extract
1/2 cup sweet red bean paste (or your choice of filling)
Instructions
Mix the Dry Ingredients: In a bowl, combine flour, sugar, baking powder, and salt.
Prepare the Batter: In a separate bowl, whisk together the egg, milk, and vanilla. Gradually add the wet ingredients to the dry ingredients and mix until smooth.
Cook the Pancakes: Heat a non-stick skillet over medium heat. Pour a small amount of batter to form a pancake. Cook until bubbles form on the surface, then flip and cook for another minute.
Assemble the Dorayaki: Place one pancake on a plate, add a spoonful of sweet red bean paste on top, and then gently place another pancake over it, creating a sandwich.
Serve: Enjoy your dorayaki warm, dusted with powdered sugar if desired!
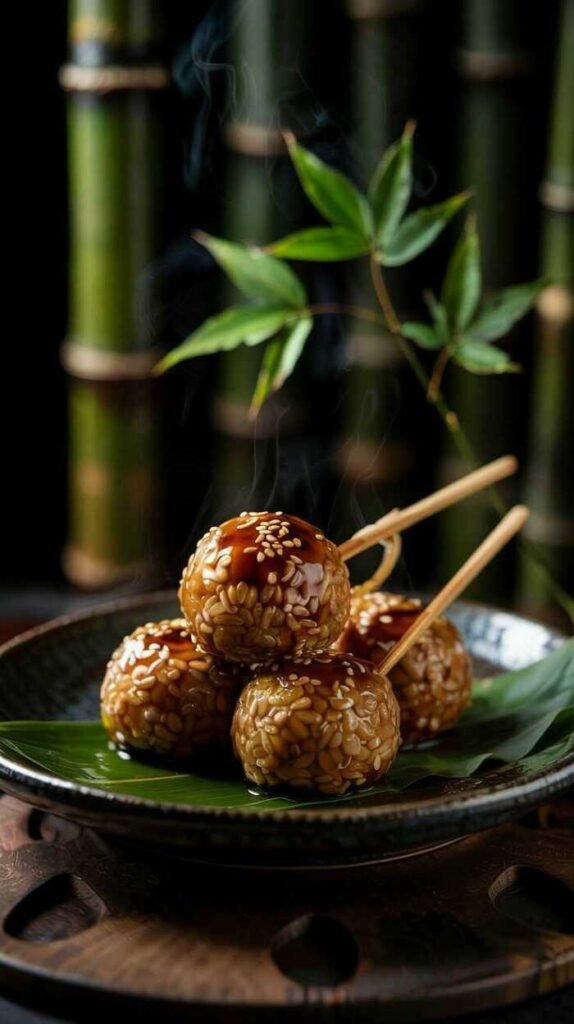
Mitarashi Dango Grilled Rice Dumplings
Mitarashi Dango are delightful Japanese rice dumplings that are both chewy and sweet. Often enjoyed during festivals, these treats are typically grilled on skewers and coated with a glossy, sweet soy sauce glaze. They have a unique taste that balances sweetness and a subtle umami flavor, making them a perfect snack for any occasion.
This recipe is simple to make, allowing you to whip up these tasty dumplings at home without any fuss. With just a few ingredients, you’ll have a delicious treat that brings a touch of Japanese culture right to your kitchen. Perfect for a bento box or as a side when enjoying ramen or curry!
Ingredients
1 cup sweet rice flour (mochi flour)
1/4 cup water
1/4 cup soy sauce
1/4 cup sugar
1 tablespoon cornstarch
1 tablespoon mirin (optional)
Wooden skewers (soaked in water)
Instructions
Prepare the Dango: In a bowl, mix the sweet rice flour and water until a smooth dough forms. Divide into small portions and roll into balls, about 1 inch in diameter.
Skewer the Balls: Thread 3-4 rice balls onto each wooden skewer.
Grill the Dumplings: Preheat a grill or grill pan. Grill the skewers over medium heat for about 5-7 minutes, turning occasionally until they are lightly browned.
Make the Sauce: In a small saucepan, combine soy sauce, sugar, cornstarch, and mirin. Heat over medium heat until the mixture thickens into a syrupy glaze.
Coat and Serve: Brush the grilled dango with the soy sauce glaze and serve warm. Enjoy as a snack or dessert!
Negitoro Don Tuna Tartare
Negitoro Don is a delightful Japanese dish featuring finely chopped raw tuna mixed with green onions and served over a bed of rice. The freshness of the tuna combined with the sharpness of scallions creates a beautiful balance of flavors. This dish is not only tasty but also straightforward to make, making it perfect for a quick lunch or dinner.
This nutritious meal is also adaptable for various diets, being low fat, gluten-free, and rich in protein. It’s a fantastic way to enjoy the flavors of sushi without the fuss of rolling. Plus, it pairs wonderfully with a side of pickled vegetables for a complete meal.
Ingredients
1 cup sushi rice
1 1/4 cups water
1/2 lb fresh tuna, diced
2 green onions, finely chopped
1 tablespoon soy sauce
1 teaspoon sesame oil
1/2 avocado, sliced (optional)
Wasabi and pickled ginger, for serving
Instructions
Cook the Rice: Rinse the sushi rice until the water runs clear. Combine with water in a rice cooker and cook according to the manufacturer’s instructions.
Prepare the Tuna: In a bowl, mix the diced tuna with green onions, soy sauce, and sesame oil. Stir gently to combine.
Assemble the Dish: Once the rice is cooked, fluff it with a fork and divide it into serving bowls. Top with the tuna mixture and sliced avocado, if using.
Serve: Accompany with wasabi and pickled ginger for an authentic experience. Enjoy your healthy and delicious Negitoro Don!
Yudofu Hot Pot with Dipping Sauce
Yudofu is a comforting Japanese hot pot dish that features soft, silky tofu simmered in a soothing broth. With its delicate flavor and smooth texture, it’s a delightful meal perfect for any season. This dish is not only simple to make but also incredibly nutritious, making it an excellent option for those following a vegetarian or plant-based lifestyle.
The beauty of yudofu lies in its versatility. You can customize your dipping sauce with ingredients like soy sauce, wasabi, or even sesame to enhance the experience. This dish pairs wonderfully with a side of rice or noodles, making it a satisfying meal for anyone looking for something healthy and delicious.
Ingredients
400g silken tofu
4 cups dashi (Japanese soup stock)
2 tablespoons soy sauce
1 tablespoon mirin
1 green onion, finely sliced
1 tablespoon fresh cilantro (for garnish)
Wasabi (optional, for dipping)
Rice, for serving
Instructions
Prepare the Broth: In a pot, bring the dashi to a gentle simmer. Add soy sauce and mirin, adjusting to taste.
Add the Tofu: Carefully cut the silken tofu into cubes and add them to the simmering broth. Let them cook gently for about 5-7 minutes, allowing the flavors to meld.
Serve: Once heated through, ladle the tofu and broth into bowls. Garnish with sliced green onions and fresh cilantro.
Enjoy: Serve with a side of rice and wasabi for dipping, if desired. Savor the comforting flavors as you enjoy each bite!
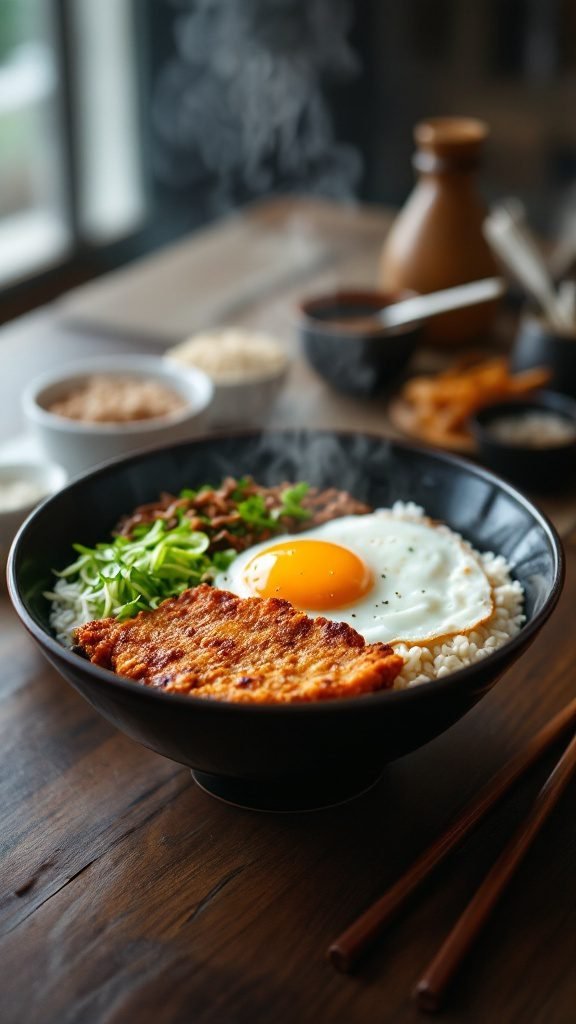
Katsu Don Pork Cutlet Rice Bowl
Katsu Don is a comforting Japanese dish that combines crispy pork cutlets with fluffy rice, topped with a savory sauce and a perfectly fried egg. The delicious blend of flavors makes it a favorite for many, and it’s quite simple to prepare at home. The crispy texture of the pork, paired with the tenderness of the egg and the richness of the sauce, creates a delicious meal that’s both satisfying and nutritious.
This recipe is perfect for any day of the week. It’s a balanced meal that can easily fit into various lifestyles, whether you’re looking for something hearty or healthy. The combination of protein from the pork and the carbohydrates from the rice makes it a filling option that leaves you energized.
Ingredients
2 pork loin chops
1 cup panko breadcrumbs
1/2 cup flour
1 egg
1 cup cooked rice
2 tablespoons soy sauce
1 tablespoon mirin
1 tablespoon dashi stock (or water)
1 green onion, chopped
1 egg for frying
Oil for frying
Instructions
Prepare the Pork: Flatten the pork loin chops with a meat mallet and season with salt and pepper. Dredge in flour, dip in the beaten egg, and coat with panko breadcrumbs.
Fry the Pork: Heat oil in a frying pan over medium heat. Fry the pork cutlets until golden brown on both sides, about 3-4 minutes per side. Remove and set on paper towels to drain.
Make the Sauce: In another pan, combine soy sauce, mirin, and dashi stock over low heat. Stir well and let simmer for a couple of minutes.
Cook the Egg: In the same sauce, crack an egg and let it cook until the white is firm but the yolk remains runny.
Assemble: Place cooked rice in a bowl, top with the pork cutlet, pour the sauce over, and finish with the cooked egg and chopped green onions.
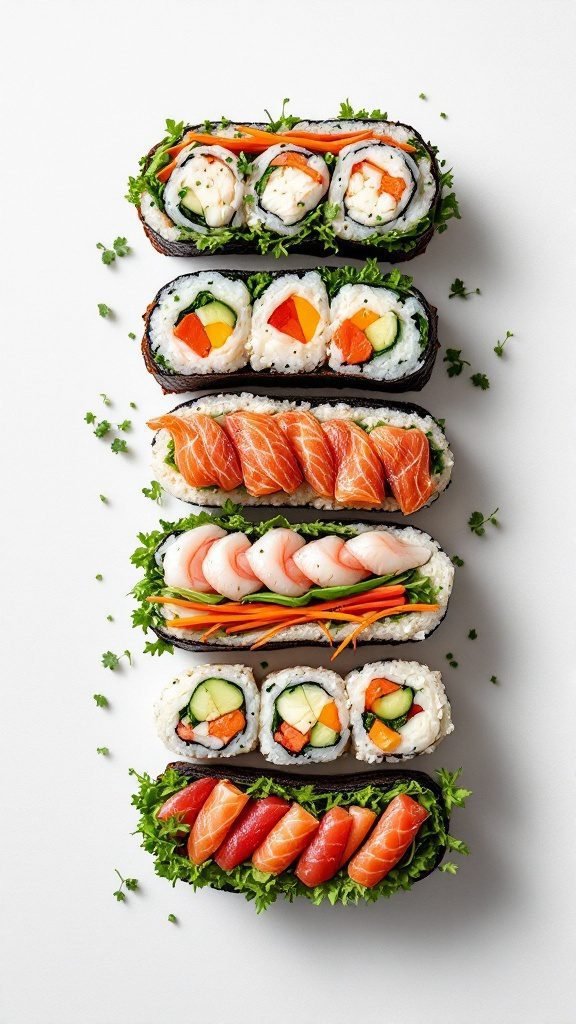
Sushi Sandwiches with Fillings
Sushi sandwiches are a fun and creative twist on traditional sushi. They are packed with flavor and can be customized to suit your taste. With layers of fresh vegetables, proteins, and sushi rice, these sandwiches are both nutritious and satisfying. Plus, they are simple to make, making them a great option for a quick meal.
Whether you prefer a vegetarian option with crunchy pickled vegetables or a protein-packed filling like teriyaki chicken or sashimi, sushi sandwiches can be tailored to fit any dietary lifestyle. They make an excellent addition to bento boxes or a perfect snack on the go!
Ingredients
2 cups sushi rice
2 1/2 cups water
1/4 cup rice vinegar
1 tablespoon sugar
1 teaspoon salt
4 sheets nori (seaweed)
1/2 cucumber, julienned
1 carrot, julienned
1 avocado, sliced
4 ounces cooked shrimp or salmon (optional)
Pickled ginger (for garnish)
Wasabi (optional)
Instructions
Cook the Rice: Rinse the sushi rice under cold water until the water runs clear. Combine rice and water in a rice cooker or pot, then cook according to the manufacturer’s instructions. Once cooked, let it sit covered for 10 minutes.
Season the Rice: In a small bowl, mix rice vinegar, sugar, and salt until dissolved. Fold this mixture gently into the rice until evenly coated. Allow the rice to cool.
Prepare the Nori: Lay a sheet of nori on a clean surface or sushi mat. With wet hands, spread a thin layer of sushi rice evenly over the nori, leaving a 1-inch border at the top.
Add Fillings: Arrange julienned cucumber, carrot, avocado, and cooked shrimp or salmon if using, on the rice. Be careful not to overfill!
Roll the Sushi: Starting from the bottom, carefully roll the nori away from you, pressing gently but firmly to keep it tight. Use the border of nori to seal the roll.
Slice and Serve: With a sharp knife, slice the sushi sandwich into bite-sized pieces. Serve with pickled ginger and a dab of wasabi if desired.
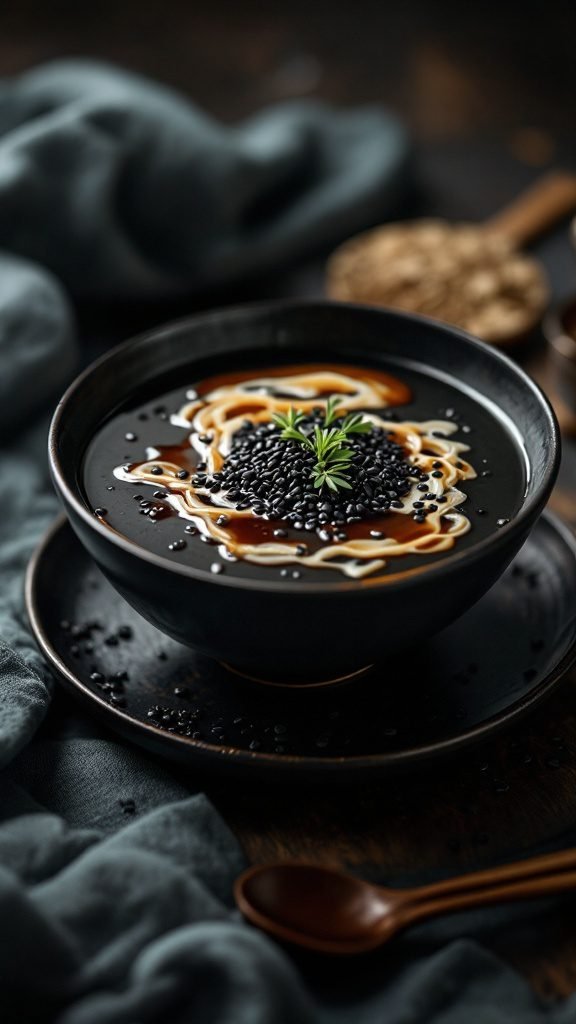
Black Sesame Soup Dessert
Black sesame soup is a delightful dessert that brings a unique flavor profile to your palate. With its nutty richness and silky texture, this dish is both comforting and satisfying. It’s simple to make, requiring just a few ingredients while offering a healthy alternative to heavier desserts.
This dessert pairs perfectly with toppings like mochi or a drizzle of syrup. Plus, it can easily fit into various diets, being both gluten-free and dairy-free. Enjoy this warm or chilled for a refreshing treat!
Ingredients
1 cup black sesame seeds
4 cups water
1/4 cup sugar (or sugar-free alternative)
1/2 cup coconut milk (optional)
A pinch of salt
Instructions
Toast the sesame seeds in a dry pan over medium heat until fragrant, about 5 minutes. Let them cool slightly.
Add the sesame seeds and water to a blender. Blend until smooth and creamy.
Pour the mixture into a saucepan and add sugar and salt. Heat gently while stirring until the sugar dissolves.
If desired, stir in coconut milk for a creamier texture and heat through.
Serve warm or chilled, garnished with sesame seeds or mochi.
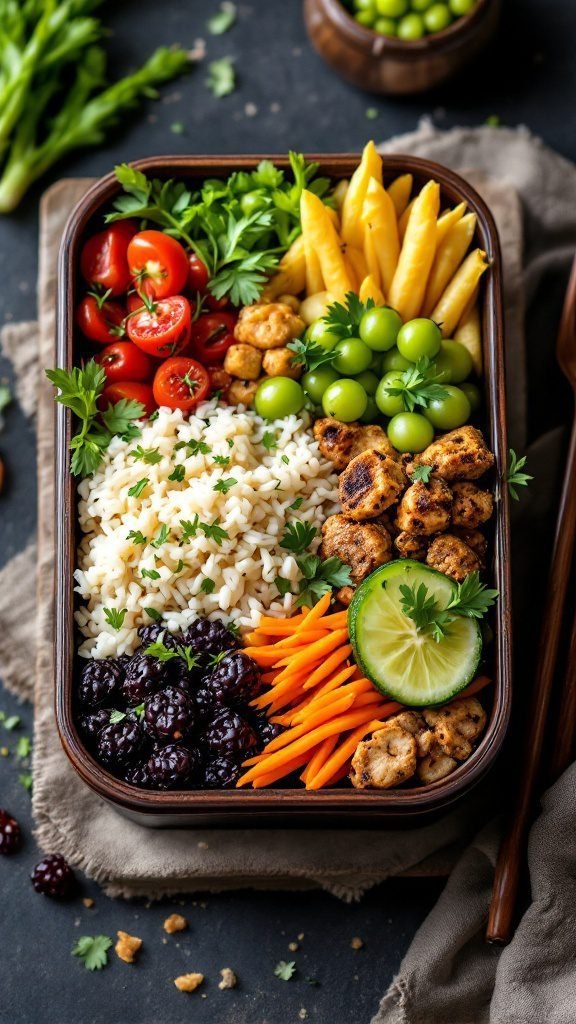
Bento Boxes with Variety of Dishes
Bento boxes are a delightful way to enjoy a variety of flavors and textures in one meal. This Japanese-inspired meal prep idea is not only visually appealing but also offers a balanced mix of nutrition. Easy to assemble, bento boxes can be customized to fit any dietary preference, making them perfect for a healthy, plant-based lunch or dinner.
Filled with ingredients like rice, grilled protein, fresh vegetables, and fruits, they provide a satisfying taste experience. The combination of savory and sweet flavors, along with a touch of umami from miso or teriyaki sauce, makes every bite enjoyable. Plus, they can be made dairy-free, gluten-free, or even sugar-free, tailoring it to fit various lifestyles.
Ingredients
1 cup cooked rice (white or brown)
1 cup mixed vegetables (carrots, bell peppers, and snap peas)
1/2 cup protein (tofu, chicken, or edamame)
1/4 cup pickled vegetables (like daikon or cucumbers)
1/2 cup fresh fruits (grapes, cherry tomatoes, or mango)
1 tablespoon sesame seeds
2 tablespoons soy sauce or tamari
Fresh herbs for garnish (like cilantro or parsley)
Instructions
Prepare the Rice: Cook rice according to package instructions. Once done, let it cool slightly before adding to the bento box.
Cook the Protein: Grill or sauté your chosen protein until fully cooked. Season with soy sauce or teriyaki sauce for extra flavor.
Prepare the Vegetables: Lightly steam or blanch mixed vegetables for a few minutes until tender but still crisp. You can also serve them raw for crunch.
Assemble the Bento: In your bento box, arrange the rice in one section, followed by the protein, mixed vegetables, pickled vegetables, and fresh fruits in separate compartments.
Garnish: Sprinkle sesame seeds over the protein and add fresh herbs on top. Close the bento box and enjoy it fresh or pack it for lunch.
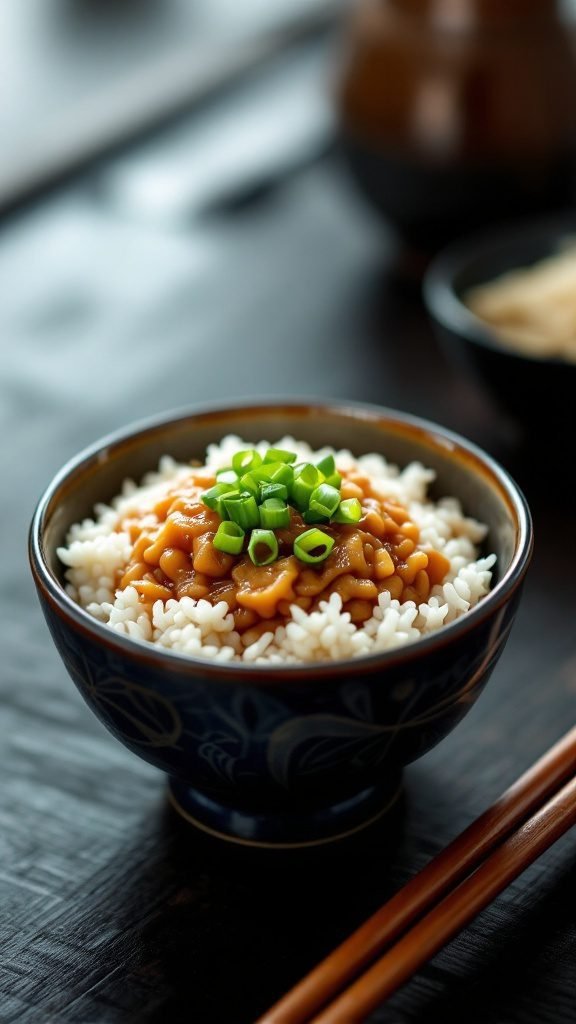
Natto Fermented Soybeans
Natto is a traditional Japanese dish made from fermented soybeans. It has a unique texture that’s sticky and slightly slimy, along with a bold, savory flavor. While it might take some getting used to, many people find it to be a nutritious addition to their meals. Plus, it’s super simple to prepare, making it an accessible option for anyone curious about Japanese cuisine.
This dish is packed with protein and is often enjoyed over rice or mixed in with soba noodles. Natto is not only a great source of protein but also fits well into various dietary lifestyles, including vegetarian and low-carb diets. If you’re seeking a healthy yet unique recipe, natto might just be your new favorite!
Ingredients
1 cup natto (fermented soybeans)
2 cups cooked rice
2 tablespoons soy sauce
1 teaspoon mustard (optional)
2 green onions, chopped
Instructions
Prepare the Rice: Cook the rice according to package instructions and set aside.
Mix Natto: In a bowl, combine the natto with soy sauce and mustard if using. Stir well to make it creamy.
Serve: Place the cooked rice in a bowl and top with the natto mixture.
Garnish: Sprinkle chopped green onions on top for an added flavor boost.
Enjoy: Serve immediately and enjoy this nutritious meal!
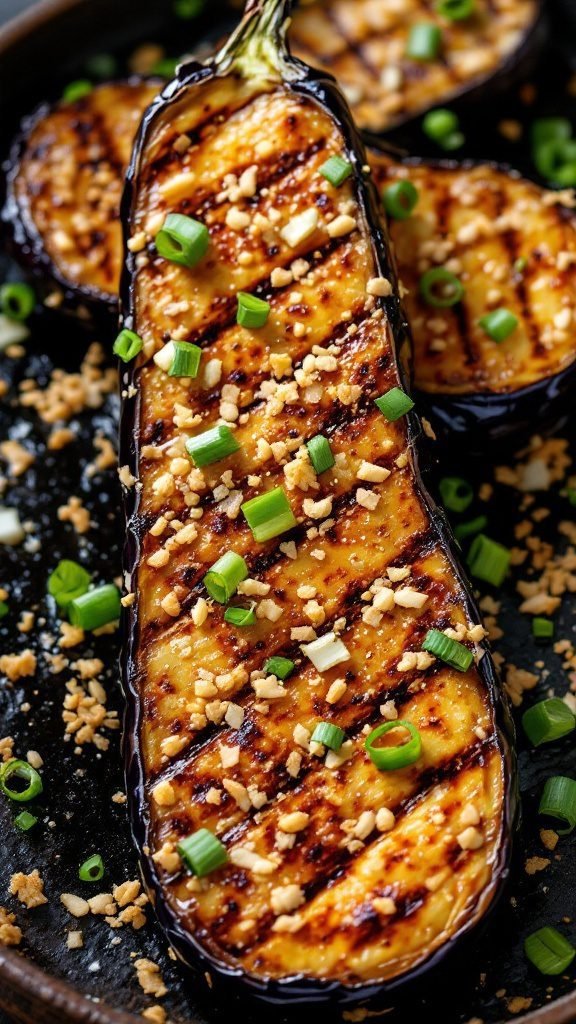
Yaki Nasu Grilled Eggplant
Yaki Nasu, or grilled eggplant, is a delightful Japanese dish that’s both simple and delicious. The eggplant becomes tender and smoky when grilled, offering a rich, savory flavor that’s perfect for any meal. It’s an excellent addition to a bento box or served alongside rice and miso soup.
This dish is not only tasty but also healthy, making it a go-to for those following a plant-based or vegan diet. With minimal ingredients and straightforward preparation, Yaki Nasu is a fantastic way to enjoy the natural flavors of eggplant.
Ingredients
2 medium-sized eggplants
3 tablespoons soy sauce
1 tablespoon mirin
1 teaspoon sesame oil
2 teaspoons sugar (or sugar-free option)
1 teaspoon wasabi (optional)
Chopped green onions for garnish
Sesame seeds for garnish
Instructions
Prepare the Eggplant: Slice the eggplants in half lengthwise. Score the flesh in a crisscross pattern without cutting through the skin.
Make the Marinade: In a small bowl, mix soy sauce, mirin, sesame oil, and sugar until well combined.
Marinate the Eggplant: Brush the marinade generously onto the eggplant halves, allowing them to sit for about 15 minutes to soak up the flavors.
Grill the Eggplant: Preheat your grill or grill pan over medium heat. Place the eggplant cut-side down and grill for about 5-7 minutes, then flip and grill for an additional 5 minutes until tender.
Garnish and Serve: Remove from the grill, sprinkle with chopped green onions and sesame seeds, and serve warm. Enjoy your Yaki Nasu as a side dish or part of a larger meal.
Kushi Katsu Deep-Fried Skewers
Kushi Katsu, or deep-fried skewers, are a delightful treat that brings a taste of Japanese street food to your kitchen. These crispy, savory bites are perfect for sharing and can be made with various ingredients, whether you prefer meat, vegetables, or a mix of both. The crunchiness of the coating paired with a rich dipping sauce creates a satisfying experience that’s hard to resist.
The beauty of making Kushi Katsu lies in its simplicity. You can easily customize the skewers to fit your taste, making them a fun option for gatherings or weeknight meals. Plus, they can be served alongside other Asian dishes like ramen or sushi for a lovely spread.
Ingredients
8 skewers (bamboo or metal)
1 cup panko breadcrumbs
1/2 cup all-purpose flour
1 large egg, beaten
Your choice of protein (chicken, pork, or tofu)
Vegetables (zucchini, bell peppers, or mushrooms)
Salt and pepper to taste
Oil for frying
Sauce for dipping (tonkatsu sauce, ketchup, or your favorite sauce)
Instructions
Prep the Ingredients: Cut your protein and vegetables into bite-sized pieces. Season with salt and pepper.
Skewer: Thread the protein and vegetables onto the skewers, alternating as you go.
Breading Station: Set up three bowls – one with flour, one with the beaten egg, and one with panko breadcrumbs. Dip each skewer first in flour, then in egg, and finally coat with panko breadcrumbs.
Heat Oil: In a deep frying pan, heat oil over medium-high heat.
Fry the Skewers: Once the oil is hot, carefully place the skewers in the oil. Fry until golden brown and crispy, about 3-4 minutes on each side.
Drain and Serve: Remove the skewers from the oil and place them on paper towels to drain excess oil. Serve with your choice of dipping sauce.
Kakigori Shaved Ice Dessert
Kakigori is a delightful Japanese shaved ice dessert that brings a refreshing twist to hot summer days. With its fluffy texture and vibrant toppings, it’s not only a feast for the eyes but also a treat for the taste buds. The combination of sweet syrups and delightful fruits makes this dessert wonderfully satisfying, and it’s surprisingly simple to make at home!
This dessert allows for endless customization. Whether you prefer traditional flavors like matcha or fruity options like mango, there’s something for everyone. Plus, it’s a great option for vegan or plant-based diets, making it a versatile choice for any gathering. Get ready to impress your friends and family with this tasty and colorful dessert!
Ingredients
2 cups finely crushed ice
1/2 cup sweetened condensed milk (or coconut milk for dairy-free option)
1/4 cup flavored syrup (like strawberry, mango, or green tea)
Fresh fruits (such as strawberries, mangoes, and blueberries)
Red beans or mochi (optional)
Mint leaves for garnish
Instructions
Prepare the Ice: Begin by crushing ice finely until it reaches a fluffy, snow-like consistency. You can use a blender or an ice shaver if you have one.
Layer the Ice: Place the crushed ice in a bowl or a tall glass, shaping it into a mound.
Add Syrup: Drizzle your chosen flavored syrup generously over the ice, allowing it to soak in a bit.
Top with Toppings: Add fresh fruits, red beans, or mochi on top for added texture and flavor.
Finish with Condensed Milk: Pour sweetened condensed milk over the top before garnishing with mint leaves.
Serve: Enjoy immediately for the best texture!
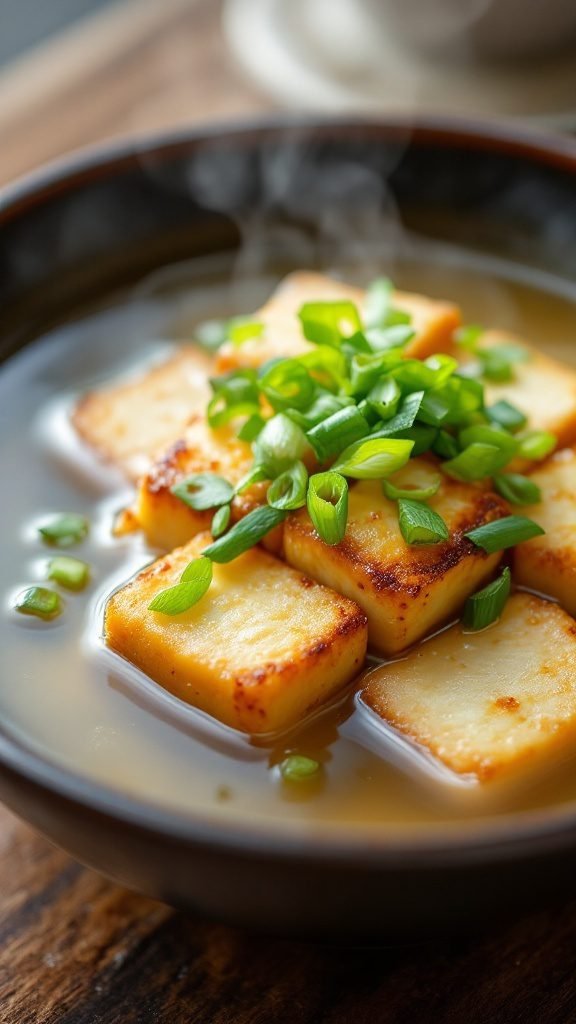
Agedashi Tofu Fried Tofu in Sauce
Agedashi Tofu is a delightful Japanese dish that features lightly fried tofu served in a savory sauce. The tofu has a crispy exterior while remaining soft and silky on the inside. The combination of the warm broth and the fried tofu creates a comforting and satisfying meal. It’s a simple and quick recipe, making it perfect for both novice cooks and experienced chefs looking for something healthy and delicious.
This dish is versatile, fitting well into a low-carb or vegetarian diet. You can enjoy it as a main dish or as part of a larger meal, perhaps alongside some gyoza or soba noodles. The taste is umami-rich, thanks to the dashi stock, and it pairs beautifully with toppings like green onions or grated daikon. Here’s how to make this tasty Agedashi Tofu.
Ingredients
1 block firm tofu
1/4 cup cornstarch
Oil for frying
2 cups dashi stock (or vegetable broth for a vegan option)
2 tablespoons soy sauce
2 tablespoons mirin
Chopped green onions for garnish
Instructions
Prepare the Tofu: Drain the tofu and press it gently to remove excess moisture. Cut it into cubes and pat dry with paper towels.
Coat the Tofu: Dust the tofu cubes with cornstarch, ensuring they are well-coated. This will help create a crispy texture when fried.
Heat the Oil: In a pan, heat oil over medium-high heat. Once hot, carefully add the tofu cubes and fry until golden brown on all sides.
Prepare the Sauce: In another pot, combine dashi stock, soy sauce, and mirin. Bring to a simmer and let it heat through.
Serve: Place the fried tofu in a bowl and pour the hot sauce over it. Top with chopped green onions and enjoy!
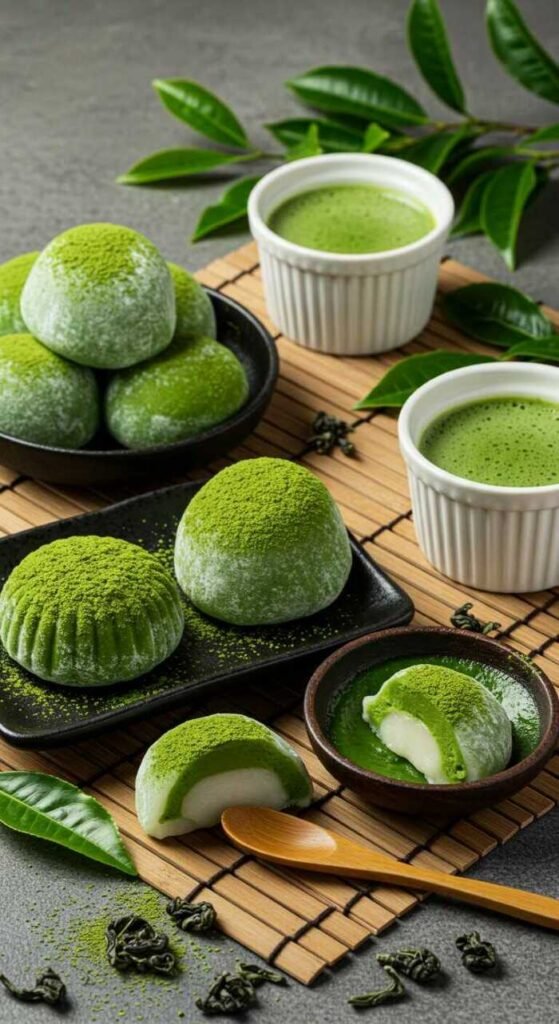
Mochi Ice Cream Treats
Mochi ice cream is a delightful fusion of chewy rice cake and creamy ice cream that offers a unique taste experience. Each bite is a blend of textures, with the soft, slightly sticky mochi wrapping around the cold, smooth ice cream. This treat is not only delicious but also simple to make, making it a fantastic choice for anyone looking to impress their friends or family with a homemade dessert.
You can customize the flavors to suit your preference, from classic green tea to fruity options like mango or strawberry. Plus, it’s a fun way to enjoy a frozen treat that can be both nutritious and low in sugar if you use healthier ice cream options. Let’s get started on making these delightful mochi ice cream treats!
Ingredients
1 cup sweet rice flour (mochi flour)
1/4 cup granulated sugar
3/4 cup water
1/2 cup ice cream (your choice of flavor)
Potato starch or cornstarch for dusting
Instructions
Prepare the Mochi Dough: In a microwave-safe bowl, mix the sweet rice flour and granulated sugar. Gradually add water, stirring until smooth. Cover the bowl with plastic wrap and microwave for 1 minute. Stir, then microwave for another minute, and finally for 30 seconds until the mixture is thick and sticky.
Shape the Mochi: Dust a clean surface with potato starch. Pour the mochi mixture onto the surface and let it cool slightly. Once cool enough to handle, dust your hands with starch and divide the dough into equal pieces.
Form the Ice Cream Balls: Flatten each piece of mochi in your hand. Place a small scoop of ice cream in the center and carefully fold the mochi around it, sealing it completely. Roll it gently to shape it into a ball.
Freeze: Place the filled mochi ice cream balls on a parchment-lined tray and freeze for at least 2 hours until firm.
Serve: Dust with additional starch to prevent sticking and enjoy your homemade mochi ice cream treats!
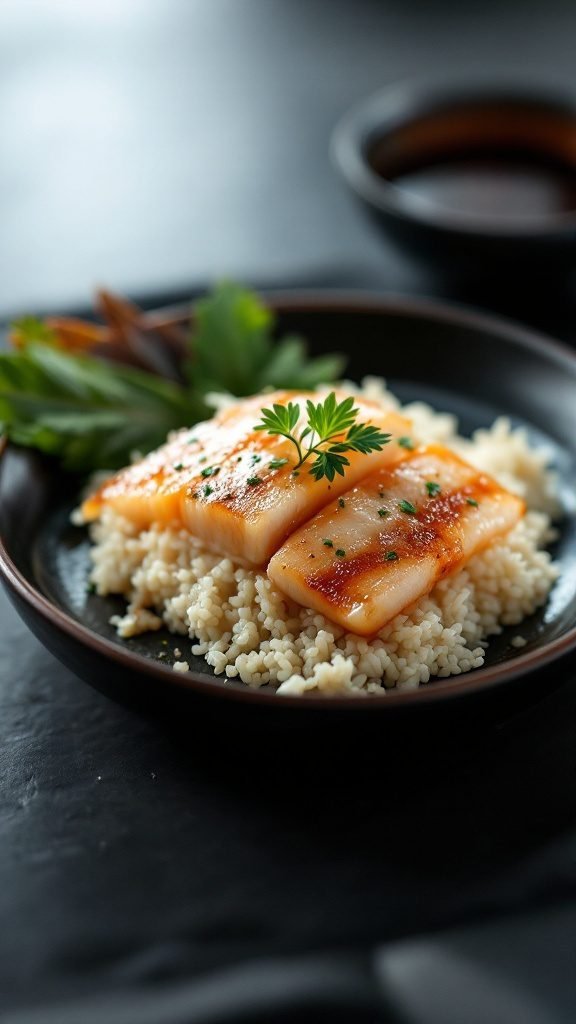
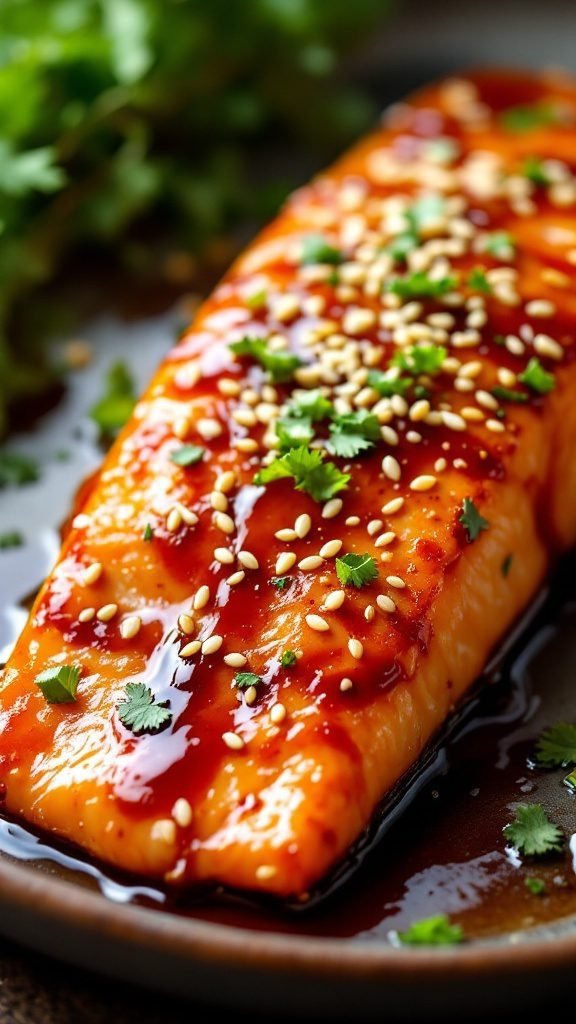
Baked Salmon with Teriyaki Glaze
Baked Salmon with Teriyaki Glaze is a delightful dish that combines flaky, tender salmon with a sweet and savory teriyaki sauce. The rich flavors meld beautifully, making it a tasty and nutritious meal. Plus, it’s simple to whip up, perfect for busy days or special occasions.
This dish is not only satisfying but also packed with healthy protein and omega-3 fatty acids. Pair it with rice or steamed vegetables for a complete meal that fits well into various dietary lifestyles, including gluten-free and low-carb options. Enjoy this delicious recipe that brings a taste of Asian cuisine right to your dinner table!
Ingredients
4 salmon fillets
1/4 cup soy sauce (or tamari for gluten-free)
1/4 cup honey or maple syrup
2 tablespoons rice vinegar
1 tablespoon sesame oil
2 cloves garlic, minced
1 teaspoon fresh ginger, grated
1 tablespoon cornstarch (optional for thickening)
Sesame seeds and chopped green onions for garnish
Instructions
Preheat the oven to 400°F (200°C). Line a baking dish with parchment paper.
In a small bowl, whisk together the soy sauce, honey, rice vinegar, sesame oil, garlic, and ginger. If you prefer a thicker glaze, mix cornstarch with a little water and add to the mixture.
Place the salmon fillets in the prepared dish and pour the teriyaki sauce over them, ensuring they are well coated.
Bake for 15-20 minutes or until the salmon is cooked through and flakes easily with a fork.
Remove from the oven and sprinkle with sesame seeds and chopped green onions before serving.
Aomori Apple Pie with A Twist
This Aomori Apple Pie is a delightful blend of sweet and tart flavors, perfect for any dessert lover. With its flaky crust and tender apple filling, it brings a unique twist to the classic recipe, making it both nutritious and satisfying.
It’s simple to prepare, making it a great choice for both novice and experienced bakers. Serve it warm with a scoop of ice cream for a comforting treat that everyone will enjoy!
Ingredients
2 cups sliced Aomori apples
1/2 cup coconut sugar (sugar-free option)
1 teaspoon cinnamon
1 tablespoon lemon juice
1 tablespoon cornstarch
1 pie crust (store-bought or homemade)
1 tablespoon butter, cut into small pieces
1 egg (for egg wash)
Instructions
Preheat the oven to 375°F (190°C).
In a mixing bowl, combine sliced apples, coconut sugar, cinnamon, lemon juice, and cornstarch. Toss until apples are well coated.
Place the pie crust in a pie dish. Fill with the apple mixture, and dot with butter.
Cover with a second pie crust, sealing the edges. Cut slits in the top for steam to escape.
Brush the top with beaten egg for a golden finish. Bake for 45-50 minutes until the crust is golden brown and the apples are tender.
Allow to cool slightly before serving. Enjoy your Aomori Apple Pie warm with a scoop of ice cream!
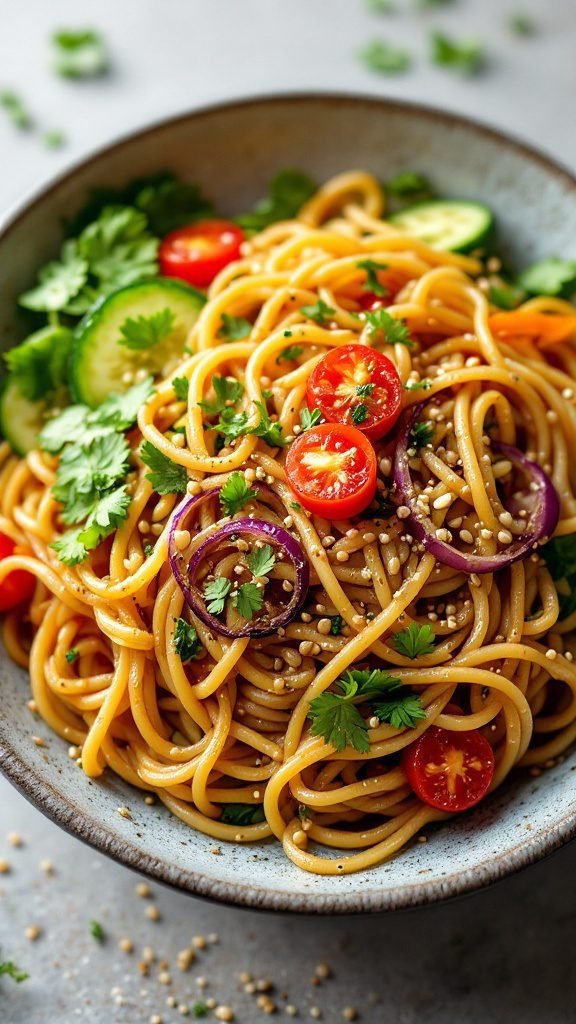
Chilled Soba Salad with Vegetables
Chilled soba salad is a refreshing, light meal that’s perfect for warm days. Made with buckwheat noodles, it offers a nutty flavor and a satisfying texture. This dish is not only nutritious but also versatile, allowing for various vegetables that can be tossed in based on your preference. It’s simple to prepare, making it a great option for a quick lunch or an easy dinner.
This salad can be tailored to fit many diets, including vegan and gluten-free lifestyles. With the combination of fresh veggies and a delicious dressing, it’s a meal that feels indulgent while remaining healthy. Plus, soba noodles are rich in protein and low in carbs, perfect if you’re following a keto or low-fat diet.
Ingredients
8 oz soba noodles
1 cup cucumber, thinly sliced
1 cup cherry tomatoes, halved
1/2 red onion, thinly sliced
1/4 cup sesame seeds
1/4 cup fresh cilantro, chopped
3 tablespoons soy sauce
2 tablespoons rice vinegar
1 tablespoon sesame oil
1 tablespoon honey or agave syrup (optional)
Instructions
Cook the Soba Noodles: Bring a pot of water to a boil and add the soba noodles. Cook according to package instructions, usually about 4-5 minutes. Drain and rinse under cold water to stop cooking.
Prepare the Vegetables: While the noodles are cooking, slice the cucumber, cherry tomatoes, and red onion. Set aside.
Make the Dressing: In a small bowl, whisk together the soy sauce, rice vinegar, sesame oil, and honey/agave syrup if using.
Toss the Salad: In a large bowl, combine the soba noodles, vegetables, and dressing. Toss gently to combine. Sprinkle sesame seeds and chopped cilantro on top before serving.
Kohaku Namasu Pickled Daikon Salad
Kohaku Namasu is a refreshing pickled salad that combines the crispness of daikon radish and the sweetness of carrots. This dish offers a delightful mix of flavors, balancing a slight tanginess with a hint of sweetness from the vinegar. It’s an easy recipe that can be whipped up in no time, making it perfect for a quick side dish or a vibrant addition to your bento box.
This pickled salad is not only tasty but also nutritious. It’s vegan, gluten-free, and low in calories, fitting well into various diets, whether you’re living a low-carb or plant-based lifestyle. Enjoy it as a standalone dish or alongside your favorite Asian meals, like gyoza or teriyaki.
Ingredients
1 medium daikon radish, julienned
1 medium carrot, julienned
1/2 cup rice vinegar
2 tablespoons sugar
1 teaspoon salt
1 tablespoon sesame seeds (optional)
Instructions
Prepare the Vegetables: In a bowl, combine the julienned daikon and carrot. Sprinkle with salt and let it sit for about 30 minutes to draw out moisture.
Make the Pickling Solution: In a separate bowl, mix rice vinegar and sugar until the sugar dissolves completely.
Combine: Rinse the daikon and carrot under cold water to remove excess salt, then drain well. Add the vegetables to the vinegar mixture and stir to coat.
Chill: Cover and refrigerate for at least 1 hour to let the flavors meld.
Serve: Before serving, sprinkle with sesame seeds if desired. This dish can be enjoyed chilled or at room temperature.
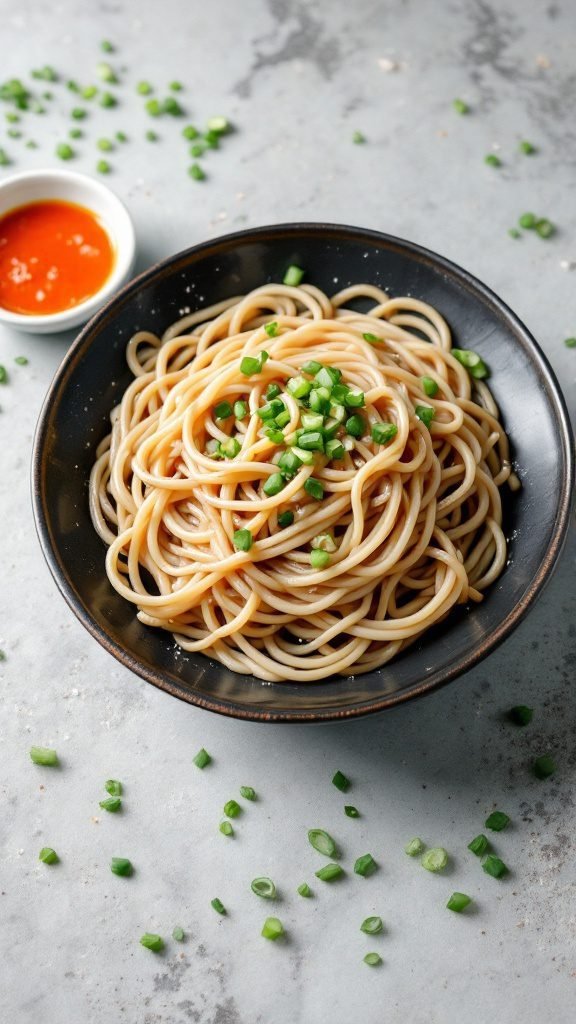
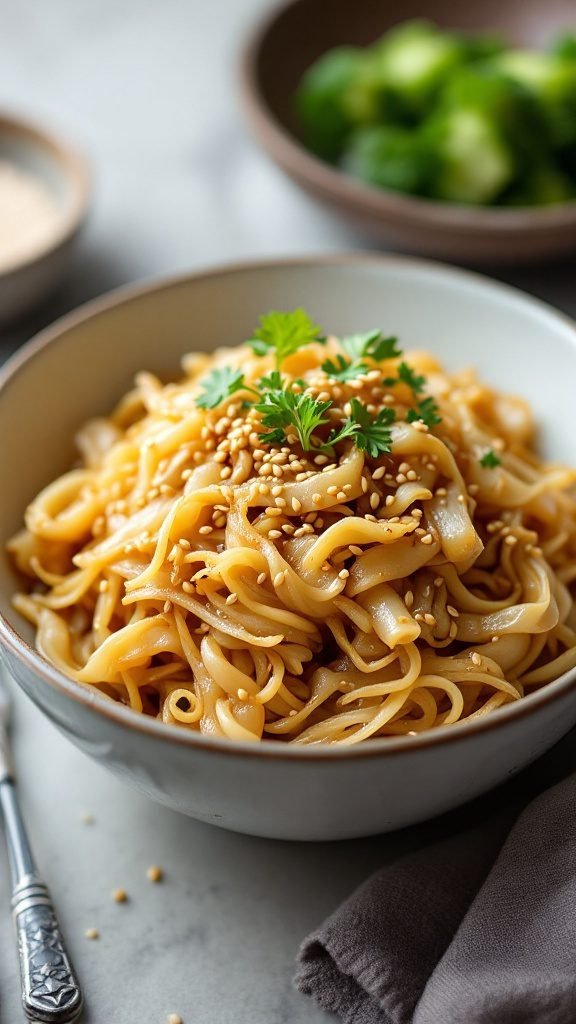
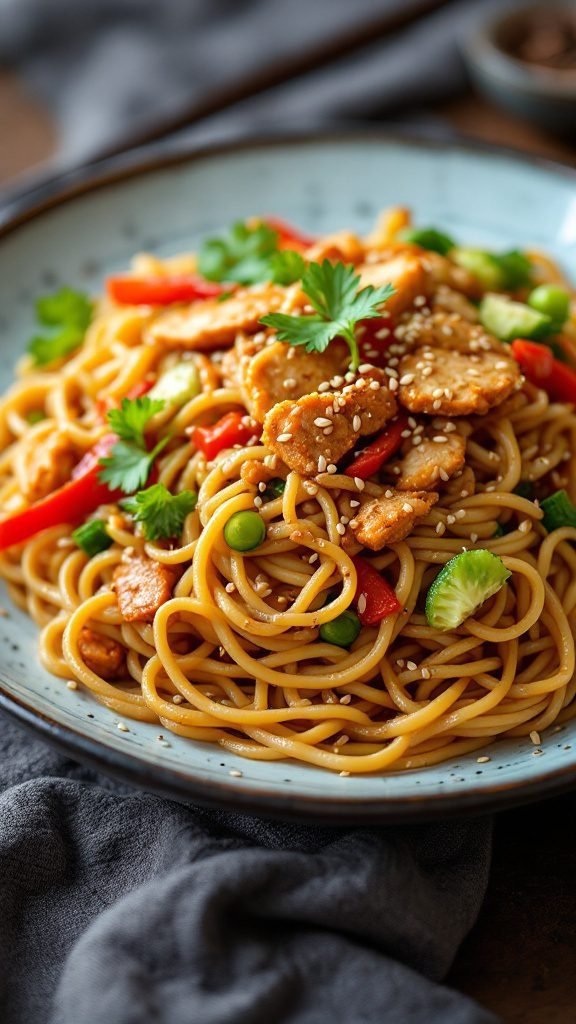
Yaki Udon Stir-Fried Udon Noodles
Yaki Udon is a delightful Japanese dish that features thick, chewy udon noodles stir-fried with an array of fresh vegetables and protein. The combination of savory sauces, often soy sauce or teriyaki, gives the dish a rich flavor that is both comforting and satisfying. This meal is wonderfully versatile, allowing you to customize it with your favorite ingredients, making it suitable for various dietary needs, including vegan and gluten-free options.
Not only is Yaki Udon delicious, but it’s also quite simple to prepare, perfect for a quick weeknight dinner. Pair it with a side of gyoza or a light salad for a complete meal. Let’s get cooking!
Ingredients
8 oz udon noodles
1 cup mixed vegetables (like bell peppers, carrots, and broccoli)
1 cup protein of choice (chicken, tofu, or shrimp)
3 tablespoons soy sauce
1 tablespoon sesame oil
1 tablespoon vegetable oil
2 green onions, chopped
1 teaspoon sesame seeds
Salt and pepper to taste
Instructions
Cook the Udon Noodles: Prepare the udon noodles according to package instructions. Drain and set aside.
Heat the Oils: In a large pan or wok, heat vegetable oil and sesame oil over medium-high heat.
Add Protein: Add your choice of protein to the pan, seasoning with salt and pepper. Cook until browned and cooked through.
Add Vegetables: Toss in the mixed vegetables and stir-fry for about 3-4 minutes until tender-crisp.
Combine Noodles: Add the cooked udon noodles to the pan. Pour in the soy sauce and stir everything together, ensuring the noodles are well-coated.
Garnish: Remove from heat and top with chopped green onions and sesame seeds before serving.
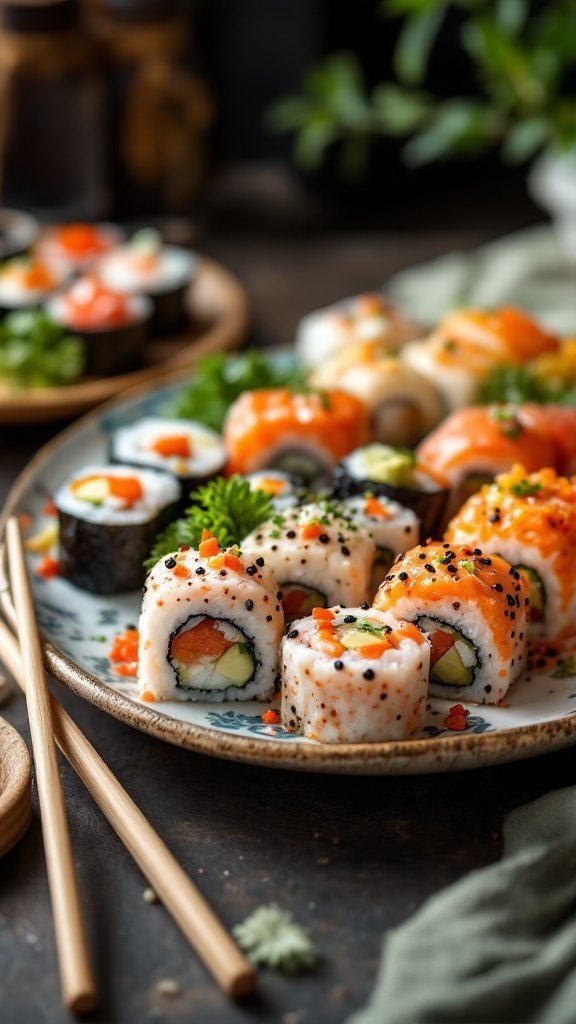
Sushi Rolls for Every Taste
Sushi rolls are a delightful fusion of flavors and textures, perfect for satisfying any palate. They can be simple to make at home, allowing you to customize your ingredients to match your preferences. Whether you prefer fresh sashimi, crunchy vegetables, or spicy sauces, sushi rolls are versatile enough to cater to various tastes.
Making sushi can be a fun kitchen project, especially when gathering friends or family to share in the experience. With a bit of practice, you’ll be rolling your own sushi like a pro. Here’s a basic sushi roll recipe to get you started!
Ingredients
2 cups sushi rice
2 1/2 cups water
1/4 cup rice vinegar
2 tablespoons sugar
1 teaspoon salt
4 sheets nori (seaweed)
1 cucumber, julienned
1 avocado, sliced
1 cup fresh fish (salmon or tuna)
Soy sauce, for serving
Wasabi and pickled ginger, for garnish
Instructions
Prepare Sushi Rice: Rinse the sushi rice under cold water until the water runs clear. Combine the rice and water in a rice cooker and cook according to the manufacturer’s instructions. Once done, transfer to a bowl.
Season the Rice: In a small saucepan, heat the rice vinegar, sugar, and salt over low heat until dissolved. Pour this mixture over the rice and mix gently to incorporate. Allow it to cool.
Roll the Sushi: Place a sheet of nori on a bamboo mat, shiny side down. Wet your hands to prevent sticking and spread a thin layer of rice over the nori, leaving about an inch at the top. Lay your desired fillings (cucumber, avocado, fish) in a line across the rice.
Form the Roll: Using the bamboo mat, carefully roll the nori away from you, applying gentle pressure to form a tight roll. Moisten the edge of the nori to seal the roll.
Slice and Serve: Use a sharp knife to slice the roll into bite-sized pieces. Serve with soy sauce, wasabi, and pickled ginger.
Umami-Rich Miso Ramen
Miso ramen is a delightful dish that brings a warm, comforting bowl of flavors right to your kitchen. This recipe features a rich, umami-packed broth that pairs perfectly with noodles, making it a favorite among ramen enthusiasts. Whether you’re looking for something hearty after a long day or a simple meal to impress friends, this ramen fits the bill!
With its savory miso base and fresh toppings, this recipe is also flexible, accommodating various dietary preferences like vegan or gluten-free. So grab your chopsticks and get ready for a nourishing meal that’s both satisfying and easy to make!
Ingredients
4 cups vegetable broth
3 tablespoons miso paste
2 packs of ramen noodles (can be gluten-free)
1 cup sliced green onions
1 cup shiitake mushrooms, sliced
2 soft-boiled eggs
1 sheet of nori, cut into strips
Salt and pepper to taste
Instructions
Prepare the Broth: In a large pot, bring the vegetable broth to a simmer. Stir in the miso paste until it’s fully dissolved.
Cook the Noodles: Add the ramen noodles to the broth and cook according to the package instructions, usually about 3-4 minutes.
Add Vegetables: Toss in the sliced shiitake mushrooms and half of the green onions, cooking for an additional minute.
Assemble the Ramen: Ladle the ramen into bowls. Top each serving with a soft-boiled egg, remaining green onions, and nori strips.
Season: Finally, add salt and pepper to taste before serving your hearty miso ramen!
Crispy Tempura Vegetables
Crispy tempura vegetables are a delightful addition to any meal. These light and airy bites are coated in a delicate batter and fried to a golden perfection. The result is a crunchy exterior that gives way to tender, flavorful veggies. Ideal for a snack or a side dish, tempura is both simple to make and satisfying to eat.
What makes tempura special is its versatility. You can use a variety of vegetables, such as sweet potatoes, zucchini, and bell peppers, making it easy to incorporate into a healthy, plant-based diet. Serve it with a dipping sauce for an extra kick, and you’ll have a dish that’s sure to please everyone.
Ingredients
1 cup all-purpose flour
1/2 cup cornstarch
1 teaspoon baking powder
1/2 teaspoon salt
1 cup cold sparkling water
2 cups mixed vegetables (e.g., bell peppers, zucchini, carrots)
Oil for frying
Soy sauce or tempura dipping sauce, for serving
Instructions
Prepare the Batter: In a mixing bowl, combine flour, cornstarch, baking powder, and salt. Gradually whisk in the cold sparkling water until the mixture is smooth.
Heat the Oil: In a deep pan, heat oil over medium-high heat until it reaches about 350°F (175°C).
Coat the Vegetables: Dip each vegetable into the batter, allowing excess to drip off before carefully placing them into the hot oil.
Fry: Fry in batches until golden brown and crispy, about 3-4 minutes per batch. Remove and drain on paper towels.
Serve: Enjoy the crispy tempura hot with soy sauce or your favorite dipping sauce.
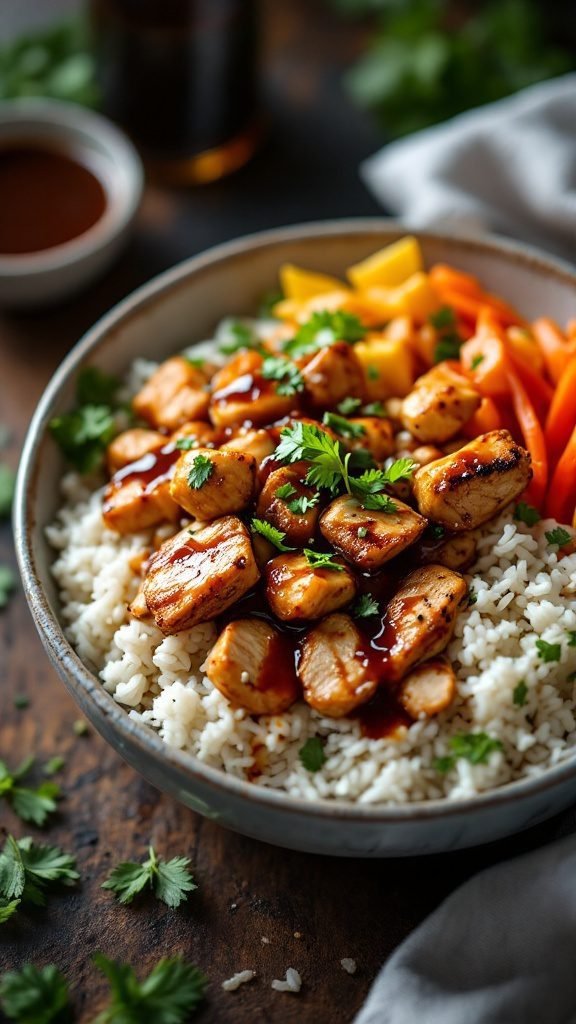
Flavorful Teriyaki Chicken Bowls
Teriyaki Chicken Bowls are a delightful combination of tender chicken, sweet and savory teriyaki sauce, and a medley of colorful vegetables, all served atop a bed of fluffy rice. This dish is not only packed with flavor but also very straightforward to whip up, making it a perfect weeknight meal. The balance of protein and veggies makes it a nutritious choice that caters to various dietary preferences.
The teriyaki sauce brings a delicious sweetness that complements the savory notes of the chicken, creating a mouthwatering experience with every bite. Whether you’re looking for a gluten-free meal or a quick dinner option, Teriyaki Chicken Bowls fit the bill beautifully. Let’s get cooking!
Ingredients
1 lb boneless, skinless chicken thighs, cut into bite-sized pieces
1/2 cup teriyaki sauce
2 cups cooked rice (white, brown, or cauliflower rice for a low-carb option)
1 cup bell peppers, sliced (any color)
1 cup carrots, julienned
1 tablespoon sesame oil
Fresh cilantro, for garnish
Salt and pepper, to taste
Instructions
Marinate the Chicken: In a bowl, mix the chicken pieces with teriyaki sauce. Let it marinate for at least 30 minutes, or up to overnight in the fridge for deeper flavor.
Cook the Chicken: Heat sesame oil in a skillet over medium-high heat. Add the marinated chicken and cook for about 5-7 minutes until browned and cooked through. Season with salt and pepper to taste.
Sauté the Vegetables: In the same skillet, add the bell peppers and carrots. Sauté for 3-4 minutes until they are tender but still crisp.
Assemble the Bowls: Divide the cooked rice among bowls. Top with the teriyaki chicken and sautéed vegetables. Drizzle with extra teriyaki sauce if desired and garnish with fresh cilantro.
Traditional Matcha Green Tea Desserts
Matcha green tea desserts are a delightful treat that brings the unique flavor of matcha into sweet dishes. They are known for their vibrant green color and earthy taste, making them a refreshing alternative to traditional sweets. These desserts are often light yet satisfying, perfect for those looking for a healthier option.
The great thing about matcha desserts is that they can be simple to prepare, using ingredients that are often found in many kitchens. From cakes to mochi and everything in between, there’s something for everyone. Whether you prefer a light mousse or a chewy treat, these recipes offer a tasty way to enjoy this nutrient-rich ingredient.
Ingredients
1 cup all-purpose flour
1/2 cup sugar
2 tablespoons matcha powder
1/2 teaspoon baking powder
1/4 teaspoon salt
1/4 cup vegetable oil
1/2 cup coconut milk (or any dairy-free milk)
1 teaspoon vanilla extract
1 tablespoon sesame seeds (optional)
Instructions
Preheat your oven to 350°F (175°C) and grease a baking dish.
In a bowl, mix together the flour, sugar, matcha powder, baking powder, and salt.
Add the vegetable oil, coconut milk, and vanilla extract to the dry ingredients. Stir until just combined.
Pour the batter into the prepared baking dish and sprinkle sesame seeds on top if desired.
Bake for 20-25 minutes, or until a toothpick inserted in the center comes out clean. Allow to cool before slicing and serving.
Simple Meals with Japanese Flair
From slurpy noodles to steamy bowls of miso-packed goodness, Japanese recipe ideas are the cozy, flavor-packed boost your weekly meals have been waiting for.
No Tokyo airline ticket necessary—just some pantry staples and a maybe bottle of soy sauce hiding in the back of your cupboard.
So grab those chopsticks (or a fork, let’s be real), and start building your own little menu of comfort classics.
Need more dinner ideas or inspiration?
Take a peek at these fresh Seafood Dinner Ideas to pair with your Japanese cooking nights.
Or add some fun veggie sides to the mix for the ultimate home-cooked feast!