
Picture this: it’s a sun-drenched afternoon, the grill is cooling down, friends are laughing, the playlist is just right—and you, the true MVP of the day, are about to unveil a tray of jaw-droppingly delicious summer dessert recipes.
Like, desserts so dreamy they practically deserve their own vacation photoshoot.
Whether you’re team ice-cold treats, fresh fruity goodness, or no-bake wonders because it’s way too hot to even think about turning on the oven—I’ve got you covered!
And here’s the thing…
A lot of these beauties are secretly gluten-free, vegan, plant-based, and dairy-free, too.
So no one has to miss out on the sweet stuff.
Get ready to live your best chill dessert life—because once you scroll through this collection, your summer table (and Insta feed) are about to get a serious glow-up.

Why You’ll Love These Summer Dessert Recipes
- They’re Heatwave-Approved: So many of these summer dessert recipes are no-bake or quick-chill, which means you can keep your cool while still serving major main character energy at the table.
- Inclusive and Irresistible: Need gluten-free, vegan, plant-based, or dairy-free options? Check, check, and double-check! These recipes are made to be shared (and devoured) by everyone at the party.
- Fresh and Fruity Vibes: Picture ripe peaches, luscious berries, citrus zings—basically all of the sunny, cheerful flavors crying out HELLO, SUMMER!
- Easy Enough for Lazy Days: Nobody has time for complicated in July. These recipes remain light with simple ingredients and minimal preparation, so you can spend more time relaxing poolside and less time stressing out in the kitchen.
Lemon Blueberry Icebox Cake
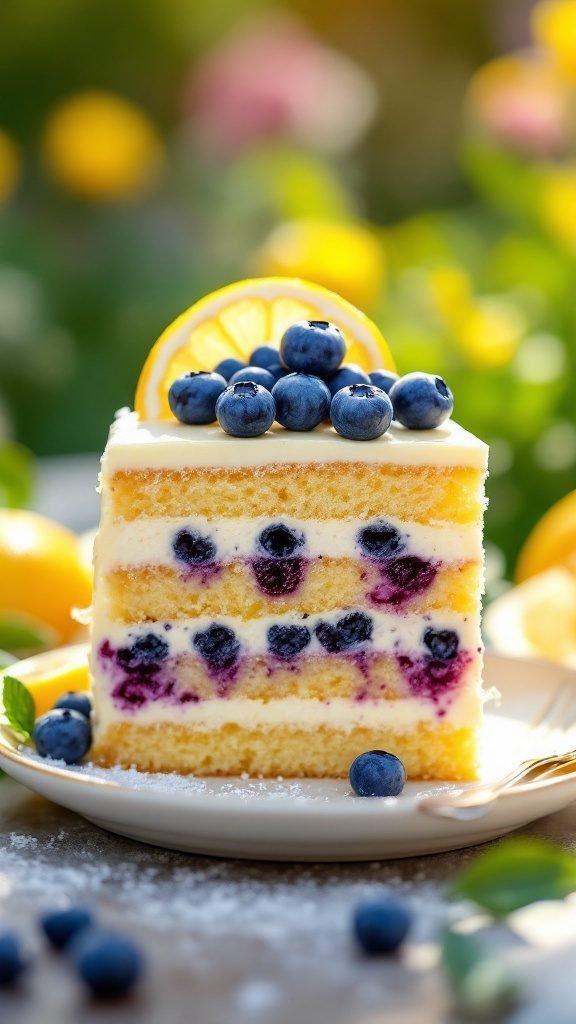
This Lemon Blueberry Icebox Cake is the perfect summer treat! It’s refreshing and layered with bright flavors that make it a delightful dessert for any occasion. Light and creamy, it combines the tartness of lemon with the sweetness of blueberries, creating a balance that is hard to resist.
What makes this recipe even better is that it’s a no-bake option, making it simple to prepare even on the hottest days of summer. With just a few ingredients, you can whip up this healthy, gluten-free dessert that everyone will love. Plus, it can easily fit into a dairy-free or vegan lifestyle if you opt for the right ingredients!
Ingredients
- 1 box gluten-free ladyfingers or graham crackers
- 2 cups heavy cream or coconut cream, chilled
- 1 cup powdered sugar
- 1 lemon, zested and juiced
- 2 cups fresh blueberries
- 1 teaspoon vanilla extract
Instructions
- Prepare the Cream: In a large bowl, whip the chilled cream until soft peaks form. Gradually add powdered sugar, lemon zest, lemon juice, and vanilla extract. Keep mixing until well combined.
- Layer the Cake: In a 9×13-inch dish, place a layer of ladyfingers or graham crackers at the bottom. Spread a layer of the lemon cream on top, then add a layer of fresh blueberries.
- Repeat Layers: Continue layering until all ingredients are used, finishing with the lemon cream on top. Cover with plastic wrap and refrigerate for at least 4 hours or overnight to set.
- Serve: Once set, slice and serve chilled, garnished with extra blueberries and lemon slices if desired.
Frozen Coconut Mousse Cups
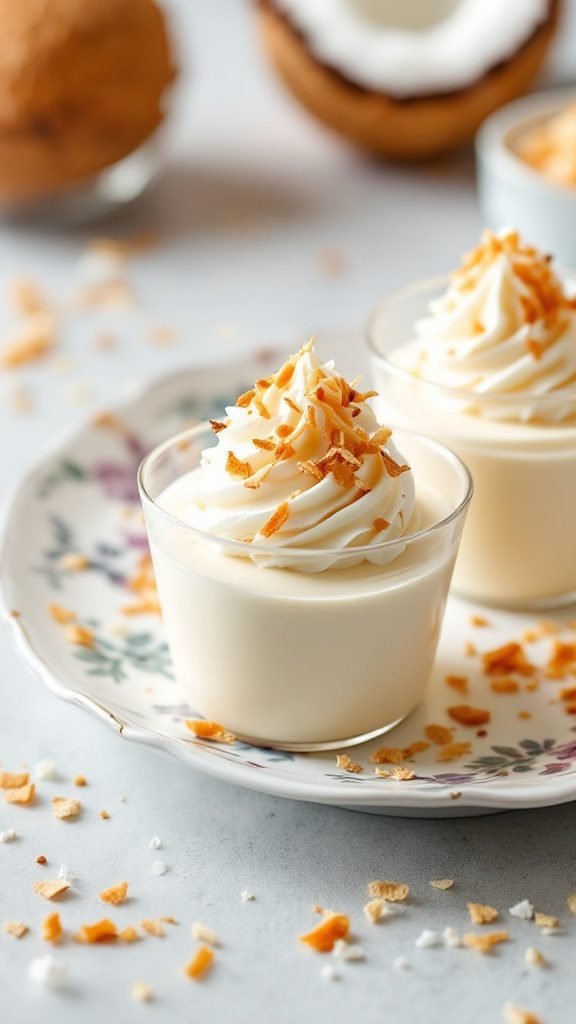
Frozen Coconut Mousse Cups are the perfect summer treat. They offer a light, refreshing taste that’s both creamy and dreamy. With a touch of coconut and a hint of sweetness, these mousse cups are a delightful way to cool off during warm days. Plus, they’re simple to whip up, making them a great choice for gatherings or just a quiet evening at home.
This recipe is not only vegan and dairy-free, but it also fits into low-carb and keto lifestyles, allowing everyone to enjoy a guilt-free dessert. The mousse is made with wholesome ingredients, ensuring it’s a nutritious snack or dessert that you can feel good about serving. Get ready to enjoy a delicious, no-bake dessert that’s sure to impress!
Ingredients
- 1 cup coconut cream
- 1/4 cup maple syrup or agave nectar
- 1 teaspoon vanilla extract
- 1 cup unsweetened shredded coconut
- 1/2 cup aquafaba (the liquid from canned chickpeas)
- Pinch of salt
- Toasted coconut flakes for garnish
Instructions
- In a bowl, whisk together the coconut cream, maple syrup, and vanilla extract until smooth.
- In another bowl, beat the aquafaba with a pinch of salt until it forms stiff peaks.
- Gently fold the whipped aquafaba into the coconut mixture until combined.
- Stir in the shredded coconut.
- Pour the mixture into individual cups and freeze for about 4 hours or until set.
- Before serving, top each cup with toasted coconut flakes for an added crunch.
Strawberry Shortcake with Whipped Cream
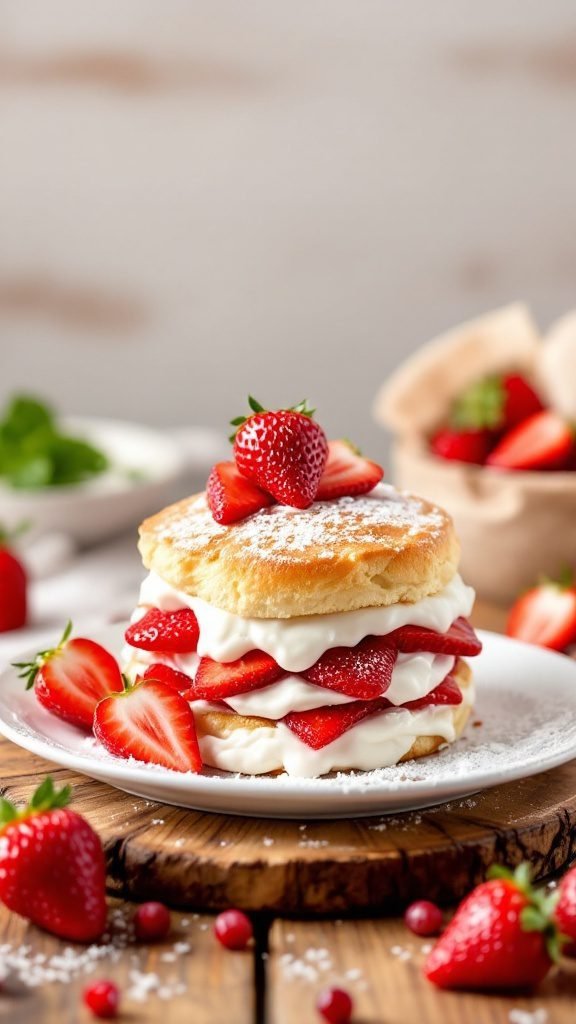
Strawberry shortcake is a classic summer dessert that perfectly balances sweetness and freshness. This treat features layers of fluffy cake, juicy strawberries, and rich whipped cream, making it a delightful way to enjoy seasonal berries. Simple to prepare, it’s ideal for both casual gatherings and special occasions.
The combination of tender shortcake and luscious strawberries creates a refreshing bite that’s both satisfying and light. Whether you’re following a vegetarian lifestyle or simply seeking a sweet snack, this recipe offers a delicious way to celebrate summer flavors.
Ingredients
- 2 cups fresh strawberries, hulled and sliced
- 1/4 cup granulated sugar (adjust for sweetness)
- 2 cups all-purpose flour
- 1/4 cup granulated sugar
- 1 tablespoon baking powder
- 1/2 teaspoon salt
- 1/4 cup unsalted butter, cold and cubed
- 1 cup heavy cream (plus extra for whipping)
- 1 teaspoon vanilla extract
Instructions
- Prepare the Strawberries: In a bowl, combine sliced strawberries and 1/4 cup sugar. Let them sit for about 30 minutes to release their juices.
- Make the Shortcake: Preheat the oven to 425°F (220°C). In a large bowl, mix flour, 1/4 cup sugar, baking powder, and salt. Cut in the cold butter until the mixture resembles coarse crumbs. Add 1 cup of heavy cream and stir until just combined.
- Shape and Bake: Turn the dough onto a floured surface, pat it into a 1-inch thick circle, and cut into rounds. Place on a baking sheet and bake for 15-20 minutes until golden brown.
- Prepare Whipped Cream: While baking, beat the remaining heavy cream and vanilla extract until soft peaks form.
- Assemble: Once cooled, slice each shortcake in half. Layer the bottom half with strawberries, top with whipped cream, then add the top half. Serve immediately and enjoy!
Peach Cobbler with Vanilla Ice Cream
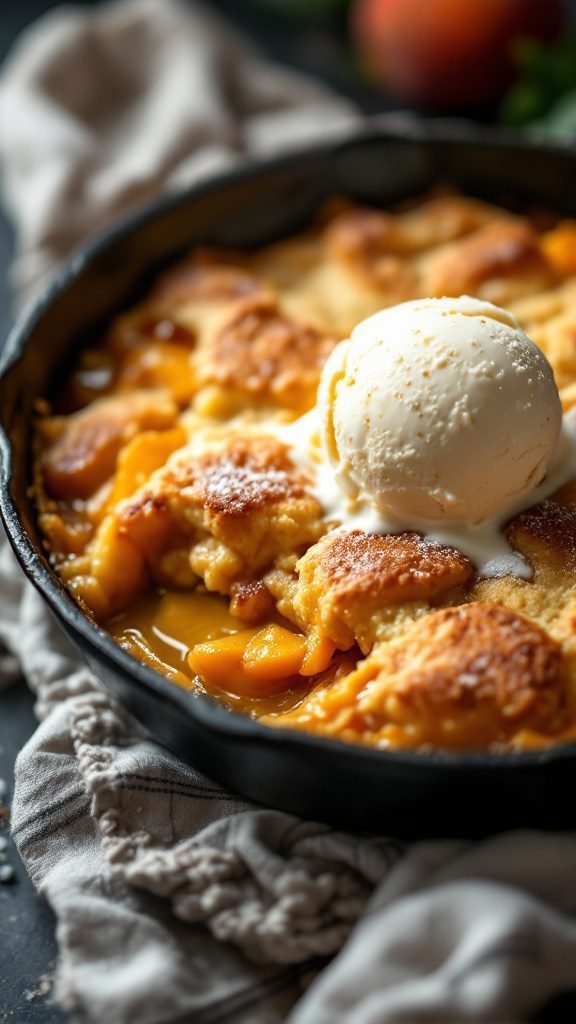
Peach cobbler is a summer classic that brings the sweet and juicy flavors of fresh peaches to your table. This easy recipe combines tender, caramelized peaches with a buttery, flaky topping, making it a delightful dessert that everyone will love. Pair it with a scoop of vanilla ice cream for a refreshing finish on a warm day.
This recipe is simple enough for beginner bakers, yet impressive enough to serve at gatherings. With its warm fruit filling and crunchy topping, it’s a comforting treat that perfectly captures the essence of summer.
Ingredients
- 4 cups fresh peaches, sliced
- 1 cup granulated sugar, divided
- 1 teaspoon cinnamon
- 1/2 cup unsalted butter, melted
- 1 cup all-purpose flour
- 1 tablespoon baking powder
- 1/4 teaspoon salt
- 1 cup milk
- 1 teaspoon vanilla extract
- Vanilla ice cream for serving
Instructions
- Preheat your oven to 375°F (190°C).
- In a bowl, mix sliced peaches with 1/2 cup of sugar and cinnamon. Spread this mixture in a greased baking dish.
- In another bowl, combine melted butter, flour, baking powder, salt, milk, and vanilla extract. Stir until just combined.
- Pour the batter over the peach mixture in the baking dish; do not stir.
- Sprinkle the remaining 1/2 cup of sugar on top.
- Bake for 40-45 minutes, or until the top is golden and the peaches are bubbling.
- Let it cool slightly before serving warm with a scoop of vanilla ice cream.
Mango Sticky Rice
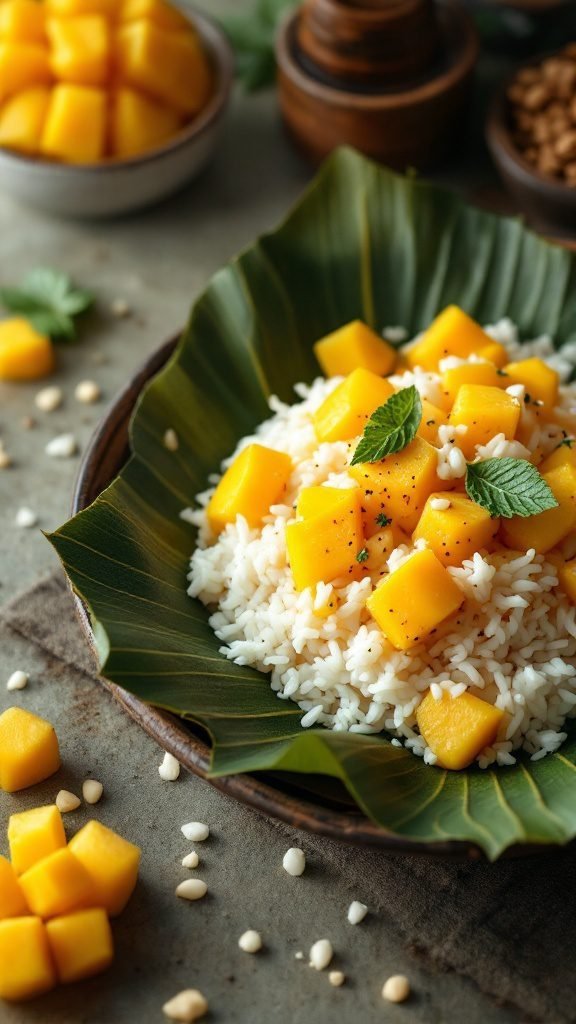
Mango Sticky Rice is a delightful summer dessert that combines sweet, juicy mango with creamy coconut sticky rice. This dish is a perfect mix of flavors and textures, offering a refreshing treat that’s ideal for warm weather. It’s simple to make and can easily be tailored to fit various dietary preferences, making it a great addition to any meal.
This dessert is not only delicious but also vegetarian, gluten-free, and can be adapted for a vegan lifestyle by ensuring the ingredients are plant-based. The combination of sticky rice and ripe mango creates a satisfying dish that feels indulgent, yet it can be a healthy option when made with nutritious ingredients. Let’s dive into the recipe!
Ingredients
- 1 cup glutinous rice
- 1 1/2 cups coconut milk
- 1/3 cup sugar
- 1/4 teaspoon salt
- 2 ripe mangoes, peeled and sliced
- Sesame seeds or mung beans for garnish (optional)
Instructions
- Prepare the Rice: Rinse the glutinous rice under cold water until the water runs clear. Soak it in water for at least 4 hours or overnight. Drain the rice and steam it for about 25-30 minutes until tender.
- Make the Coconut Sauce: In a saucepan, combine coconut milk, sugar, and salt over medium heat. Stir until the sugar dissolves, but do not let it boil. Reserve 1/2 cup of the sauce for serving.
- Mix the Rice: Once the rice is cooked, transfer it to a bowl and pour the remaining coconut sauce over it. Stir well and let it sit for about 20 minutes to absorb the flavors.
- Serve: To serve, place a portion of sticky rice on a plate, top with sliced mango, and drizzle with the reserved coconut sauce. Sprinkle sesame seeds or mung beans on top if desired.
No-Bake Key Lime Pie
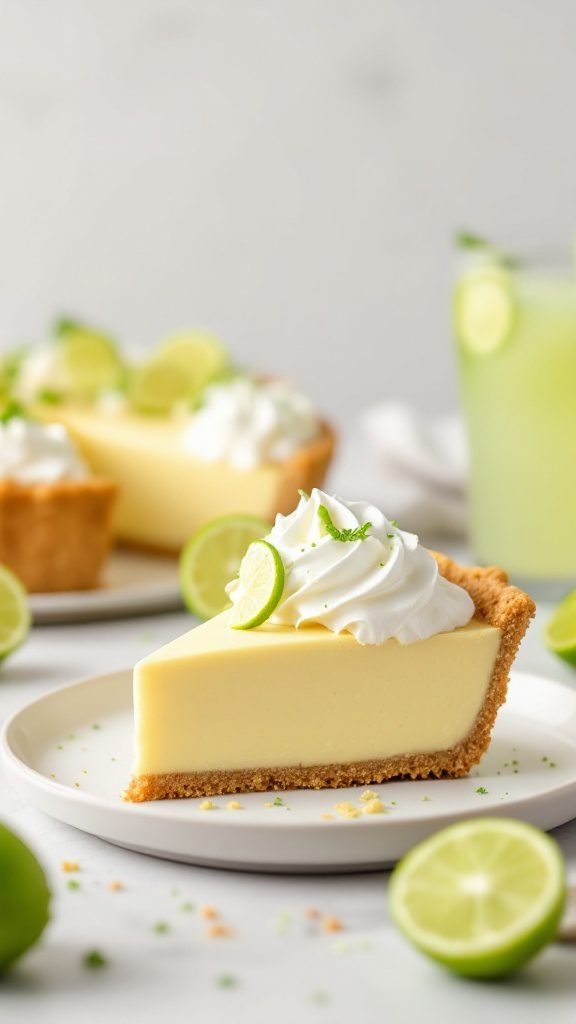
No-Bake Key Lime Pie is a refreshing dessert perfect for summer. With its tangy lime flavor and creamy texture, it brings a burst of sunshine to any gathering. Plus, it’s incredibly easy to make, requiring no baking at all!
This dessert is not only delicious but also versatile, accommodating various dietary needs. It can be made low-carb, gluten-free, or even vegan, making it a great choice for everyone. Serve it chilled, topped with whipped cream for a delightful finish.
Ingredients
- 1 ½ cups graham cracker crumbs
- ½ cup unsalted butter, melted
- 1 can (14 oz) sweetened condensed milk
- ½ cup fresh lime juice
- 1 tablespoon lime zest
- 1 cup heavy whipping cream
- ¼ cup powdered sugar
- Extra lime slices for garnish
Instructions
- Prepare the Crust: In a mixing bowl, combine graham cracker crumbs and melted butter until well mixed. Press the mixture firmly into the bottom and sides of a 9-inch pie pan. Refrigerate for 30 minutes to set.
- Make the Filling: In another bowl, whisk together sweetened condensed milk, fresh lime juice, and lime zest until smooth. Pour the filling into the prepared crust.
- Chill: Cover the pie and refrigerate for at least 2 hours, allowing it to set completely.
- Whip the Cream: In a mixing bowl, beat heavy cream and powdered sugar until soft peaks form. Spread or pipe the whipped cream over the chilled pie before serving.
- Garnish and Serve: Add lime slices on top for decoration. Slice and enjoy your refreshing No-Bake Key Lime Pie!
Chilled Peach Melba

Chilled Peach Melba is a delightful summer dessert that combines fresh peaches, creamy vanilla custard, and a tangy raspberry sauce. The sweet and juicy peaches paired with the smooth custard create a refreshing treat that’s perfect for warm days. It’s simple to make and can be prepared ahead of time, making it an ideal choice for gatherings or family dinners.
This dessert is not only delicious but also caters to various dietary needs. You can easily make it gluten-free and vegan by substituting the ingredients. Enjoy this nutritious and satisfying dessert that offers a burst of summer flavors!
Ingredients
- 4 ripe peaches, peeled and sliced
- 1 cup raspberries, fresh or frozen
- 1/2 cup sugar
- 2 cups almond milk (or any plant-based milk)
- 1/4 cup cornstarch
- 1 teaspoon vanilla extract
- 1/4 cup maple syrup (for sweetness)
- Whipped coconut cream for topping
- Mint leaves for garnish
Instructions
- Prepare the Raspberry Sauce: In a small saucepan, combine raspberries and sugar. Cook over medium heat until bubbly, and mash the berries slightly. Let it simmer for about 5 minutes until it thickens. Remove from heat and let it cool.
- Make the Custard: In another saucepan, whisk together almond milk and cornstarch until smooth. Heat over medium heat while continuously stirring until thickened. Remove from heat, stir in vanilla extract and maple syrup, and let it cool.
- Assemble the Dessert: In serving glasses, layer the peach slices, followed by the custard, and then drizzle with raspberry sauce. Repeat the layers until the glasses are filled.
- Chill: Place the assembled desserts in the refrigerator for at least 2 hours before serving.
- Serve: Top with whipped coconut cream and garnish with mint leaves before enjoying your refreshing treat!
Refreshing Watermelon Sorbet
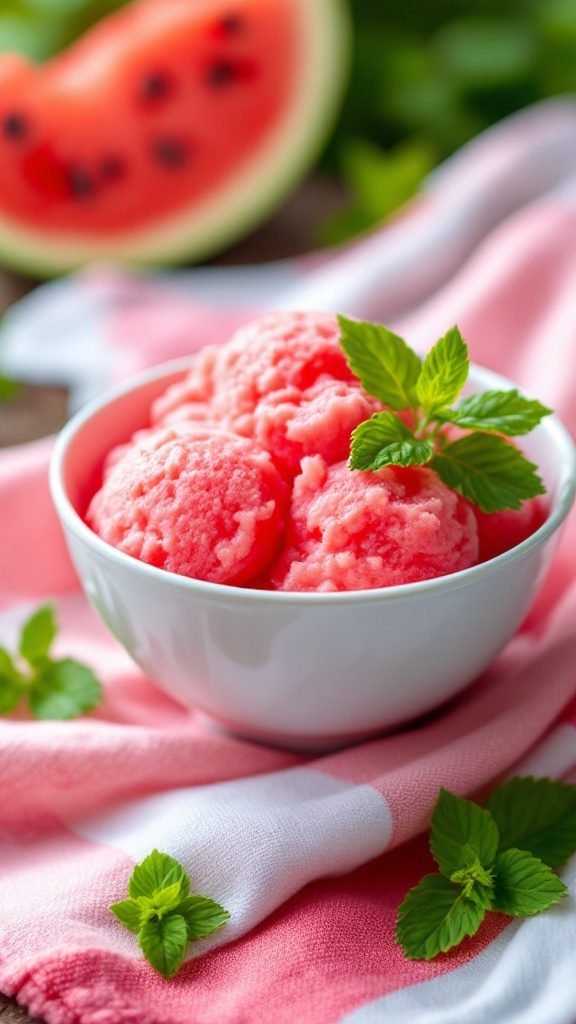
Watermelon sorbet is a delightful, icy treat that perfectly captures the essence of summer. This refreshing dessert is not only simple to make, but it also showcases the sweet, juicy flavor of fresh watermelon. With a light and airy texture, it’s a wonderful way to cool off on a hot day while keeping things healthy.
This recipe is low fat, vegan, and dairy-free, making it a fantastic option for various lifestyles. Plus, it’s a no-bake dessert that requires just a few ingredients. Enjoy it as a light snack or a fun dessert that everyone can indulge in without guilt!
Ingredients
- 4 cups of cubed seedless watermelon
- 1/4 cup of fresh lime juice
- 2 tablespoons of agave syrup (or honey for non-vegan)
- 1 tablespoon of fresh mint leaves, chopped (optional)
Instructions
- Prepare the Watermelon: Place the watermelon cubes in a blender and blend until smooth.
- Add Ingredients: Mix in the lime juice and agave syrup, adjusting the sweetness to your taste.
- Optional Mint: If you want a refreshing twist, stir in the chopped mint leaves.
- Freeze the Mixture: Pour the mixture into a shallow dish and freeze for about 3-4 hours, stirring every hour until the texture is light and fluffy.
- Serve: Scoop the sorbet into bowls and enjoy immediately!
Blueberry Lemonade Popsicles
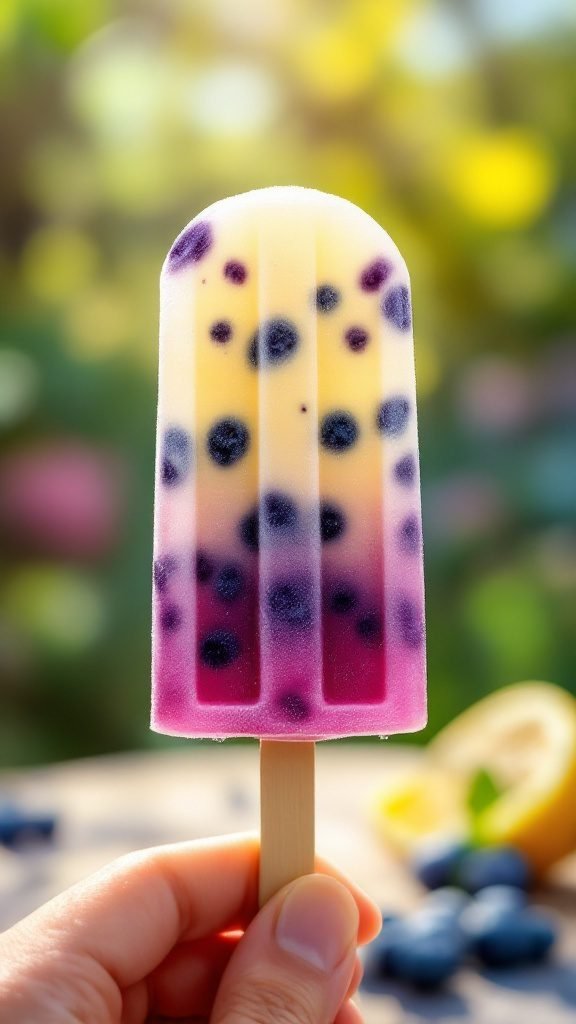
Blueberry lemonade popsicles are a refreshing treat perfect for hot summer days. These popsicles combine the tartness of lemonade with the sweet burst of blueberries, creating a delightful balance of flavors. Plus, they’re super simple to make, making them a fun activity for kids and adults alike.
This recipe is not only delicious but also healthy. They are low-carb, gluten-free, and can easily be made vegan or dairy-free. Enjoy these popsicles as a snack or dessert, and feel good about your choices while living a nutritious lifestyle!
Ingredients
- 2 cups fresh blueberries
- 1 cup lemonade (store-bought or homemade)
- 1 tablespoon honey or maple syrup (optional, adjust for sweetness)
- 1 cup water
Instructions
- Blend the blueberries with water until smooth. You can strain the mixture if you prefer a smoother texture.
- In a bowl, mix the blueberry puree with the lemonade and the optional sweetener if using. Stir well until combined.
- Pour the mixture into popsicle molds, leaving a bit of space at the top for expansion.
- Insert sticks and freeze for at least 4-6 hours or until solid.
- To remove the popsicles, run warm water over the outside of the molds for a few seconds. Enjoy!
Raspberry Lemonade Granita

Raspberry Lemonade Granita is the perfect way to cool off during hot summer days. This refreshing dessert combines the tartness of raspberries with the citrusy zing of lemons, creating a treat that’s both invigorating and satisfying. Plus, it’s super simple to make!
This no-bake dessert is ideal for those who want something quick and nutritious without turning on the oven. With its vibrant color and light texture, it’s not just a snack, but a delightful addition to any summer meal. Enjoy it guilt-free, as it can be made sugar-free or vegan.
Ingredients
- 2 cups fresh raspberries
- 1 cup freshly squeezed lemon juice
- 1/2 cup honey or agave syrup (or sugar-free sweetener)
- 2 cups water
- 1 tablespoon lemon zest
Instructions
- Blend the raspberries, lemon juice, honey (or sweetener), and water in a blender until smooth.
- Strain the mixture through a fine mesh sieve into a shallow dish to remove the seeds.
- Add lemon zest to the strained mixture and stir well.
- Place the dish in the freezer and stir with a fork every 30 minutes, scraping the mixture until it becomes fluffy and granular (about 3-4 hours).
- Once the granita is fully frozen and has a light, fluffy texture, serve it in cups and enjoy immediately!
Chocolate Covered Banana Pops

Chocolate covered banana pops are a fun and tasty treat perfect for summer. They combine the sweetness of bananas with the rich flavor of chocolate, making for a delightful snack or dessert. This recipe is simple to make, and it’s a great way to enjoy a nutritious fruit while satisfying your sweet tooth.
These pops can be made dairy-free or vegan by using dark chocolate that’s free from animal products. Plus, they are easy to customize with your favorite toppings, like sprinkles or crushed nuts. They’re not just delicious; they’re also a refreshing, low-carb option that fits various diets such as keto and sugar-free, making them suitable for anyone looking for a healthy summer dessert.
Ingredients
- 2 ripe bananas
- 1 cup dark chocolate chips (dairy-free if needed)
- 1 tablespoon coconut oil
- Sprinkles or chopped nuts for topping
- Popsicle sticks
Instructions
- Prepare the Bananas: Peel the bananas and cut them in half. Insert a popsicle stick into the cut end of each banana half.
- Melt the Chocolate: In a microwave-safe bowl, combine the chocolate chips and coconut oil. Microwave in 30-second intervals, stirring in between, until melted and smooth.
- Coat the Bananas: Dip each banana half into the melted chocolate, ensuring they are fully coated. Allow excess chocolate to drip off.
- Add Toppings: While the chocolate is still wet, sprinkle your choice of toppings over the bananas.
- Freeze: Place the coated banana pops on a baking sheet lined with parchment paper. Freeze for at least 2 hours until solid.
- Enjoy: Remove from the freezer and enjoy your delicious chocolate covered banana pops!
S’mores Dip with Graham Crackers

Looking for a fun and easy dessert that screams summer? S’mores dip is the perfect sweet treat to enjoy with friends and family. This gooey, chocolatey delight combines the classic flavors of s’mores without the hassle of a campfire. It’s creamy, melty, and topped with toasted marshmallows, making it a hit at any gathering.
This recipe is simple to make, requiring just a few ingredients and minimal prep time. Serve it warm with crispy graham crackers for dipping, and watch it disappear in no time. It’s a refreshing way to celebrate summer evenings, whether you’re hosting a barbecue or just relaxing at home.
Ingredients
- 1 cup chocolate chips (semi-sweet or dark)
- 1 cup mini marshmallows
- ½ cup heavy cream
- 1 teaspoon vanilla extract
- Graham crackers for serving
Instructions
- Preheat your oven to 350°F (175°C).
- In a medium oven-safe dish, combine the chocolate chips and heavy cream. Stir until the chocolate is evenly coated.
- Bake in the oven for about 10 minutes or until the chocolate is melted and bubbly. Remove from the oven.
- Sprinkle mini marshmallows over the melted chocolate. Return to the oven and broil for 1-2 minutes, watching closely to ensure the marshmallows toast but do not burn.
- Serve warm with graham crackers for dipping. Enjoy!
Chocolate Chip Cookie Ice Cream Sandwiches
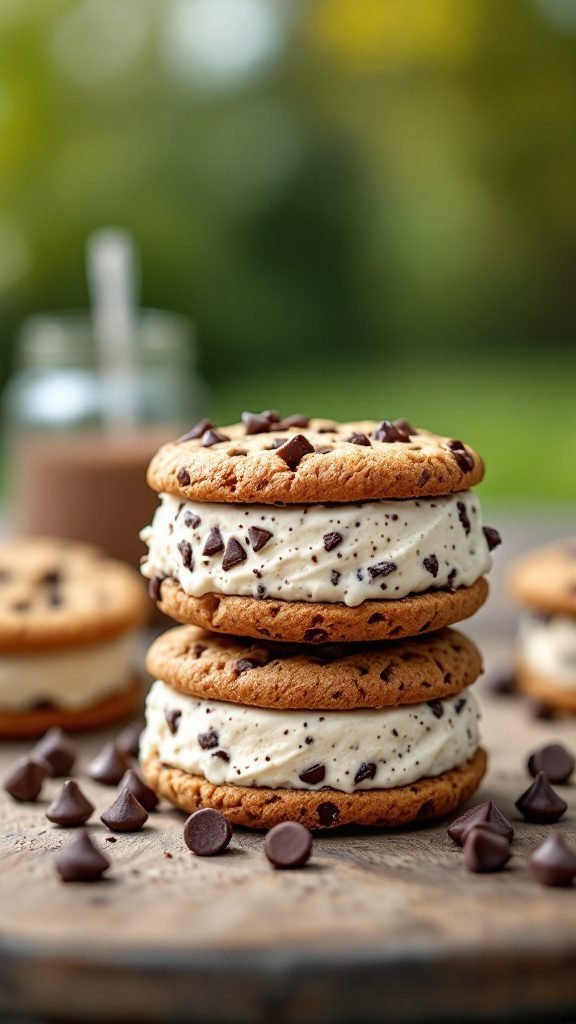
Chocolate chip cookie ice cream sandwiches are the perfect summer treat that combines the classic flavors of soft, chewy cookies with creamy, cold ice cream. They deliver a delightful mix of textures and temperatures, making every bite a refreshing and indulgent experience. This recipe is simple to follow, and you can easily customize it to fit your taste preferences.
Using your favorite chocolate chip cookie recipe, you can whip up these sandwiches in no time. Choose any ice cream flavor you like for a personal twist, and even consider making them dairy-free or vegan by selecting suitable ingredients. They are an excellent way to cool down during hot days while satisfying your sweet tooth!
Ingredients
- 1 cup unsalted butter, softened
- 3/4 cup granulated sugar
- 3/4 cup brown sugar, packed
- 1 teaspoon vanilla extract
- 2 large eggs
- 2 1/4 cups all-purpose flour
- 1 teaspoon baking soda
- 1/2 teaspoon salt
- 2 cups semi-sweet chocolate chips
- 1 quart ice cream (your choice of flavor)
Instructions
- Preheat your oven to 350°F (175°C). In a large bowl, cream together the softened butter, granulated sugar, brown sugar, and vanilla extract until smooth.
- Add the eggs, one at a time, mixing well after each addition. In another bowl, combine flour, baking soda, and salt. Gradually add this mixture to the wet ingredients until well blended.
- Fold in the chocolate chips. Drop spoonfuls of dough onto a baking sheet lined with parchment paper, spacing them about 2 inches apart.
- Bake for 10-12 minutes, or until the edges are golden. Let the cookies cool on the baking sheet for a few minutes before transferring them to wire racks to cool completely.
- Once cooled, take one cookie and scoop a generous amount of ice cream onto the flat side. Top with another cookie, pressing gently to adhere. Repeat with the remaining cookies and ice cream. For best results, freeze the sandwiches for about 30 minutes before serving.
Tropical Fruit Salad with Honey Lime Dressing
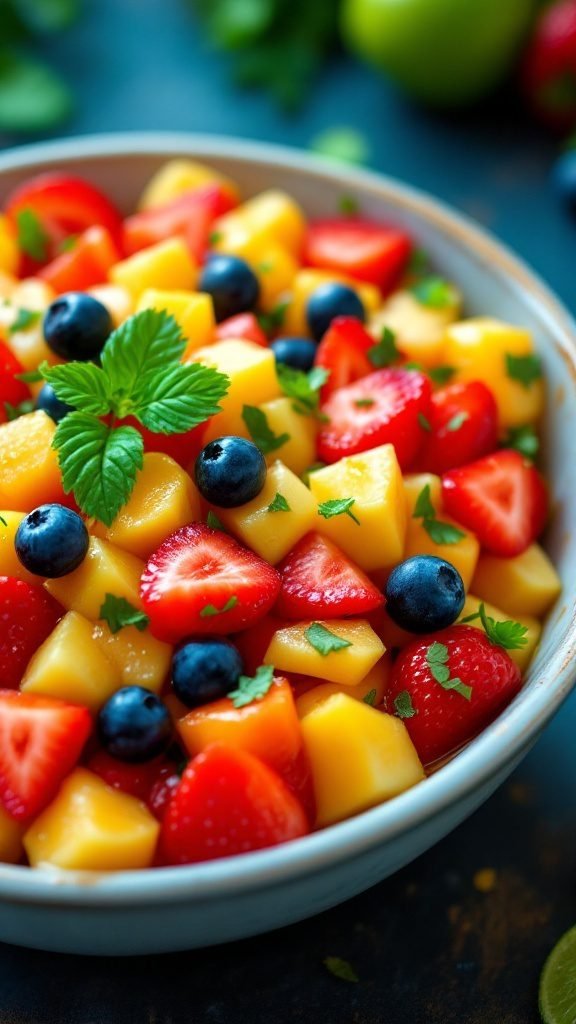
This Tropical Fruit Salad is a refreshing and vibrant dish perfect for summer days. Bursting with flavors from various fruits, it’s not only delicious but also simple to prepare. The combination of sweet and tangy honey lime dressing elevates the dish, making it a delightful snack or dessert that everyone will love.
What makes this recipe special is its versatility. You can use whatever fruits are in season or your personal favorites. It’s a healthy option that fits into a variety of lifestyles, from vegan and vegetarian to gluten-free and low carb. Enjoy it as a light meal or a satisfying dessert that’s sure to impress!
Ingredients
- 1 cup diced fresh pineapple
- 1 cup diced mango
- 1 cup sliced strawberries
- 1 cup blueberries
- 1 cup diced kiwi
- 2 tablespoons fresh mint, chopped
- 2 tablespoons honey
- 1 tablespoon lime juice
Instructions
- Prepare the Fruit: In a large bowl, combine the diced pineapple, mango, strawberries, blueberries, and kiwi.
- Create the Dressing: In a small bowl, whisk together honey and lime juice until well combined.
- Toss Together: Drizzle the honey lime dressing over the fruit salad, and gently toss to coat all the fruit evenly.
- Add Mint: Sprinkle chopped mint on top and give it another light toss.
- Serve: Enjoy immediately or refrigerate for 30 minutes to let the flavors meld.
Banana Cream Pie with Toasted Meringue
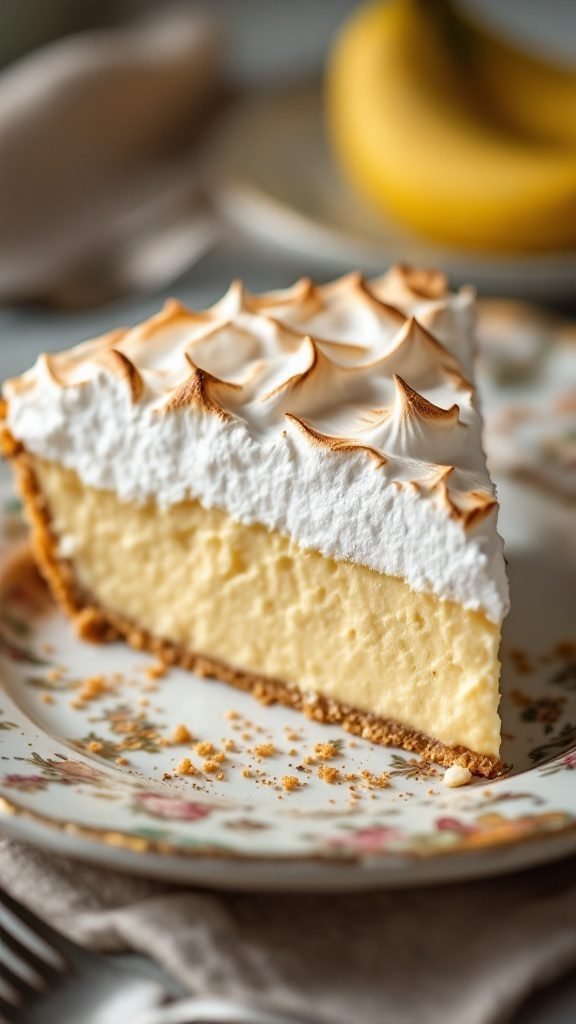
Banana Cream Pie with Toasted Meringue is the perfect summer dessert that balances creamy, sweet flavors with a light, airy texture. The rich banana filling is enveloped in a buttery crust, crowned with a fluffy meringue that brings a delightful contrast. This pie is not only delicious but also straightforward to prepare, making it an excellent choice for both experienced bakers and beginners.
Every bite offers the refreshing taste of ripe bananas mixed with a creamy custard, topped with a toasted meringue that adds a hint of sweetness. It’s a delightful way to enjoy summer flavors, and it’s sure to impress at any gathering!
Ingredients
- 1 pre-made graham cracker pie crust
- 2 large ripe bananas
- 2 cups milk
- 1/2 cup granulated sugar
- 1/4 cup cornstarch
- 1/4 teaspoon salt
- 3 large egg yolks
- 2 tablespoons unsalted butter
- 1 teaspoon vanilla extract
- 3 large egg whites
- 1/4 teaspoon cream of tartar
- 1/2 cup granulated sugar (for meringue)
Instructions
- Make the Filling: In a saucepan, combine milk, sugar, cornstarch, and salt. Cook over medium heat, stirring constantly until the mixture thickens. Remove from heat and whisk in egg yolks, butter, and vanilla until smooth.
- Assemble the Pie: Slice the ripe bananas and layer them in the bottom of the pre-made crust. Pour the custard filling over the bananas and let it cool to room temperature.
- Prepare the Meringue: In a clean bowl, beat the egg whites with cream of tartar until soft peaks form. Gradually add the sugar and continue beating until stiff peaks form.
- Top the Pie: Spread the meringue over the cooled filling, making sure it touches the crust to prevent shrinking. Use a spatula to create decorative peaks.
- Toast the Meringue: Bake in a preheated oven at 350°F (175°C) for about 10 minutes, or until the meringue is lightly browned. Let cool before serving.
Berry Pavlova with Whipped Cream
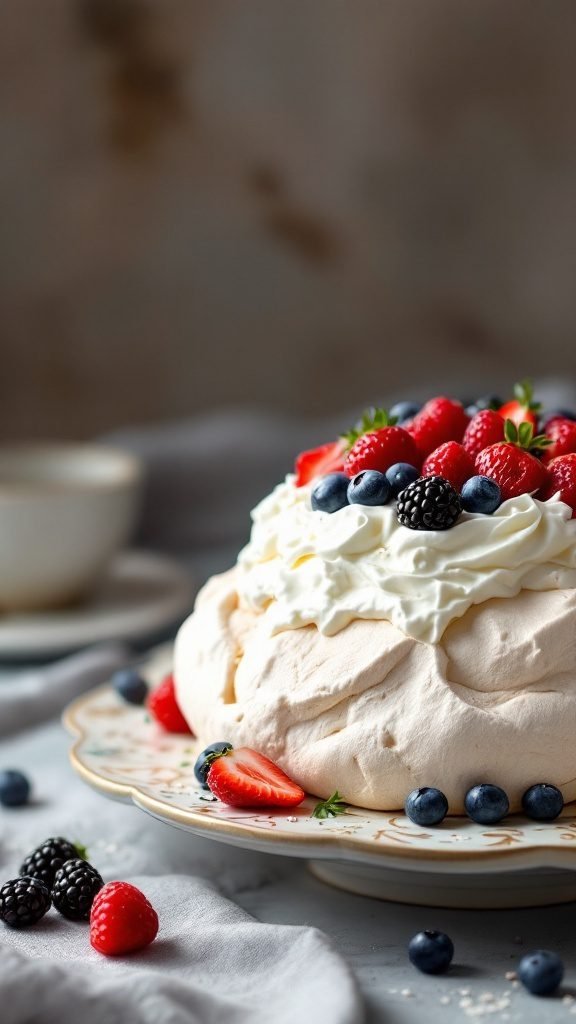
This Berry Pavlova is a delightful summer dessert that’s light, airy, and packed with flavor. The combination of a crisp meringue base topped with fluffy whipped cream and a medley of fresh berries creates a treat that’s both refreshing and satisfying. It’s a simple recipe that’s perfect for warm days, making it a favorite among dessert lovers.
Enjoying a slice of this pavlova transports you to a sunny day, where each bite offers a sweet crunch followed by a soft, creamy finish. It’s gluten-free, and can also be made sugar-free or dairy-free, making it a flexible option for various lifestyles. Whether you’re hosting a gathering or simply treating yourself, this dessert is sure to impress!
Ingredients
- 4 large egg whites
- 1 cup granulated sugar
- 1 teaspoon vanilla extract
- 1 teaspoon white vinegar
- 2 cups heavy whipping cream
- 2 tablespoons powdered sugar (optional)
- 1 cup strawberries, hulled and sliced
- 1 cup raspberries
- 1 cup blueberries
Instructions
- Preheat your oven to 275°F (135°C) and line a baking sheet with parchment paper.
- In a large mixing bowl, whip the egg whites until soft peaks form. Gradually add the granulated sugar, continuing to whip until the mixture is glossy and stiff peaks form.
- Gently fold in the vanilla extract and vinegar.
- Spoon the meringue onto the prepared baking sheet and shape it into a circle with a slight dip in the center to hold the toppings.
- Bake for about 1 hour, then turn off the oven and let the pavlova cool completely inside.
- In a separate bowl, whip the heavy cream until soft peaks form. If desired, add powdered sugar to sweeten.
- Once the pavlova has cooled, top it with whipped cream and arrange the fresh berries on top.
- Slice and serve immediately for a refreshing summer dessert!
Coconut Lime Sorbet
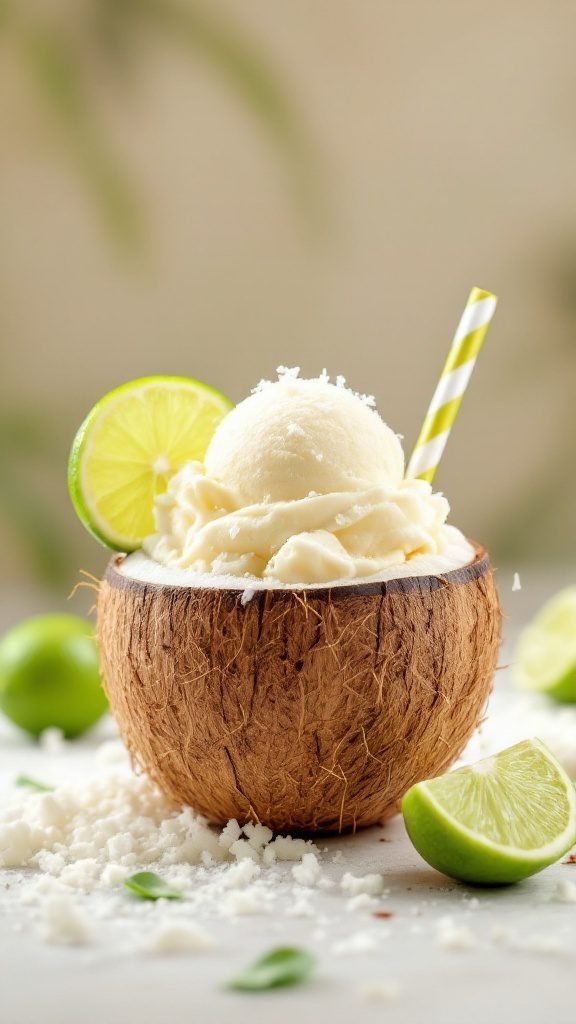
Coconut Lime Sorbet is a refreshing treat that’s perfect for hot summer days. This simple, no-bake recipe combines the creamy sweetness of coconut with the zesty brightness of lime, creating a delightful balance that’s both invigorating and satisfying.
With just a few ingredients, making this sorbet is a breeze. It’s healthy, low in calories, and suitable for various diets, including vegan and gluten-free lifestyles. Enjoy this delicious, dairy-free snack as a light dessert or a cool afternoon pick-me-up!
Ingredients
- 2 cups coconut milk (canned or carton)
- 1/2 cup lime juice (freshly squeezed)
- 1/4 cup honey or agave syrup (adjust to taste)
- 1 tablespoon lime zest
- 1/4 teaspoon salt
Instructions
- Blend the Ingredients: In a blender, combine coconut milk, lime juice, honey (or agave), lime zest, and salt. Blend until smooth.
- Taste and Adjust: Taste the mixture and add more honey or lime juice if desired, then blend again to mix.
- Chill: Pour the mixture into a shallow dish and place it in the freezer. Let it chill for about 2 hours until slightly frozen.
- Scrape and Freeze: After 2 hours, use a fork to scrape the mixture to create a fluffy texture. Return it to the freezer and continue to freeze for another 2-4 hours, or until fully firm.
- Serve: Scoop the sorbet into bowls and enjoy! Garnish with extra lime zest or coconut flakes if desired.
Peanut Butter Banana Ice Cream
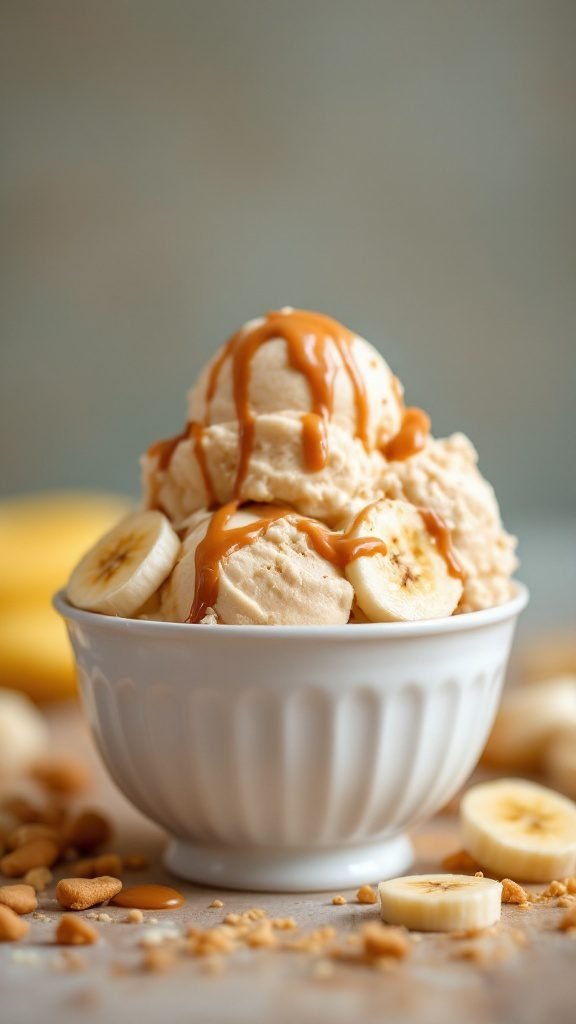
This Peanut Butter Banana Ice Cream is a deliciously simple treat perfect for hot summer days. It combines the creamy goodness of peanut butter with the natural sweetness of ripe bananas, creating a satisfying dessert that’s both nutritious and indulgent. Plus, it’s made with minimal ingredients, making it an easy go-to for anyone looking to whip up a refreshing snack.
This recipe is not only dairy-free and vegan, but it’s also a healthy option for those following a low-carb or sugar-free diet. Enjoy it on its own or topped with your favorite toppings for an extra burst of flavor!
Ingredients
- 4 ripe bananas, sliced
- 1/2 cup creamy peanut butter
- 1 tablespoon maple syrup (optional)
- 1 teaspoon vanilla extract
Instructions
- Freeze the Bananas: Place the sliced bananas in a single layer on a baking sheet and freeze until solid, about 2 hours.
- Blend the Ingredients: In a food processor, combine the frozen bananas, peanut butter, maple syrup, and vanilla extract. Blend until smooth and creamy.
- Serve: Scoop the mixture into bowls and enjoy immediately for a soft-serve texture, or transfer to an airtight container and freeze for an additional hour for a firmer ice cream.
Chocolate Raspberry Tart
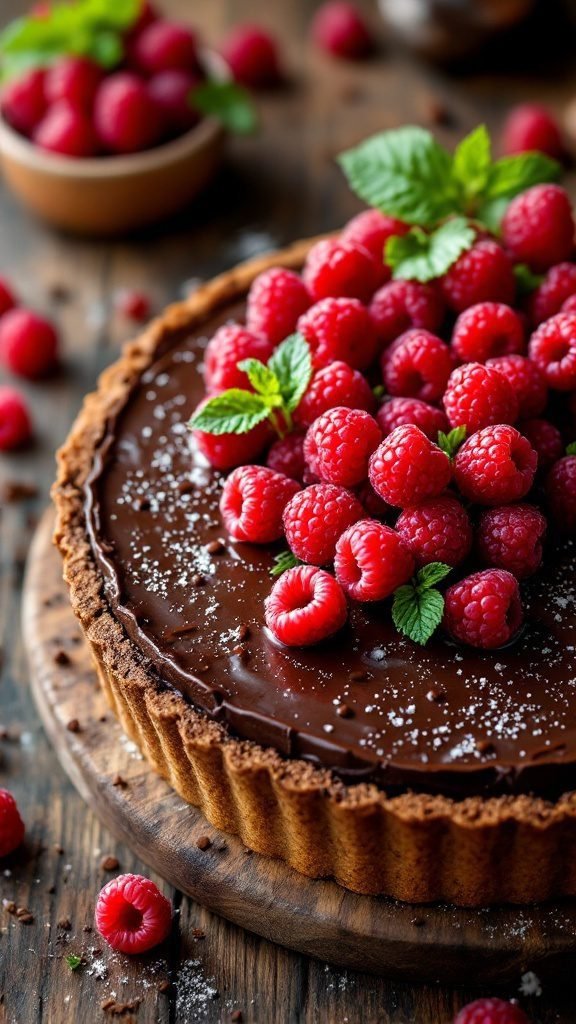
This Chocolate Raspberry Tart is the perfect summer treat, blending rich chocolate with the fresh tang of raspberries. The combination creates a delightful balance of flavors that’s sure to impress. Plus, it’s simple to make, making it an ideal choice for both novice and experienced bakers.
The tart has a buttery crust that holds a smooth chocolate ganache, topped with plump, juicy raspberries. It’s a fantastic dessert that not only looks stunning but also tastes amazing. Whether you’re hosting a summer gathering or just treating yourself, this tart is a refreshing, decadent option that everyone will love.
Ingredients
- 1 1/2 cups almond flour (for a gluten-free crust)
- 1/4 cup coconut oil, melted
- 2 tablespoons maple syrup
- 1/4 teaspoon salt
- 1 1/4 cups dark chocolate chips (dairy-free if desired)
- 1/2 cup coconut cream
- 1 teaspoon vanilla extract
- 2 cups fresh raspberries
- Powdered sugar for dusting (optional)
Instructions
- Preheat the oven to 350°F (175°C). In a bowl, mix almond flour, melted coconut oil, maple syrup, and salt until combined. Press the mixture into a tart pan evenly.
- Bake the crust for about 10-12 minutes until lightly golden. Let it cool completely.
- In a saucepan, heat the coconut cream until it simmers. Remove from heat and stir in chocolate chips and vanilla extract until smooth and fully melted.
- Pour the chocolate mixture into the cooled crust and refrigerate for at least 1 hour until set.
- Once set, top with fresh raspberries and dust with powdered sugar before serving. Enjoy your delicious Chocolate Raspberry Tart!
Creamy Avocado Lime Mousse
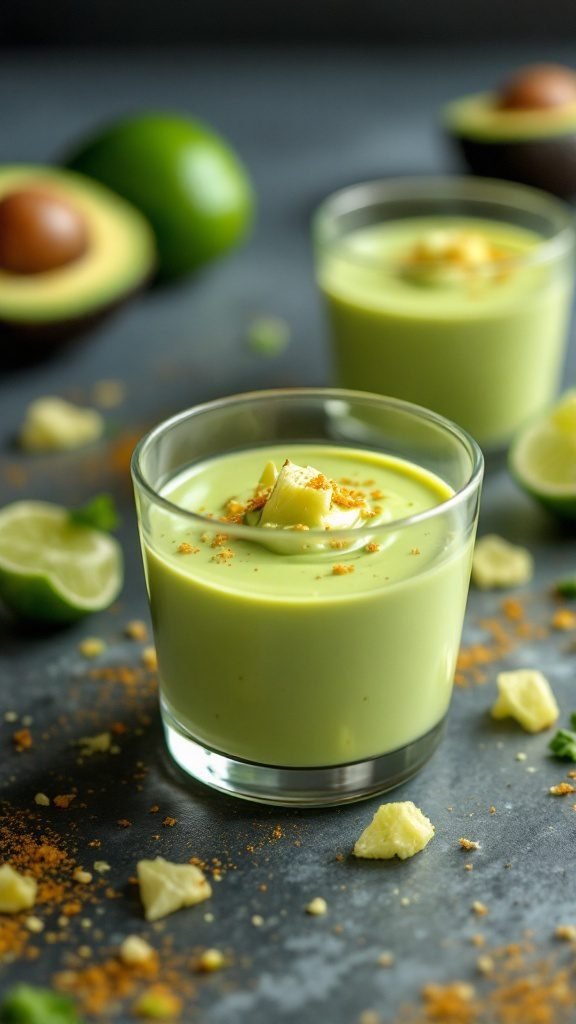
Looking for a refreshing dessert that’s both creamy and nutritious? This avocado lime mousse is the perfect summer treat! Combining the rich texture of avocados with the zesty brightness of lime, this mousse is a delightful balance of flavors. It’s not only delicious but also simple to make and perfect for those who prefer plant-based or low-carb options.
This dessert is vegan, dairy-free, and sugar-free, making it a guilt-free indulgence. The mousse is light and airy, a great choice for those hot summer days when you want something cool and satisfying. Plus, its vibrant green color adds a fun touch to any table setting!
Ingredients
- 2 ripe avocados
- 1/2 cup coconut milk
- 1/4 cup lime juice
- 1/4 cup maple syrup or your choice of sweetener
- 1 teaspoon vanilla extract
- Pinch of salt
- Fresh lime zest for garnish
- Crushed nuts or cookie crumbs for topping (optional)
Instructions
- Prepare the Avocados: Cut the avocados in half, remove the pit, and scoop the flesh into a blender or food processor.
- Blend Ingredients: Add coconut milk, lime juice, maple syrup, vanilla extract, and a pinch of salt to the blender. Blend until smooth and creamy.
- Taste and Adjust: Taste the mousse and adjust sweetness or lime juice as desired. Blend again to combine.
- Chill: Spoon the mousse into serving dishes and refrigerate for at least 30 minutes to help it set.
- Serve: Top with fresh lime zest and crushed nuts or cookie crumbs before serving for added texture.
Caramelized Pineapple with Ice Cream
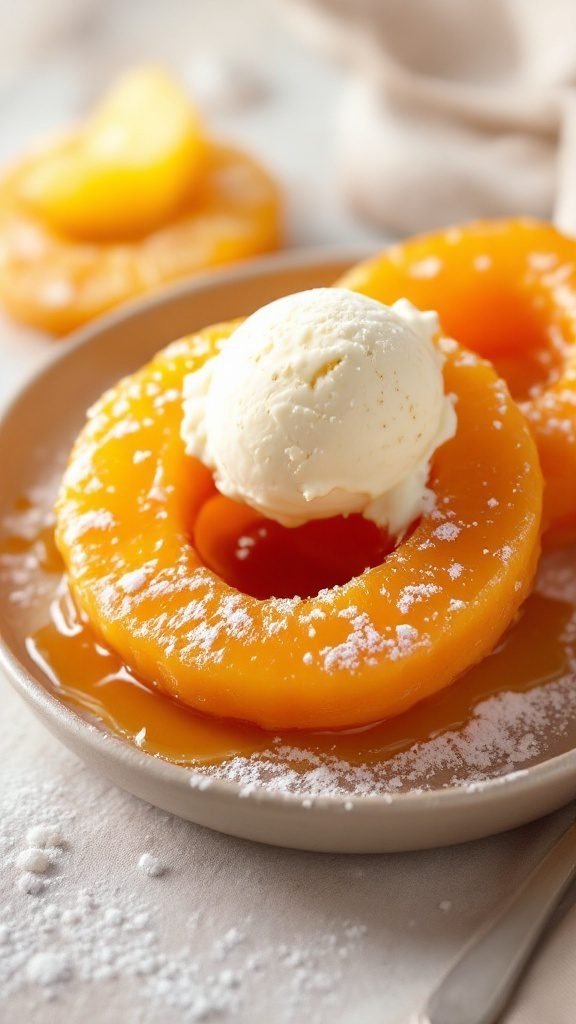
This recipe for caramelized pineapple with ice cream is a delightful summer treat that’s both refreshing and simple to make. The natural sweetness of the pineapple shines through as it’s caramelized to perfection, creating a warm, gooey topping that pairs beautifully with cool ice cream.
Perfect for warm evenings, this dessert is not only delicious but also versatile. You can enjoy it on its own or as a topping for pancakes or waffles. Plus, it can easily fit into various dietary lifestyles, being gluten-free and vegetarian.
Ingredients
- 1 ripe pineapple, peeled and sliced into rings
- 1/4 cup brown sugar
- 2 tablespoons butter
- 1 teaspoon ground cinnamon
- Vanilla ice cream (or a dairy-free alternative)
- Mint leaves for garnish (optional)
Instructions
- In a large skillet, melt the butter over medium heat. Add the brown sugar and cinnamon, stirring until the mixture is bubbly.
- Add the pineapple rings to the skillet, cooking for about 3-4 minutes on each side until caramelized and golden brown.
- Remove from heat and let cool slightly. Serve the warm pineapple rings with a scoop of vanilla ice cream on top.
- Garnish with mint leaves, if desired, and enjoy your refreshing summer dessert!
Zesty Orange Sorbet

Bright and refreshing, zesty orange sorbet is a perfect treat for those hot summer days. This simple recipe combines the natural sweetness of oranges with a hint of citrusy zing, making it a delightful dessert that everyone will love. Plus, it’s a healthy choice, being both vegan and gluten-free!
Making this sorbet is a breeze. With just a few ingredients and a blender, you can whip up a creamy, no-bake dessert in no time. It’s not only a great snack but also a fantastic way to impress guests at summer gatherings!
Ingredients
- 4 cups fresh orange juice (about 8-10 oranges)
- 1/2 cup granulated sugar (or honey for a natural sweetener)
- 1 tablespoon lemon juice
- 1 tablespoon orange zest
- Mint leaves for garnish
Instructions
- Juice the Oranges: Squeeze the juice from the fresh oranges and strain it to remove any pulp or seeds.
- Mix Ingredients: In a mixing bowl, combine the orange juice, granulated sugar, lemon juice, and orange zest. Stir well until the sugar is fully dissolved.
- Chill the Mixture: Pour the mixture into a shallow dish and place it in the freezer. Allow it to chill for about 1-2 hours, stirring every 30 minutes until it begins to freeze.
- Blend for Smoothness: Once the mixture is mostly frozen, remove it from the freezer and transfer it to a blender. Blend until smooth and creamy.
- Final Freeze: Return the blended sorbet to the shallow dish and freeze for another 2-3 hours until fully set. Serve in bowls, garnished with fresh mint leaves.
Chilled Cucumber Yogurt Parfait
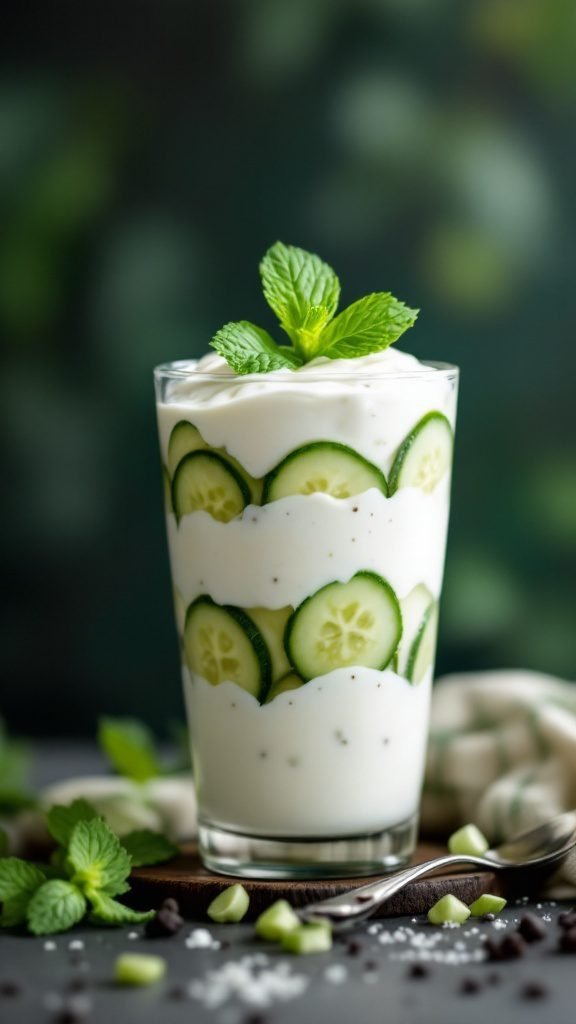
Chilled Cucumber Yogurt Parfait is a refreshing summer dessert that combines creamy yogurt and crisp cucumber slices in a delightful way. This dessert is not only simple to make but also a fantastic option for those looking for a healthy treat. With its light texture and subtle flavors, it’s perfect for hot days when you want something cool and satisfying.
This parfait is vegan, gluten-free, and can be made sugar-free, making it a nutritious choice for various diets. Layered in a glass, it’s visually appealing and offers a unique twist on traditional desserts. Enjoy it as a snack or a light meal—either way, it’s sure to please!
Ingredients
- 2 cups plain yogurt (dairy-free or regular)
- 1 medium cucumber, thinly sliced
- 2 tablespoons honey or maple syrup (optional)
- 1 teaspoon vanilla extract
- Fresh mint leaves for garnish
Instructions
- In a bowl, mix the yogurt with honey or maple syrup and vanilla extract until well combined.
- In a glass or bowl, start layering the yogurt mixture and cucumber slices. Begin with a layer of yogurt, followed by a layer of cucumber.
- Repeat the layers until the glass is filled, finishing with a layer of yogurt on top.
- Garnish with fresh mint leaves for an extra touch of freshness.
- Chill in the refrigerator for at least 30 minutes before serving for a cooler experience.
Chocolate Mint Brownie Sundae
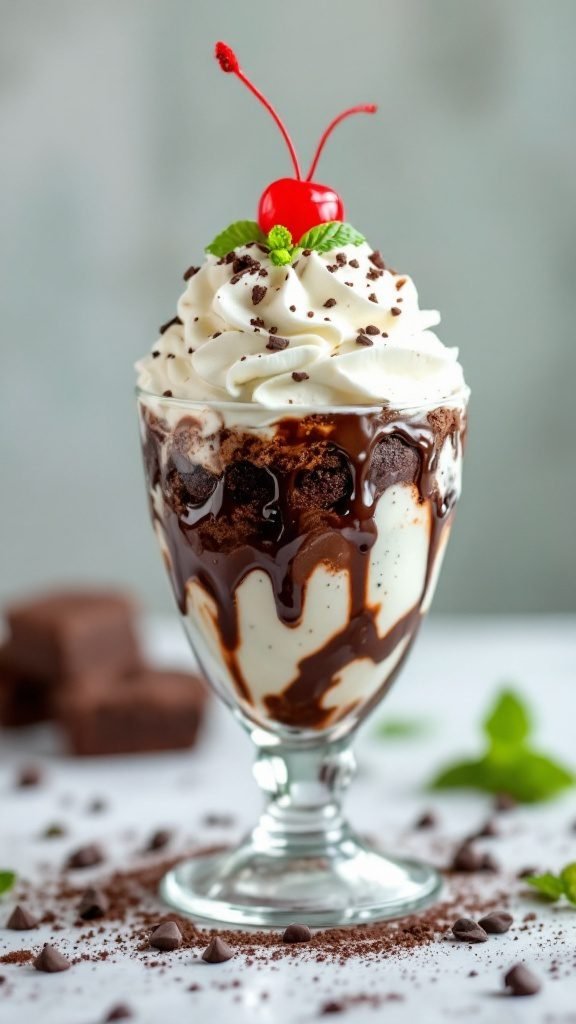
Chocolate Mint Brownie Sundae is a delightful treat perfect for summer. This dessert combines rich chocolate brownies with refreshing mint ice cream, creating a flavor explosion that’s hard to resist. Top it off with whipped cream, chocolate sauce, and a cherry for the ultimate finish. It’s simple to prepare, making it ideal for gatherings or a sweet snack at home.
Using fudgy brownies as the base adds depth to this dessert, while mint ice cream brings an invigorating twist. Whether you’re hosting a summer barbecue or just want to indulge on a hot day, this sundae is sure to impress. Plus, it’s a fun, no-bake option that lets you enjoy the sweet flavors of summer without too much effort.
Ingredients
- 2 cups brownie cubes
- 2 cups mint chocolate chip ice cream
- 1 cup whipped cream
- 1/2 cup chocolate sauce
- Fresh mint leaves for garnish
- Maraschino cherries for topping
Instructions
- Prepare the Brownies: Bake your favorite brownie recipe and let them cool completely. Cut into bite-sized cubes.
- Layer the Sundae: In a tall glass, layer the brownie cubes and mint chocolate chip ice cream. Repeat the layers until the glass is full.
- Add Toppings: Generously dollop whipped cream on top. Drizzle with chocolate sauce and finish with a cherry and a mint leaf.
- Serve: Enjoy immediately for the best experience!
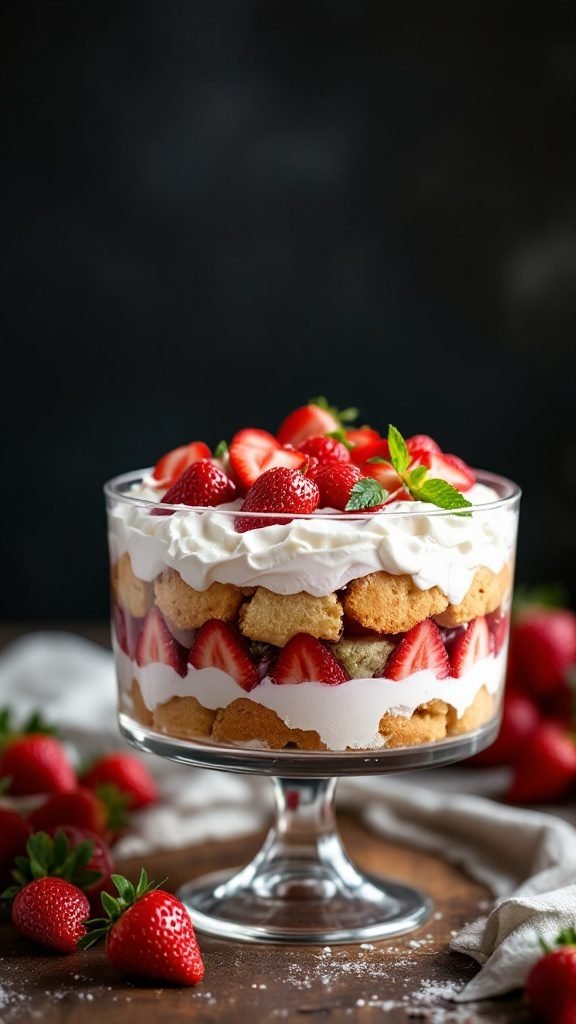
Summer Berry Trifle
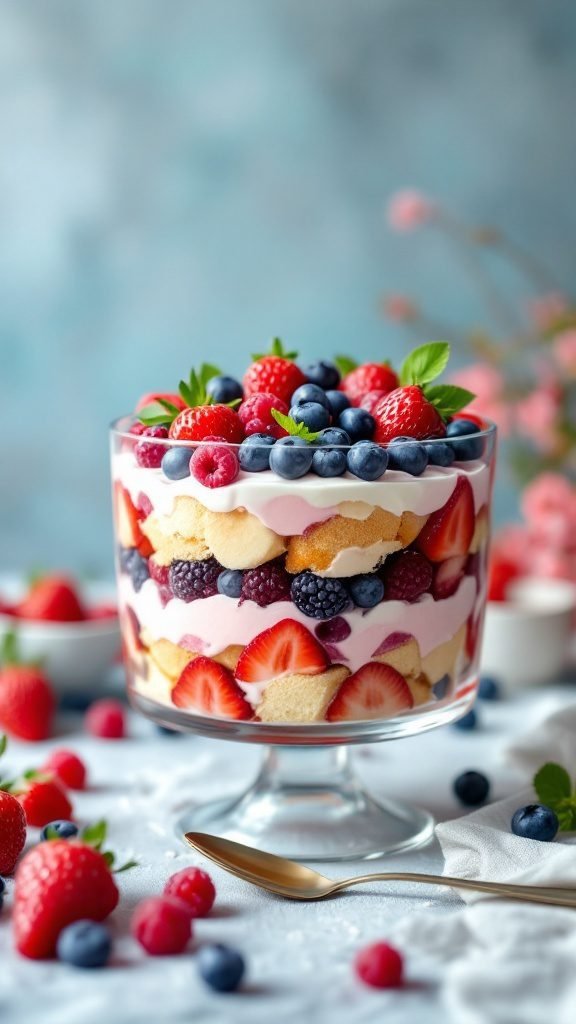
Summer berry trifle is a delightful dessert that combines layers of fresh berries, creamy yogurt, and light sponge cake. The result is a refreshing treat perfect for hot summer days. It’s not only simple to make but also a crowd-pleaser.
This no-bake recipe provides a light and fruity dessert option that fits various dietary lifestyles, whether you’re looking for a low-carb, vegan, or gluten-free treat. The vibrant colors and flavors of seasonal berries make it an attractive centerpiece for any gathering.
Ingredients
- 2 cups mixed fresh berries (strawberries, blueberries, raspberries, blackberries)
- 1 cup vanilla yogurt (dairy-free or vegan if desired)
- 1 cup whipped cream (or coconut cream for dairy-free)
- 1 package ladyfinger cookies or sponge cake
- 1 tablespoon honey or maple syrup (optional)
- Fresh mint leaves for garnish
Instructions
- Start by washing and preparing the berries. Slice the strawberries if they are large.
- In a bowl, mix the yogurt and honey or maple syrup, if using, until smooth.
- In a trifle bowl or glass dish, layer half of the ladyfingers or sponge cake at the bottom.
- Add a layer of yogurt mixture followed by a layer of mixed berries.
- Repeat the layers, finishing with a layer of yogurt and topping with whipped cream and remaining berries.
- Chill in the refrigerator for at least 1 hour before serving. Garnish with fresh mint leaves just before serving.
Lemon Basil Cheesecake Bars
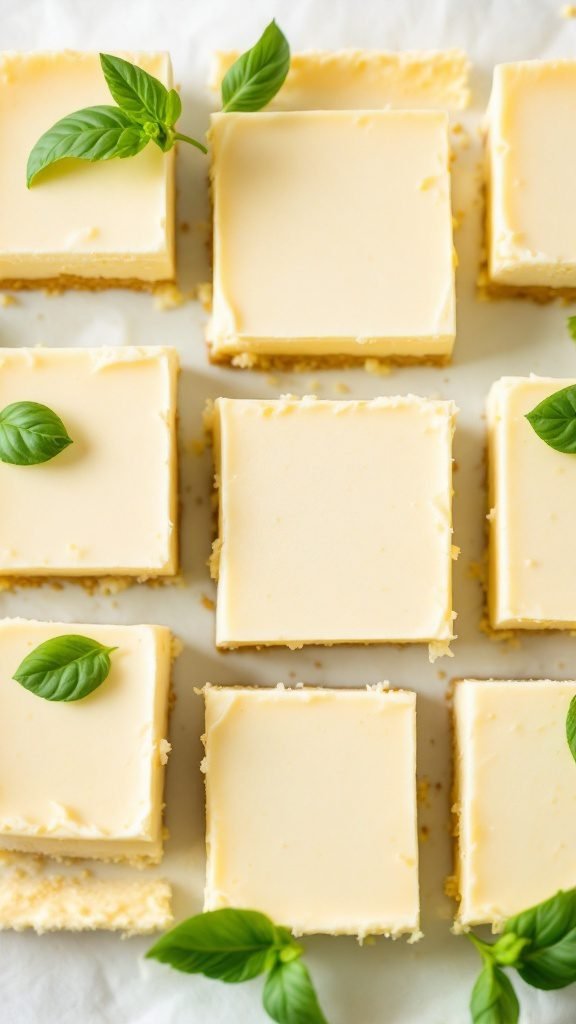
Lemon Basil Cheesecake Bars offer a fresh twist on a classic dessert. The bright flavors of lemon paired with the subtle earthiness of basil create a unique treat that’s perfect for summer. These bars are not only delicious but also easy to make, making them an excellent choice for a casual gathering or a cozy night in.
These bars are a no-bake option, which means you can whip them up without ever turning on your oven. They are creamy, refreshing, and light—ideal for those warm days when you want something satisfying yet not too heavy. Plus, they can easily fit into a gluten-free, low-carb, or vegan lifestyle with some simple substitutions!
Ingredients
- 1 1/2 cups graham cracker crumbs (or almond flour for gluten-free)
- 1/2 cup unsalted butter, melted (or coconut oil for vegan)
- 16 oz cream cheese, softened (or coconut cream for dairy-free)
- 1 cup powdered sugar (or a sugar substitute for keto)
- 1/4 cup fresh lemon juice
- 1 tablespoon lemon zest
- 1/4 cup fresh basil leaves, finely chopped
- 1 teaspoon vanilla extract
Instructions
- Prepare the crust: In a medium bowl, combine graham cracker crumbs and melted butter. Press the mixture firmly into the bottom of a lined 9×9 inch baking dish. Chill in the refrigerator for about 15 minutes.
- Make the cheesecake filling: In a large mixing bowl, beat the softened cream cheese until smooth. Gradually add powdered sugar, lemon juice, lemon zest, chopped basil, and vanilla extract, mixing until well combined.
- Assemble the bars: Spread the cheesecake filling evenly over the chilled crust. Smooth the top with a spatula and refrigerate for at least 4 hours, or until set.
- Serve: Cut into squares and garnish with additional basil leaves, if desired. Enjoy your refreshing lemon basil cheesecake bars!
Chia Seed Pudding with Mango
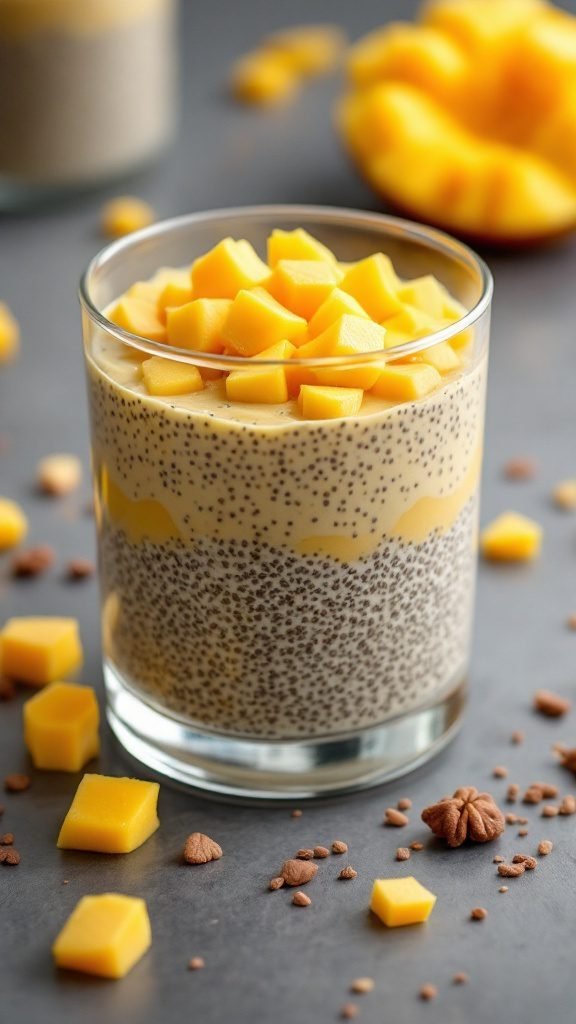
This chia seed pudding with mango is an easy and healthy dessert that screams summer. The creamy texture of the pudding pairs perfectly with the sweet, juicy mango, making it a refreshing treat for any occasion. Plus, it’s simple to whip up, requiring just a few ingredients and minimal prep time!
Not only is this dessert delicious, but it’s also packed with nutrients. Chia seeds are a great source of omega-3 fatty acids, fiber, and protein, fitting well into various lifestyles, whether you’re vegan, gluten-free, or following a low-carb diet. Enjoy it as a light meal or a satisfying snack!
Ingredients
- 1/2 cup chia seeds
- 2 cups almond milk (or any plant-based milk)
- 1 tablespoon maple syrup (optional)
- 1 teaspoon vanilla extract
- 1 large ripe mango, diced
- A pinch of salt
Instructions
- Mix Ingredients: In a bowl, combine chia seeds, almond milk, maple syrup, vanilla extract, and salt. Stir well to avoid clumps.
- Chill: Cover the bowl and refrigerate for at least 4 hours, or overnight for the best results. The chia seeds will expand and create a pudding-like texture.
- Serve: Once the pudding is set, give it a good stir. Layer it in serving glasses with diced mango on top. Enjoy chilled!
Chocolate Chip Brownie Ice Cream Cups
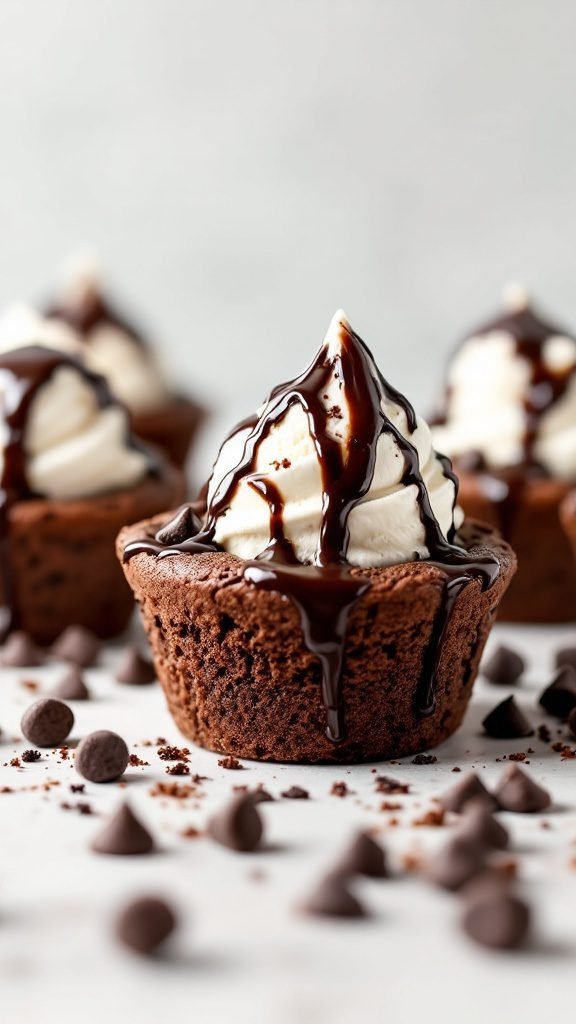
Chocolate Chip Brownie Ice Cream Cups are a delightful summer treat that combines the richness of brownies with the creaminess of ice cream. Each cup is like a mini dessert bowl, making it a fun and easy dessert to serve at gatherings or enjoy on a quiet evening. The combination of warm brownie and cold ice cream gives a perfect contrast that’s hard to resist.
This recipe is simple to follow and doesn’t require any fancy techniques. They’re perfect for those looking for a quick sweet fix, and you can even customize them with your favorite ice cream flavors or toppings for a refreshing twist!
Ingredients
- 1 box brownie mix (plus ingredients required on the box)
- 1 pint vanilla ice cream
- Whipped cream
- Chocolate syrup
- Chocolate chips (optional, for topping)
Instructions
- Preheat your oven according to the brownie mix instructions.
- Prepare the brownie batter as directed on the box.
- Grease a muffin tin and pour the brownie batter into each cup, filling them about halfway.
- Bake for the time specified on the box, but check them a few minutes early. You want them to be slightly underbaked in the center for a fudgy texture.
- Once out of the oven, let the brownie cups cool for a few minutes. Use a small spoon to create a well in the center of each cup for the ice cream.
- Allow the brownie cups to cool completely, then scoop a generous amount of vanilla ice cream into each cup.
- Top with whipped cream, a drizzle of chocolate syrup, and chocolate chips if desired.
- Serve immediately and enjoy your delicious summer dessert!
Peach and Raspberry Galette

Welcome summer with this delightful Peach and Raspberry Galette! This rustic dessert combines sweet, juicy peaches with tart raspberries, creating a refreshing treat perfect for warm days. It’s simple to make, so even novice bakers can whip it up without stress.
The golden crust envelops the vibrant filling, giving a beautiful contrast of flavors. It’s a wonderful dessert to share at gatherings or enjoy as a healthy snack, and it can easily fit into various dietary lifestyles, including vegan and gluten-free.
Ingredients
- 1 pre-made pie crust (store-bought or homemade)
- 2 large ripe peaches, sliced
- 1 cup fresh raspberries
- 1/4 cup granulated sugar
- 1 tablespoon cornstarch
- 1 teaspoon vanilla extract
- 1 teaspoon lemon juice
- 1 egg (for egg wash; optional)
- 1 tablespoon brown sugar (for sprinkling)
Instructions
- Preheat your oven to 375°F (190°C).
- In a mixing bowl, combine sliced peaches, raspberries, granulated sugar, cornstarch, vanilla extract, and lemon juice. Gently toss until the fruit is well coated.
- Roll out the pie crust on a parchment-lined baking sheet, creating a circular shape.
- Spoon the fruit mixture into the center of the crust, leaving about a 2-inch border around the edges.
- Fold the edges of the crust over the fruit, pleating it as you go.
- If using, brush the crust with the egg wash and sprinkle brown sugar over it.
- Bake for 30-35 minutes, or until the crust is golden brown and the fruit is bubbly.
- Let it cool slightly before serving. Enjoy warm or at room temperature!
Apricot Almond Crumble
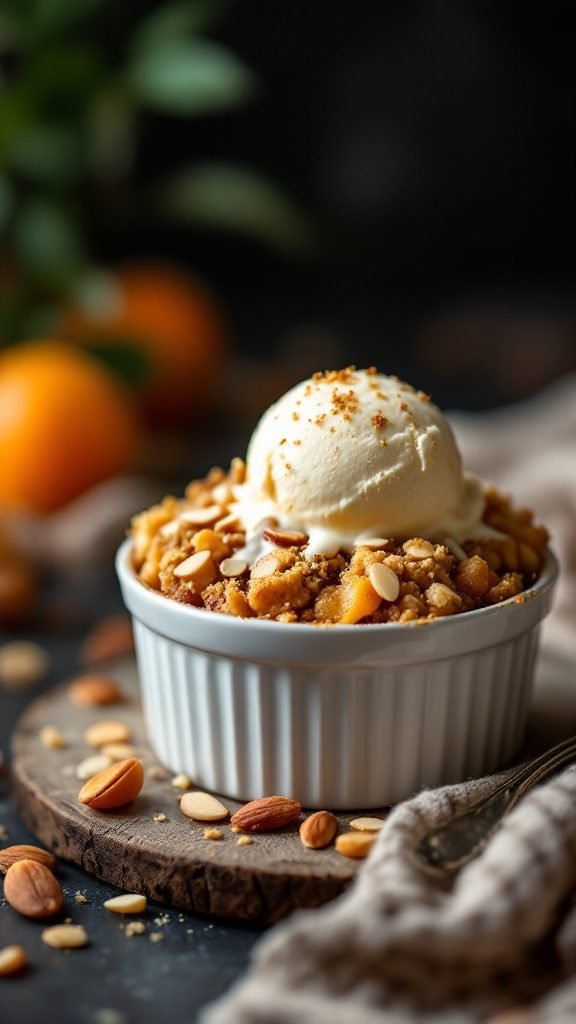
Apricot Almond Crumble is a light and refreshing dessert that’s perfect for summer gatherings or a cozy night in. The sweet apricots bring a bright flavor, while the almond crumble adds a delightful crunch. This recipe is simple to make, making it a go-to option for both novice and experienced bakers looking for a delicious treat.
This crumble is versatile and can easily fit into various dietary lifestyles. It can be made gluten-free or even vegan by using the right substitutes. Serve it warm with a scoop of ice cream or yogurt for a satisfying dessert that’s both nutritious and enjoyable.
Ingredients
- 4 cups fresh apricots, pitted and sliced
- 1/4 cup maple syrup (or honey)
- 1 teaspoon vanilla extract
- 1 cup rolled oats
- 1/2 cup almond flour
- 1/2 cup sliced almonds
- 1/4 cup coconut oil, melted
- 1/4 teaspoon salt
- 1 teaspoon cinnamon
Instructions
- Preheat your oven to 350°F (175°C) and grease a baking dish.
- In a bowl, combine the sliced apricots with maple syrup and vanilla extract. Spread the mixture evenly in the baking dish.
- In another bowl, mix together the rolled oats, almond flour, sliced almonds, melted coconut oil, salt, and cinnamon until crumbly.
- Sprinkle the crumble topping over the apricots evenly.
- Bake for 25-30 minutes until the topping is golden and the apricots are bubbly.
- Let it cool slightly before serving. Enjoy warm or at room temperature, optionally topped with ice cream or yogurt.
Honeydew Melon Sorbet
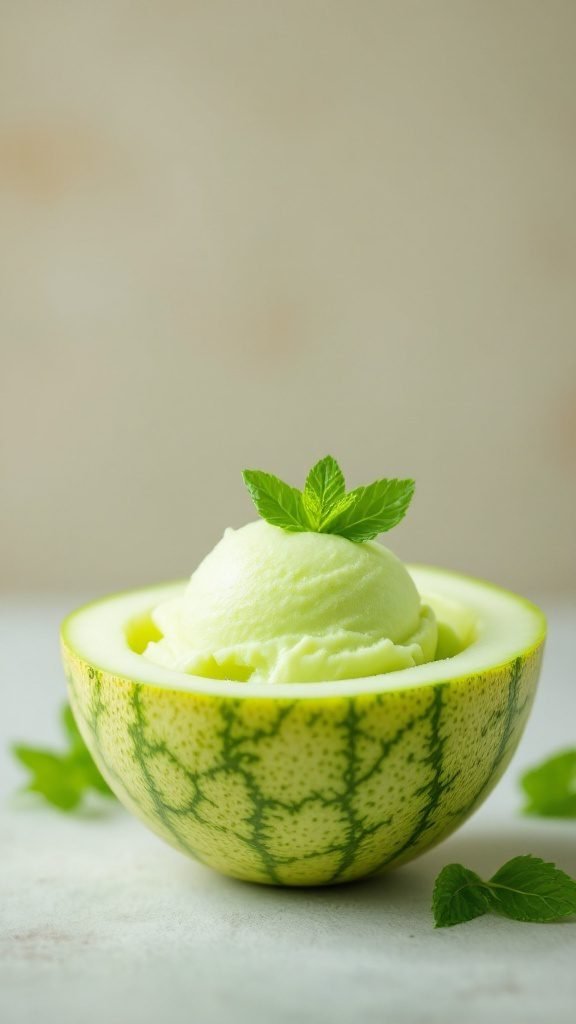
Honeydew melon sorbet is a refreshing and light dessert that perfectly captures the essence of summer. With its naturally sweet flavor and smooth texture, this sorbet is both delicious and easy to make, making it a great choice for a warm day. This recipe is also keto-friendly and sugar-free, aligning well with various dietary needs.
The best part? You don’t need an ice cream maker to whip this up! Simply blend the ingredients, freeze, and enjoy a delightful treat that’s not only nutritious but also a great way to hydrate. It’s a fantastic option for those seeking a low-carb, vegan, or gluten-free dessert that everyone can enjoy.
Ingredients
- 4 cups honeydew melon, cubed and peeled
- 1/4 cup fresh lime juice
- 1/4 cup agave syrup or your preferred sweetener
- 1 tablespoon fresh mint leaves (optional)
- Pinch of salt
Instructions
- Prepare the Melon: Start by cutting the honeydew melon into cubes and placing them in the freezer for about 2-3 hours until frozen.
- Blend: In a blender or food processor, combine the frozen honeydew cubes, lime juice, agave syrup, mint leaves, and a pinch of salt. Blend until smooth and creamy.
- Freeze: Pour the mixture into a shallow dish and spread it evenly. Place it in the freezer for about 2 hours or until firm.
- Scoop and Serve: Once frozen, scoop out the sorbet into bowls and garnish with additional mint leaves if desired. Enjoy your homemade, refreshing treat!
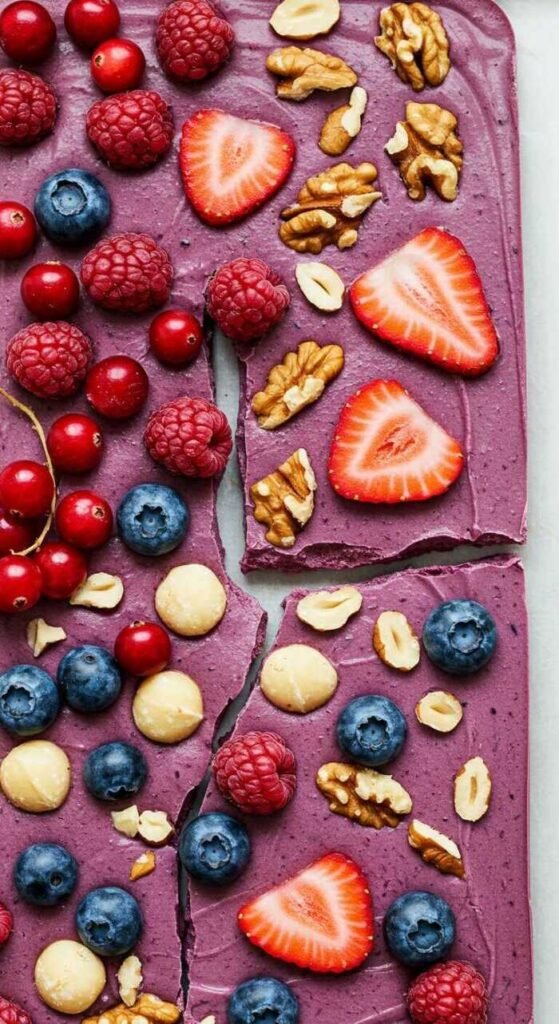
Frozen Yogurt Bark with Berries
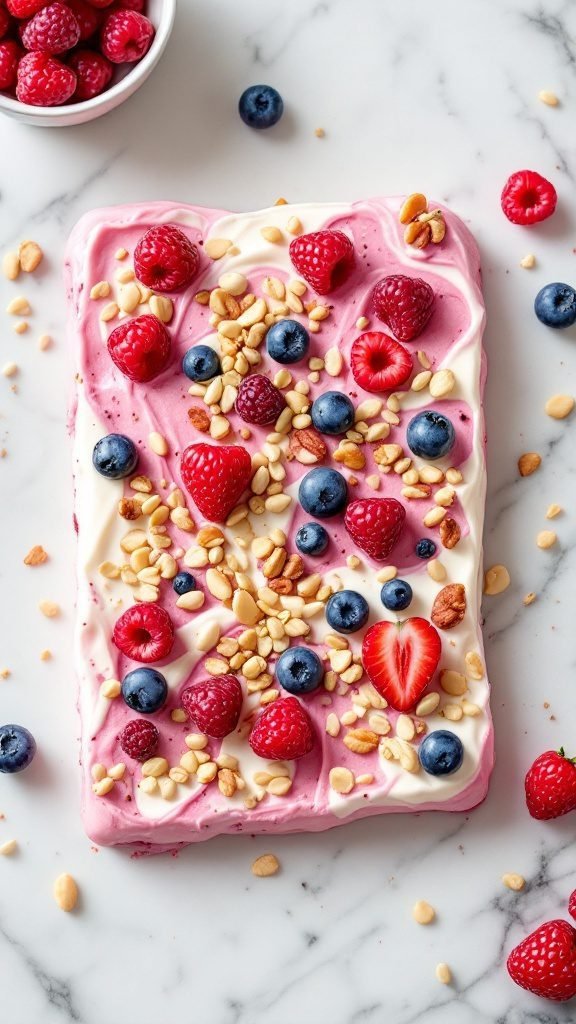
Frozen Yogurt Bark with Berries is a delightful and refreshing treat perfect for summer. This simple, no-bake dessert combines creamy yogurt with a medley of colorful berries, making it not just tasty but also visually appealing. Each bite offers a balance of sweetness from the fruit and a creamy texture, making it a fantastic way to cool down on hot days.
Not only is this dessert healthy and low in sugar, but it’s also plant-based and gluten-free, fitting well into various lifestyles. It’s an easy recipe that can be customized with your favorite fruits and toppings, allowing you to get creative. Enjoy it as a snack or a light dessert!
Ingredients
- 2 cups Greek yogurt (or dairy-free yogurt)
- 2 tablespoons honey or maple syrup (optional)
- 1 cup mixed berries (strawberries, blueberries, raspberries)
- 1/4 cup chopped nuts (almonds, peanuts, or your choice)
- 1 teaspoon vanilla extract
Instructions
- Prepare the Yogurt Mix: In a bowl, combine the yogurt, honey (if using), and vanilla extract. Stir until well mixed.
- Spread the Mixture: Line a baking sheet with parchment paper. Pour the yogurt mixture onto the baking sheet and spread it out evenly.
- Add the Toppings: Sprinkle mixed berries and chopped nuts over the yogurt. Press them gently into the mixture.
- Freeze: Place the baking sheet in the freezer for about 4-6 hours, or until the yogurt is fully set.
- Break into Pieces: Once frozen, remove the bark from the freezer and break it into pieces. Serve immediately or store in an airtight container in the freezer.
Matcha Green Tea Ice Cream
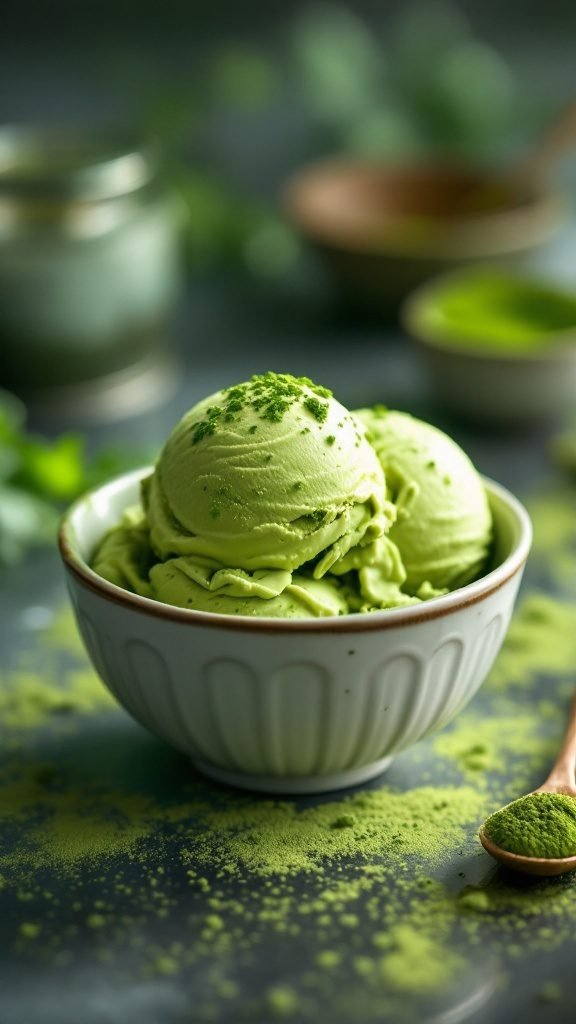
Matcha green tea ice cream is a delightful treat that combines the earthy flavor of matcha with the creamy sweetness of ice cream. This refreshing dessert is perfect for summer, offering a unique twist that’s both satisfying and nutritious. Whether you’re on a low-carb, sugar-free, or dairy-free diet, this recipe caters to various lifestyles while keeping it fun and indulgent.
Making matcha ice cream is surprisingly easy and requires no baking! With just a few ingredients and a bit of patience, you can whip up a batch that impresses your friends and satisfies your sweet tooth. It’s not only a cool snack but also a great way to enjoy the health benefits of matcha in a delicious form.
Ingredients
- 2 cups coconut milk (or any dairy-free alternative)
- 1/2 cup granulated sweetener (like erythritol or agave)
- 2 tablespoons culinary-grade matcha powder
- 1 teaspoon vanilla extract
- Pinch of salt
Instructions
- In a mixing bowl, whisk together the coconut milk, sweetener, matcha powder, vanilla extract, and salt until smooth and well combined.
- Pour the mixture into an ice cream maker and churn according to the manufacturer’s instructions until it reaches a soft-serve consistency.
- If you don’t have an ice cream maker, pour the mixture into a shallow container and freeze for about 4 hours, stirring every 30 minutes to break up ice crystals.
- Once it’s firm, scoop it into bowls and enjoy your refreshing matcha green tea ice cream!
Ginger Peach Sorbet
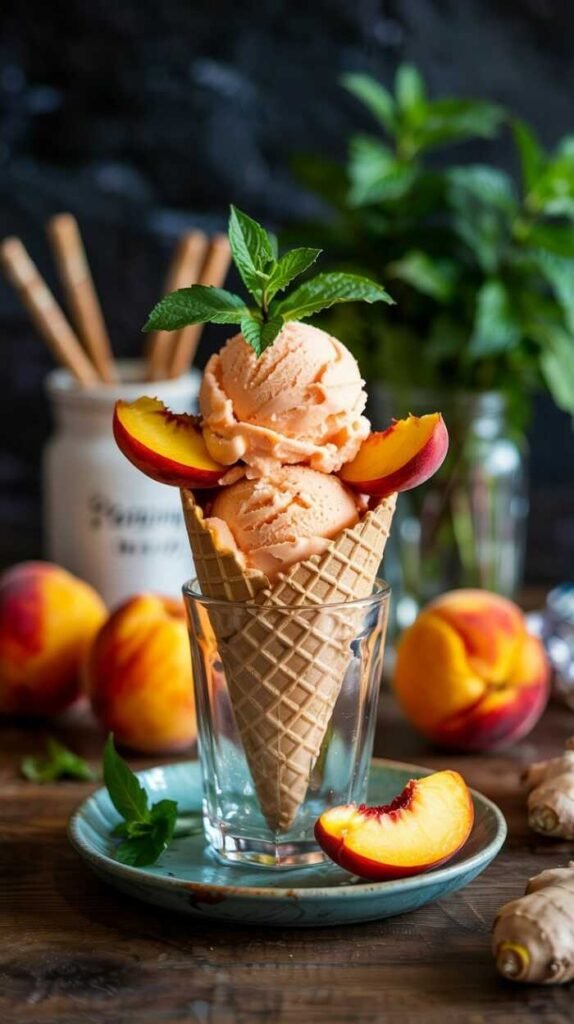
This Ginger Peach Sorbet is a refreshing treat perfect for hot summer days. The blend of sweet peaches with a hint of spicy ginger creates a delightful flavor that’s both fruity and zesty. Plus, it’s simple to make and requires no baking, making it an ideal option for those looking for a quick and healthy dessert.
This dairy-free, sugar-free, and vegan sorbet is not only delicious but also fits perfectly into a low-carb or plant-based lifestyle. Enjoy it as a light snack or a cool dessert after meals. You can easily impress your friends and family with this nutritious summer dessert!
Ingredients
- 4 ripe peaches, peeled and pitted
- 1 tablespoon fresh ginger, grated
- 1/2 cup coconut or maple syrup
- 1 tablespoon lemon juice
- 1 cup water
Instructions
- In a blender, combine the peaches, grated ginger, coconut or maple syrup, lemon juice, and water.
- Blend until smooth and well combined.
- Transfer the mixture to a freezer-safe container and place it in the freezer for about 2-3 hours, or until solid.
- Once frozen, let the sorbet sit at room temperature for a few minutes before scooping.
- Serve in bowls or cones, and enjoy your refreshing summer dessert!
Frozen Strawberry Cheesecake Bites
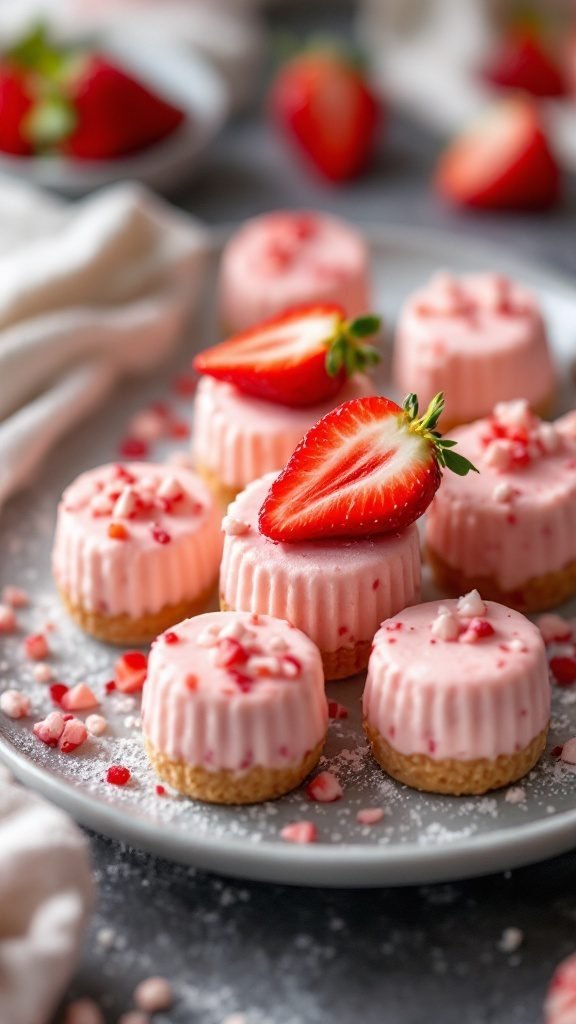
Frozen Strawberry Cheesecake Bites are the perfect summer treat. They combine a creamy cheesecake filling with delightful strawberry flavor, all on a crunchy crust. These bites are refreshing and offer a sweet way to cool down on hot days. Plus, they’re simple to make and require no baking, which makes them a breeze to whip up!
These bites are not just delicious; they’re also versatile. Whether you’re following a vegan, gluten-free, or low-carb lifestyle, you can easily adjust the ingredients to meet your dietary needs. Enjoy them as a snack, a dessert, or a healthy treat at your next gathering. They’re sure to impress!
Ingredients
- 1 cup crushed graham crackers (or gluten-free alternative)
- 2 tablespoons melted coconut oil
- 1 cup cream cheese (or dairy-free alternative)
- 1/2 cup Greek yogurt (or dairy-free yogurt)
- 1/2 cup powdered sugar (or sugar-free sweetener)
- 1 cup fresh strawberries, pureed
- 1 teaspoon vanilla extract
- Fresh strawberries, for topping
Instructions
- Prepare the Crust: In a bowl, combine crushed graham crackers with melted coconut oil. Press the mixture into the bottom of mini cupcake or silicone molds to form a base.
- Make the Filling: In a mixing bowl, beat together cream cheese, yogurt, powdered sugar, strawberry puree, and vanilla until smooth and creamy.
- Fill the Molds: Spoon the cheesecake mixture over the crust in the molds, filling them to the top. Smooth out the surface with a spatula.
- Freeze: Place the molds in the freezer for at least 4 hours or until the bites are solid.
- Serve: Once frozen, remove the bites from the molds and top with fresh strawberries before serving. Enjoy your delicious and refreshing dessert!
Pistachio and Rosewater Panna Cotta
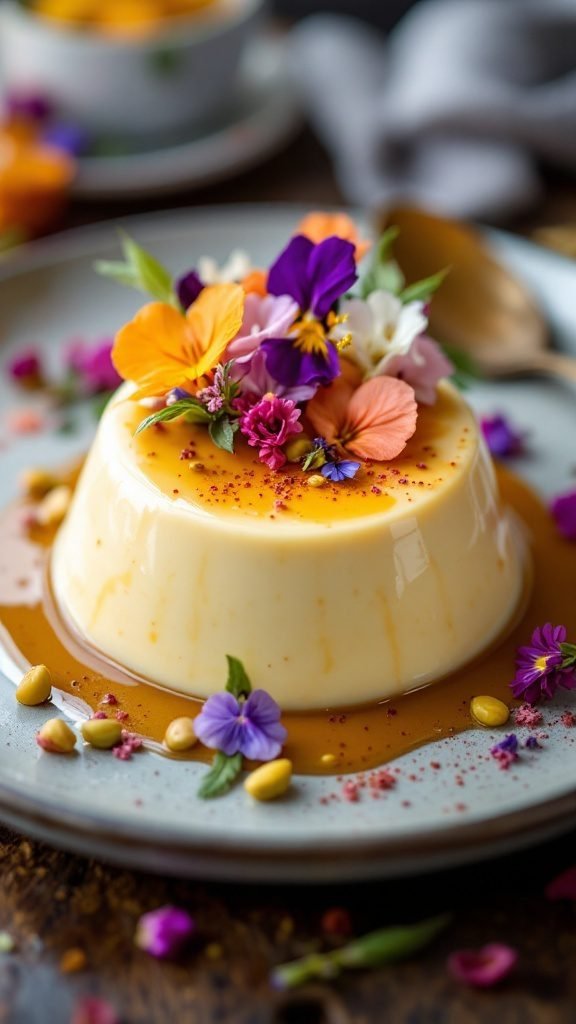
Pistachio and rosewater panna cotta is a delightful summer dessert that combines creamy goodness with subtle floral notes. It’s not just delicious; it also offers a light and refreshing option for those warm evenings. This dessert is simple to make, with no baking required, making it perfect for anyone looking to whip up something special with minimal effort.
The panna cotta is made using plant-based ingredients, making it suitable for those following a vegan lifestyle. With its silky texture and the unique flavor of rosewater paired with the nutty taste of pistachios, this dessert is a sure crowd-pleaser. You can serve it chilled, topped with crushed pistachios and edible flowers for an extra touch of elegance.
Ingredients
- 1 cup coconut milk
- 1/2 cup almond milk
- 1/4 cup granulated sugar
- 2 teaspoons rosewater
- 1/2 cup pistachio nuts, finely ground
- 1 tablespoon agar-agar powder
- 1/4 teaspoon salt
Instructions
- In a saucepan, combine coconut milk, almond milk, sugar, and salt. Heat over medium heat until sugar dissolves.
- Add agar-agar powder and bring to a boil, stirring constantly. Let it simmer for 2-3 minutes.
- Remove from heat and stir in rosewater and ground pistachios.
- Pour the mixture into molds and refrigerate for at least 4 hours, or until set.
- To serve, gently unmold the panna cotta and top with extra crushed pistachios and edible flowers if desired.
Blackberry Fool with Whipped Cream
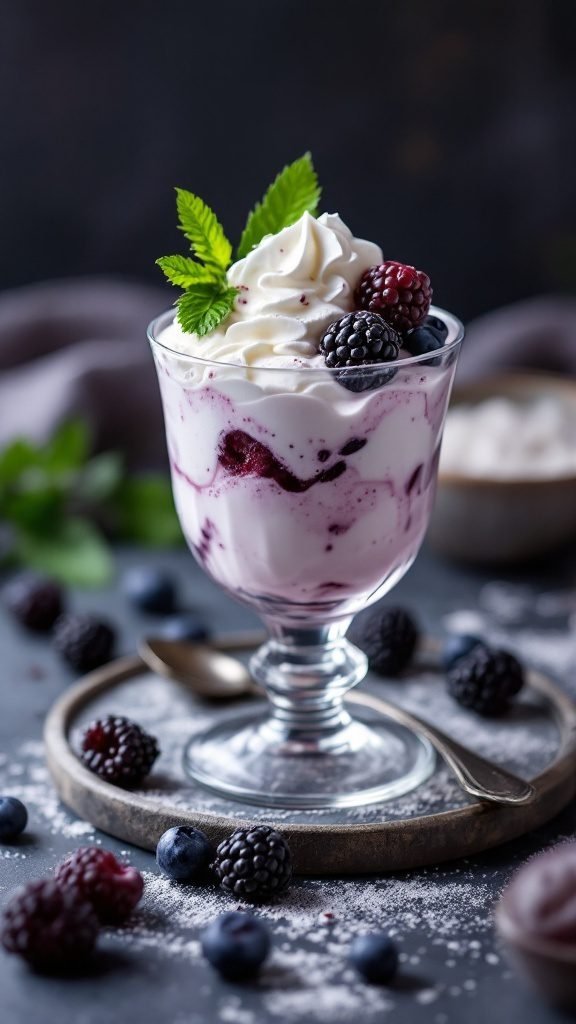
Blackberry Fool is a delightful, no-bake dessert that captures the essence of summer. This simple recipe combines fresh blackberries with creamy whipped topping, resulting in a refreshing treat that’s both light and flavorful. It’s perfect for warm evenings, offering a sweet and tangy balance that will please your taste buds.
The beauty of this dessert lies in its simplicity. With just a few ingredients, you can whip up a satisfying snack that caters to various dietary preferences. Whether you’re looking for a vegan or dairy-free option, this recipe can easily adapt to fit your lifestyle. Enjoy this nutritious and guilt-free dessert without the fuss!
Ingredients
- 2 cups fresh blackberries
- 1 tablespoon honey or maple syrup (adjust to taste)
- 1 1/2 cups heavy cream (or coconut cream for dairy-free)
- 1 teaspoon vanilla extract
- Mint leaves for garnish (optional)
Instructions
- Prepare the Blackberries: In a bowl, mash the blackberries with honey or maple syrup using a fork. Set aside.
- Whip the Cream: In a separate bowl, whip the heavy cream until soft peaks form. Add vanilla extract and continue whipping until firm peaks are achieved.
- Combine: Gently fold the mashed blackberries into the whipped cream until swirled but not completely mixed. You want to see some beautiful streaks of blackberry.
- Serve: Spoon the mixture into individual serving glasses or bowls. Chill in the refrigerator for about 30 minutes to firm up.
- Garnish: Top with extra blackberries and mint leaves before serving.
Lime Coconut Pudding
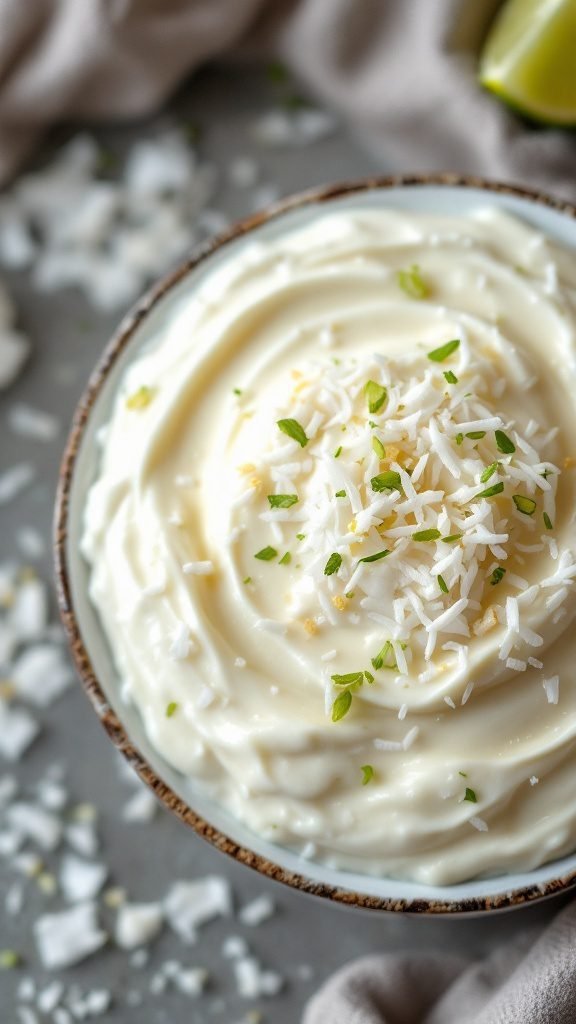
Lime Coconut Pudding is the perfect summer dessert! It brings together the zesty flavor of lime and the creamy goodness of coconut for a refreshing treat. This pudding is not only tasty but also simple to whip up—ideal for those hot days when you want something light and satisfying.
This dessert fits well into various lifestyles, whether you’re living a keto, vegan, or gluten-free lifestyle. It’s sugar-free and low fat, making it a nutritious snack that everyone can enjoy. Plus, there’s no baking involved! Just mix, chill, and serve for a delightful finish to any meal.
Ingredients
- 1 cup coconut milk
- 1/2 cup unsweetened almond milk
- 1/4 cup fresh lime juice
- 1/4 cup sweetener of choice (like erythritol or stevia)
- 1/4 cup cornstarch
- 1 teaspoon vanilla extract
- 1/2 cup shredded coconut (toasted for garnish)
- Fresh lime zest (for garnish)
Instructions
- In a medium saucepan, whisk together the coconut milk, almond milk, lime juice, sweetener, and cornstarch until well combined.
- Heat the mixture over medium heat, stirring constantly until it thickens and begins to bubble, about 5–7 minutes.
- Remove from heat and stir in the vanilla extract. Allow it to cool slightly.
- Pour the pudding into serving dishes and refrigerate for at least 2 hours or until set.
- Before serving, garnish with toasted shredded coconut and fresh lime zest.
Frozen Cherry Yogurt Bark
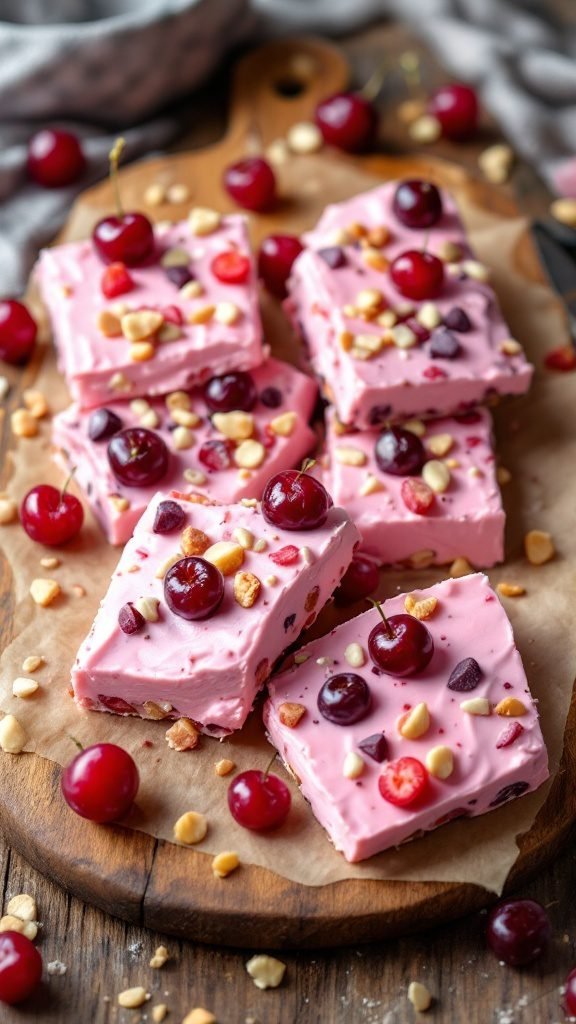
Frozen Cherry Yogurt Bark is a fantastic summer dessert that’s not only refreshing but also super easy to whip up. With just a few ingredients, you can create a delightful treat that’s perfect for cooling down on hot days. The combination of creamy yogurt and sweet cherries delivers a delicious balance of flavors, making it a guilt-free snack that fits into a healthy lifestyle.
This no-bake recipe is low carb, gluten-free, and can easily be made dairy-free or vegan by using plant-based yogurt. It’s a fun way to enjoy fruits while satisfying your sweet tooth. Plus, it’s ideal for sharing with friends or family at summer gatherings!
Ingredients
- 2 cups Greek yogurt (or dairy-free alternative)
- 2 tablespoons honey or maple syrup (for a sugar-free option, use a sugar substitute)
- 1 cup fresh cherries, pitted and halved
- 1/2 cup mixed nuts, chopped (optional)
- 1/4 cup dark chocolate chips (optional)
Instructions
- Prepare the Yogurt Mixture: In a mixing bowl, combine the Greek yogurt and honey (or maple syrup) until smooth.
- Spread the Yogurt: Line a baking sheet with parchment paper. Pour the yogurt mixture onto the prepared sheet and spread it evenly to about 1/2 inch thick.
- Add Toppings: Sprinkle the halved cherries, chopped nuts, and dark chocolate chips evenly over the yogurt layer.
- Freeze: Place the baking sheet in the freezer for at least 3-4 hours or until the yogurt is completely frozen.
- Cut and Serve: Once frozen, remove the yogurt bark from the parchment paper and cut it into pieces. Enjoy immediately or store in an airtight container in the freezer for later!
Coconut Cream Pie with Toasted Coconut
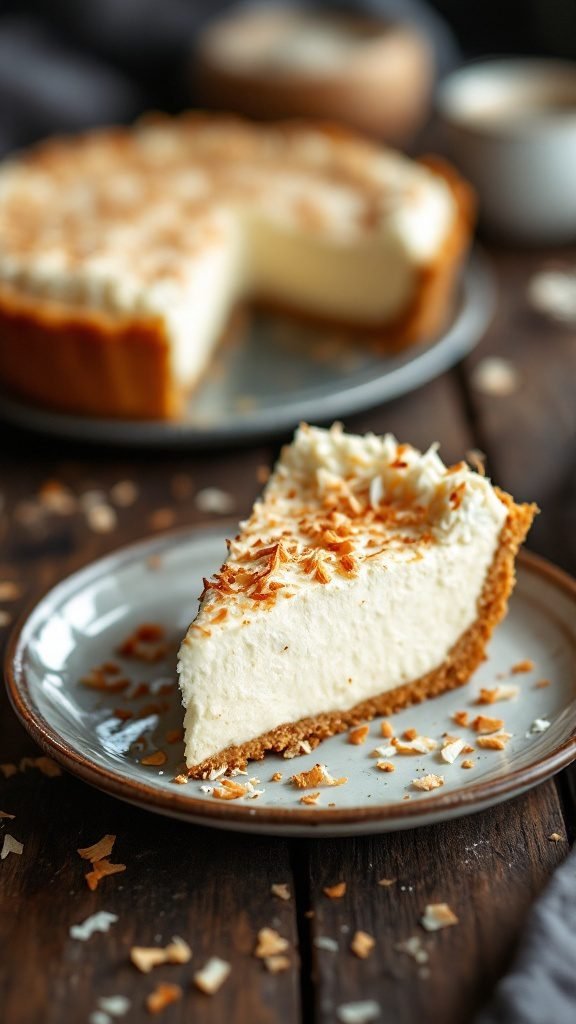
Coconut cream pie is a delightful summer dessert that combines creamy coconut flavors with a crispy crust. This pie is not only rich and satisfying but also surprisingly easy to make, making it perfect for gatherings or a simple afternoon treat. The toasted coconut on top adds a crunchy texture that complements the smooth filling perfectly.
This recipe is ideal for those looking for a refreshing, no-bake dessert during the warm months. Whether you’re following a vegetarian or gluten-free lifestyle, this pie can be adapted to fit your dietary needs while still being delicious and satisfying.
Ingredients
- 1 ½ cups graham cracker crumbs
- ⅓ cup granulated sugar
- ½ cup unsalted butter, melted
- 1 (14-ounce) can of coconut milk
- 1 cup heavy cream
- ¾ cup powdered sugar
- 1 teaspoon vanilla extract
- 1 cup shredded coconut (sweetened or unsweetened)
- ½ cup whipped cream (for topping)
Instructions
- Make the Crust: In a medium bowl, mix graham cracker crumbs, sugar, and melted butter until combined. Press the mixture into a pie dish to form an even crust. Refrigerate for at least 30 minutes to set.
- Prepare the Filling: In a large bowl, whisk together the coconut milk, heavy cream, powdered sugar, and vanilla extract until smooth. Fold in the shredded coconut, reserving some for topping.
- Assemble the Pie: Pour the coconut filling into the chilled crust, spreading it evenly. Cover and refrigerate for at least 4 hours, or until set.
- Finish with Toppings: Before serving, toast the reserved shredded coconut in a dry skillet over medium heat until golden brown. Garnish the pie with whipped cream and the toasted coconut.
- Serve and Enjoy: Slice the pie and serve chilled. It’s the perfect treat to cool you down on a hot summer day!
Lemon Raspberry Sorbet
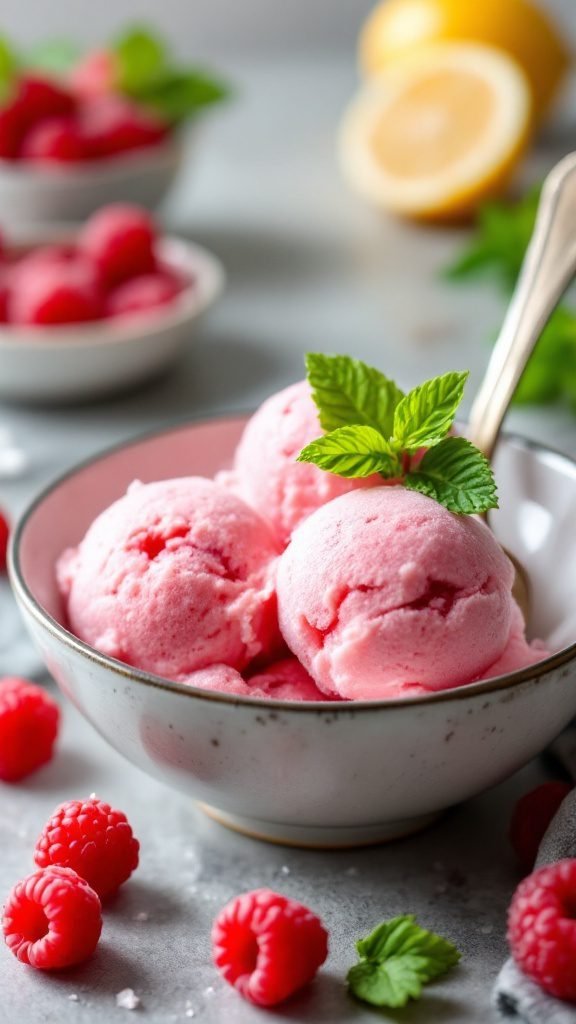
This lemon raspberry sorbet is a bright and refreshing summer dessert that combines the tartness of lemons with the sweetness of raspberries. It’s a low-fat and sugar-free treat that’s perfect for hot days, offering a light and fruity flavor that feels indulgent without the guilt. Plus, it’s super easy to whip up—no fancy equipment or cooking required!
The vibrant pink color and zesty taste make it a showstopper at any gathering. It’s vegan, gluten-free, and a fantastic way to cool down while enjoying a nutritious dessert. Gather your friends and family, and serve this delightful sorbet as a refreshing snack or a light meal to beat the summer heat!
Ingredients
- 2 cups fresh raspberries
- 1 cup freshly squeezed lemon juice
- 1 cup water
- 1/2 cup agave syrup (or sweetener of choice)
- 1 tablespoon lemon zest
Instructions
- Blend: In a blender, combine raspberries, lemon juice, water, agave syrup, and lemon zest. Blend until smooth.
- Strain: Pour the mixture through a fine mesh sieve into a bowl to remove the seeds, if desired.
- Freeze: Transfer the strained mixture to a shallow dish and freeze for about 2-3 hours, stirring every 30 minutes to break up ice crystals.
- Serve: Once fully frozen and fluffy, scoop the sorbet into bowls and enjoy this refreshing treat!
No-Bake Berry Cheesecake
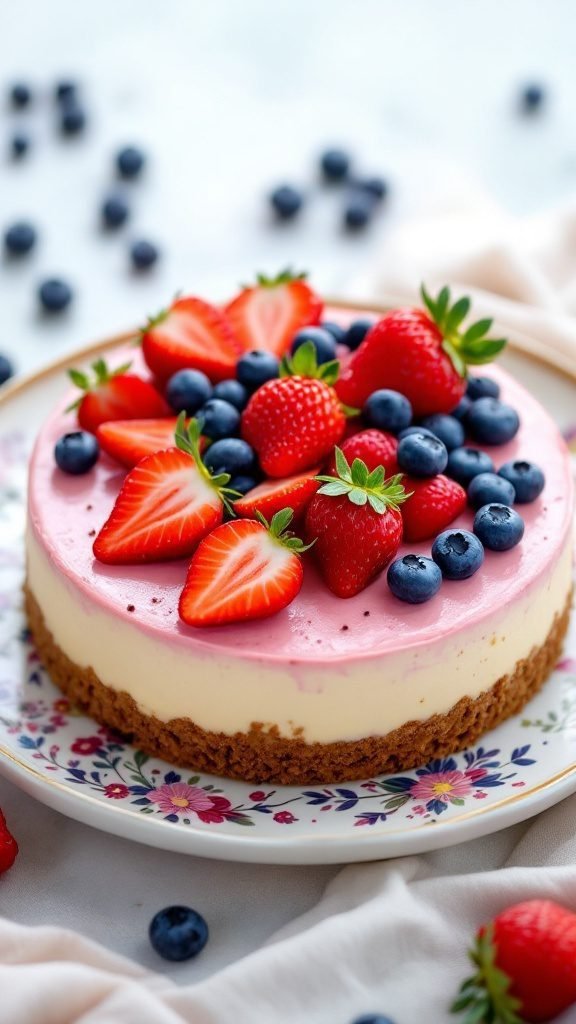
This no-bake berry cheesecake is a delightful summer dessert that combines the creaminess of cheesecake with the freshness of berries. It’s light, refreshing, and perfect for warm days when you want something sweet without heating up your kitchen.
With a simple mix of cream cheese, whipped cream, and your choice of berries, this dessert is not only easy to make but also nutritious. It’s a great option for those embracing a gluten-free or vegetarian lifestyle. Plus, it’s sugar-free, making it a perfect guilt-free treat.
Ingredients
- 1 1/2 cups graham cracker crumbs (or gluten-free alternative)
- 1/3 cup melted butter
- 2 cups cream cheese, softened
- 1 cup powdered sugar (or sugar-free alternative)
- 1 teaspoon vanilla extract
- 2 cups heavy whipping cream
- 2 cups mixed berries (strawberries, blueberries, raspberries)
Instructions
- Prepare the Crust: In a bowl, mix graham cracker crumbs and melted butter until combined. Press the mixture into the bottom of a springform pan to form a crust.
- Make the Filling: In another bowl, beat cream cheese until smooth. Gradually add powdered sugar and vanilla, mixing until well combined. In a separate bowl, whip the heavy cream until stiff peaks form, then gently fold it into the cream cheese mixture.
- Combine: Pour the cream cheese mixture over the crust and smooth the top. Refrigerate for at least 4 hours or until set.
- Add Toppings: Once set, top with mixed berries before serving. Enjoy your refreshing and nutritious no-bake berry cheesecake!
Grilled Peaches with Honey and Yogurt
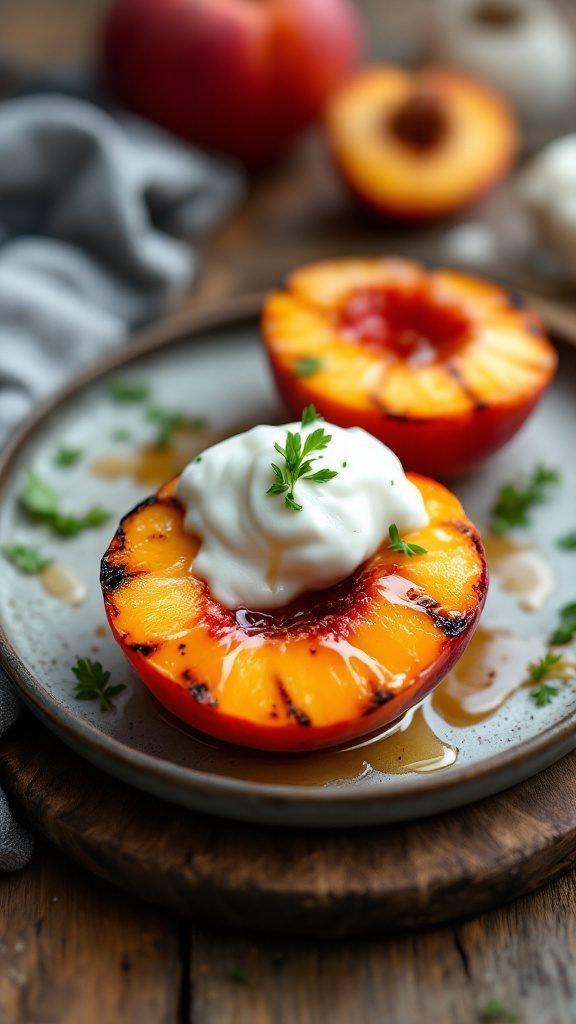
Grilled peaches with honey and yogurt are a delightful summer treat that brings out the natural sweetness of the fruit. The warm, caramelized peaches paired with creamy yogurt and a drizzle of honey create a refreshing dessert that is both nutritious and satisfying. This recipe is simple to whip up and can be enjoyed by everyone, including those following a low carb or gluten-free diet.
Perfect for casual gatherings or a quiet evening at home, this dish is a light, healthy option that can be prepared in no time. It’s vegan-friendly if you choose a plant-based yogurt, making it suitable for various lifestyles. Enjoy the vibrant flavors of summer with this easy-to-make dessert!
Ingredients
- 4 ripe peaches, halved and pitted
- 2 tablespoons honey (or maple syrup for a vegan option)
- 1 cup yogurt (use Greek for creaminess, or plant-based for dairy-free)
- 1 teaspoon cinnamon (optional)
- Fresh mint leaves for garnish (optional)
- Olive oil for grilling
Instructions
- Preheat the grill to medium heat. Lightly brush the cut side of the peach halves with olive oil.
- Place the peaches cut side down on the grill and cook for about 4-5 minutes, until grill marks appear and they are slightly softened.
- Remove the peaches from the grill and place them on a serving plate cut side up.
- Drizzle honey over the warm peaches and add a generous dollop of yogurt on top. Sprinkle with cinnamon if using.
- Garnish with fresh mint leaves and serve immediately.
Watermelon Mint Salad
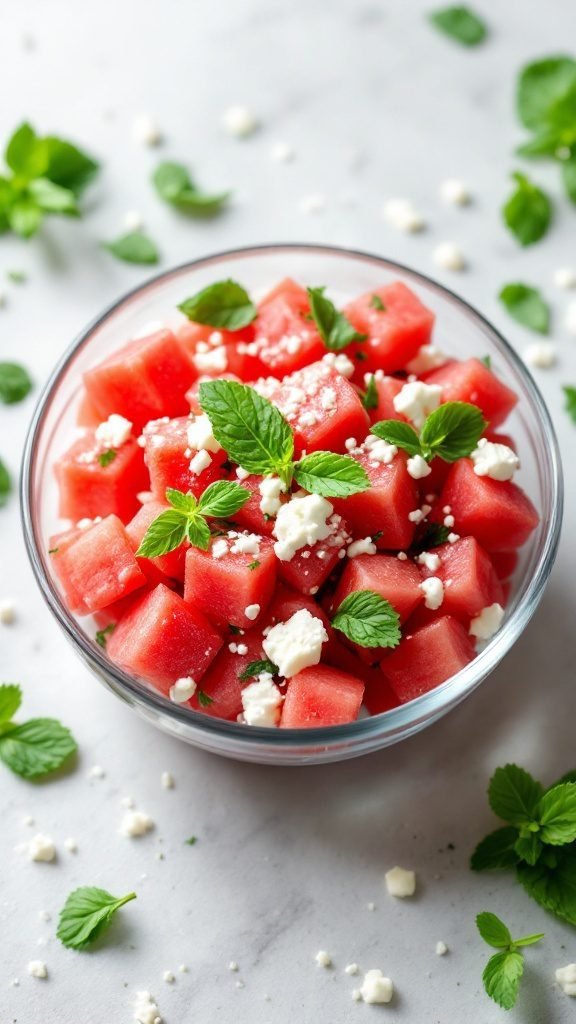
This watermelon mint salad is a refreshing delight perfect for summer days. It combines sweet, juicy watermelon with the coolness of fresh mint, creating a light and uplifting dish. Simple to prepare, it’s a fantastic choice for a quick snack or a delightful side for any summer meal.
This salad not only tastes amazing, but it’s also nutritious and fits various lifestyles, being gluten-free, dairy-free, and low-carb. Whether you’re keeping it keto, vegetarian, or simply looking for a healthy dessert, this recipe checks all the boxes!
Ingredients
- 4 cups watermelon, cubed
- 1/4 cup fresh mint leaves, chopped
- 1/4 cup feta cheese, crumbled (optional)
- 1 tablespoon lime juice
- Salt and pepper to taste
Instructions
- In a large bowl, combine the watermelon cubes and chopped mint leaves.
- If using, sprinkle the feta cheese over the top.
- Drizzle with lime juice and season with salt and pepper.
- Toss gently to combine all the ingredients.
- Chill in the refrigerator for about 15 minutes before serving for an extra refreshing taste.
Chocolate Coconut Popsicles
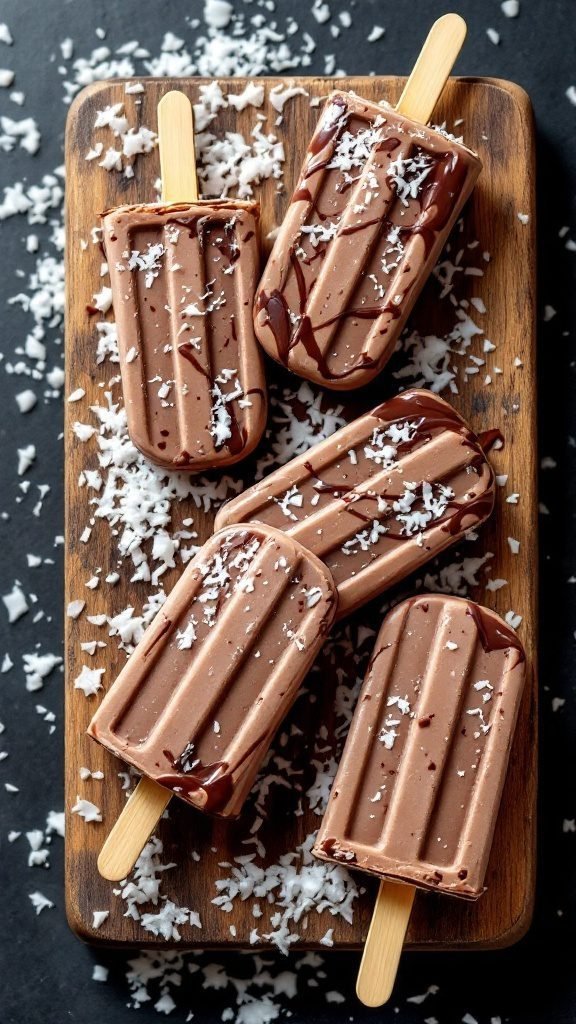
Chocolate coconut popsicles are the perfect summer treat! They combine rich chocolate flavor with the tropical sweetness of coconut, making them both refreshing and satisfying. Plus, they’re incredibly easy to whip up, requiring no baking and just a bit of blending. Your taste buds will thank you for this delightful dessert!
These popsicles are not only delicious but also cater to various dietary needs. They can be made dairy-free and vegan, making them suitable for almost everyone. Whether you’re looking for a low carb or sugar-free option, these popsicles fit right in. They’re a simple way to enjoy a nutritious snack while staying cool during the warm summer days.
Ingredients
- 1 can (13.5 oz) full-fat coconut milk
- 1/2 cup unsweetened cocoa powder
- 1/4 cup maple syrup or sweetener of choice
- 1 teaspoon vanilla extract
- 1/4 cup shredded coconut (optional)
- Pinch of salt
Instructions
- In a blender, combine the coconut milk, cocoa powder, maple syrup, vanilla extract, and salt. Blend until smooth and creamy.
- If using, stir in the shredded coconut for extra texture and flavor.
- Pour the mixture into popsicle molds, leaving a little space at the top for expansion.
- Insert sticks and freeze for at least 4-6 hours, or until solid.
- To remove the popsicles, run warm water over the outside of the molds for a few seconds and gently pull them out. Enjoy your homemade chocolate coconut popsicles!
Strawberry Shortcake Trifle
Strawberry shortcake trifle is a delightful summer dessert that combines layers of fresh strawberries, fluffy whipped cream, and sweet cake. This treat bursts with flavor, making it a refreshing choice for warm weather gatherings or casual get-togethers. It’s simple to prepare, allowing you to impress your guests without spending hours in the kitchen.
This dessert is not only tasty but can also be made to fit various dietary needs. You can easily adapt it to be gluten-free, dairy-free, or even plant-based by choosing the right ingredients. Perfect for a healthy lifestyle, this trifle is a great way to enjoy summer’s bounty of strawberries while keeping your treats nutritious!
Ingredients
- 4 cups fresh strawberries, hulled and sliced
- 1 cup heavy whipping cream
- 1/4 cup powdered sugar
- 1 teaspoon vanilla extract
- 1 pound sponge cake or angel food cake, cut into cubes
- Mint leaves for garnish
Instructions
- Prepare the Strawberries: In a bowl, mix the sliced strawberries with a tablespoon of powdered sugar. Let them sit for about 10 minutes to release their juices.
- Whip the Cream: In another bowl, beat the heavy cream with the remaining powdered sugar and vanilla extract until soft peaks form.
- Layer the Trifle: In a glass trifle dish or individual cups, start by placing a layer of cake cubes at the bottom. Add a layer of strawberries, followed by a layer of whipped cream. Repeat the layers until you reach the top of the dish.
- Finish and Serve: Top the last layer with additional whipped cream and garnish with fresh mint leaves. Chill in the refrigerator for at least an hour before serving to let the flavors meld together.
Peach Melba Sundae
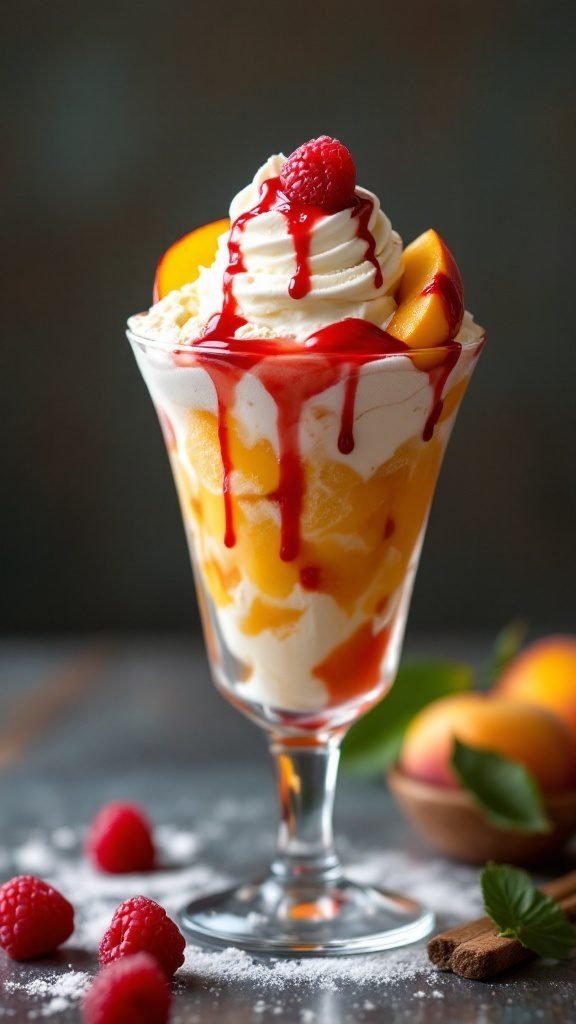
Summer is the perfect time for a delightful dessert, and the Peach Melba Sundae fits the bill! This treat combines juicy peaches, creamy ice cream, and a drizzle of raspberry sauce for a refreshing taste. It’s simple to whip up, making it a go-to choice for warm days when you want a sweet snack without too much fuss.
This dessert offers a balance of sweetness and creaminess, with the tartness of the raspberries complementing the soft, ripe peaches. Whether you’re hosting a summer gathering or enjoying a quiet evening at home, this sundae is sure to bring a smile to your face.
Ingredients
- 2 ripe peaches, sliced
- 2 cups vanilla ice cream
- 1/2 cup raspberry sauce (store-bought or homemade)
- Whipped cream for topping
- Fresh raspberries for garnish
Instructions
- In a serving bowl, layer a scoop of vanilla ice cream at the bottom.
- Add a generous amount of sliced peaches on top of the ice cream.
- Drizzle raspberry sauce over the peaches and ice cream.
- Top with another scoop of ice cream, followed by a swirl of whipped cream.
- Garnish with fresh raspberries and an extra drizzle of raspberry sauce if desired.
Frozen Yogurt Bark with Nuts and Berries
Frozen yogurt bark is a fun and refreshing summer dessert that’s super easy to whip up. With creamy yogurt as its base, it’s both healthy and satisfying, making it a perfect snack or treat on a hot day. You can customize it with your favorite nuts and berries, creating a colorful and nutritious dessert that everyone will love.
This recipe is not only gluten-free and plant-based but also fits well into various diets, including vegan and low-carb lifestyles. It’s a no-bake option, meaning you can put it together in no time and let the freezer do the work. Plus, each bite is a delightful mix of creamy yogurt, crunchy nuts, and sweet berries, making it a delicious way to enjoy the summer.
Ingredients
- 2 cups dairy-free yogurt (such as almond or coconut yogurt)
- 1/4 cup honey or maple syrup (for a sugar-free option, use a sugar alternative)
- 1/2 cup mixed nuts (such as almonds, walnuts, or pecans)
- 1 cup mixed berries (strawberries, blueberries, raspberries)
- 1/4 cup granola (optional for added crunch)
Instructions
- Prep the Yogurt: In a bowl, combine the dairy-free yogurt and honey or maple syrup. Mix well until smooth.
- Spread the Mixture: Line a baking sheet with parchment paper. Pour the yogurt mixture onto the sheet and spread it evenly to about 1/2 inch thick.
- Add Toppings: Sprinkle the mixed nuts, berries, and granola over the yogurt layer. Press them slightly into the yogurt to ensure they stick.
- Freeze: Place the baking sheet in the freezer and let it freeze for at least 4 hours, or until solid.
- Break into Pieces: Once frozen, remove the yogurt bark from the freezer and let it sit for a few minutes before breaking it into pieces. Enjoy your healthy summer snack!
Chilled Chocolate Avocado Mousse
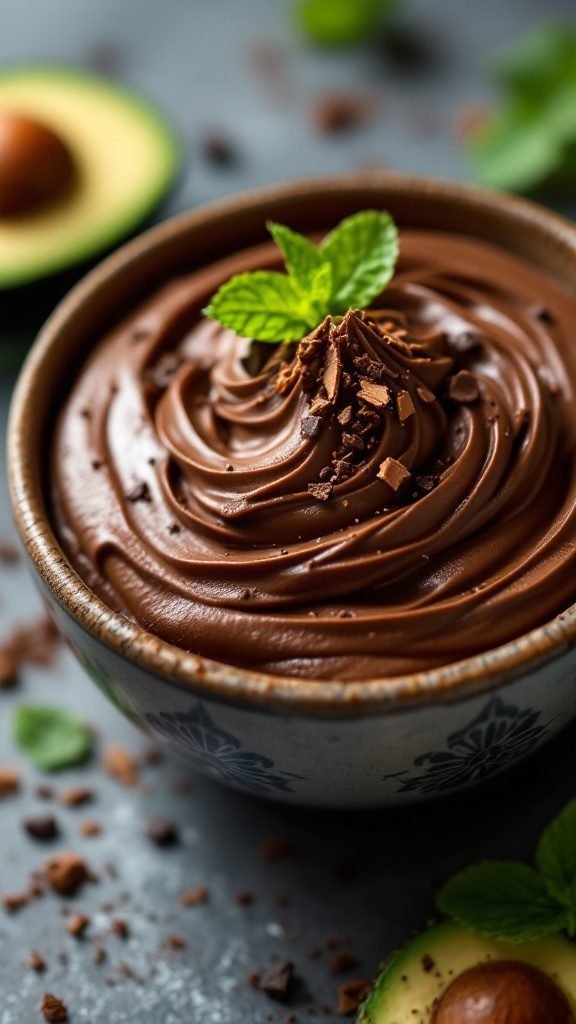
Chilled Chocolate Avocado Mousse is a delightful treat that combines the rich flavors of chocolate with the creamy texture of avocado. This no-bake dessert is both refreshing and nutritious, making it a perfect choice for summer gatherings. It’s simple to whip up, with only a handful of ingredients required, and it offers a guilt-free way to satisfy your sweet tooth.
This dessert is not just delicious; it’s also a meal that fits into various lifestyles. Whether you’re following a keto, vegan, or gluten-free diet, this mousse is a fantastic option. It’s low in carbs and sugar-free, allowing you to enjoy your dessert without the worry. Plus, the plant-based ingredients make it a healthy choice for everyone.
Ingredients
- 2 ripe avocados
- 1/2 cup unsweetened cocoa powder
- 1/4 cup maple syrup or honey
- 1/4 cup almond milk (or any plant-based milk)
- 1 teaspoon vanilla extract
- A pinch of salt
- Dark chocolate shavings for garnish
- Fresh mint leaves for garnish
Instructions
- In a food processor, combine the ripe avocados, cocoa powder, maple syrup (or honey), almond milk, vanilla extract, and a pinch of salt.
- Blend until smooth and creamy, scraping down the sides as needed to ensure everything is well mixed.
- Taste the mixture and adjust the sweetness if necessary, adding more syrup or honey if desired.
- Transfer the mousse into serving bowls and chill in the refrigerator for at least 30 minutes to an hour.
- Before serving, top with dark chocolate shavings and fresh mint leaves for a pop of color and added flavor.
No-Bake Berry Cheesecake Cups
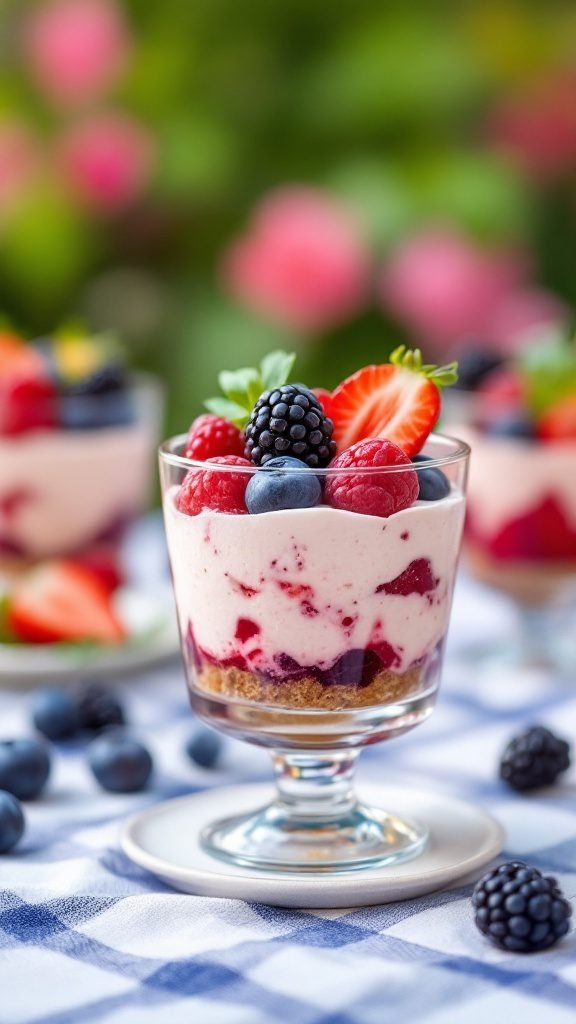
No-bake berry cheesecake cups are the perfect summer treat that’s light, refreshing, and oh-so-delicious. This dessert combines creamy cheesecake filling with layers of fresh berries, making it a colorful and inviting option for any occasion. Plus, it’s simple to make, requiring minimal effort and no baking at all.
This recipe is not only vegetarian but can easily be adapted for those seeking healthier options, like low-fat or sugar-free ingredients. Whether you’re hosting a summer gathering or just craving a sweet snack, these cups deliver on taste and presentation.
Ingredients
- 1 cup crushed graham crackers
- 2 tablespoons melted butter
- 1 cup cream cheese, softened
- 1/2 cup powdered sugar
- 1 teaspoon vanilla extract
- 1 cup heavy whipping cream
- 1 cup mixed berries (strawberries, blueberries, raspberries, blackberries)
- 2 tablespoons berry jam (optional)
Instructions
- Prepare the Base: In a bowl, mix the crushed graham crackers with melted butter until well combined. Divide the mixture evenly into serving cups, pressing it down firmly to form a base.
- Make the Cheesecake Filling: In another bowl, beat the softened cream cheese until smooth. Gradually add powdered sugar and vanilla extract, mixing until well incorporated. In a separate bowl, whip the heavy cream until stiff peaks form, then gently fold it into the cream cheese mixture.
- Layer the Cups: Spoon a layer of the cheesecake filling over the graham cracker base in each cup. If using, add a layer of berry jam and then top with a mixture of fresh berries.
- Repeat Layers: Add another layer of cheesecake filling and finish with more berries on top. Chill in the refrigerator for at least 2 hours before serving to let the flavors meld.
- Serve and Enjoy: Garnish with a sprig of mint if desired and enjoy your refreshing no-bake berry cheesecake cups!
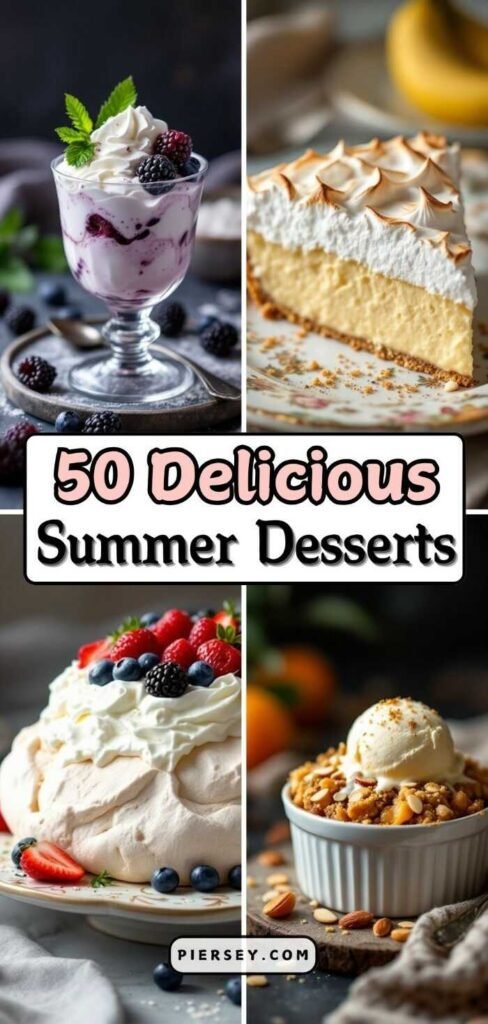

Summer Desserts That Scream “Hammock Vibes”
Whew, are you drooling yet??
Because same.
For real though,, these summer dessert recipes are giving major “eat me outside on a hammock” vibes.
Whether you’re whipping them up for backyard BBQs, lazy lake days, or just a Tuesday when you’re craving something sweet (no judgment), they are the moment.
And hey, if you’re already in chill kitchen mode, you might wanna bookmark some of my other easy, no-stress faves too—like these overnight oats recipes that basically make breakfast for you (YES PLEASE) or these ridiculously good vegetarian cookies ideas that just happen to be totally irresistible.
Long story short: summer desserts = serotonin. You deserve all the sparkle.


