
You know those days when the oven feels like a personal attack?
Like… hello, it’s 90 degrees outside and now I’m supposed to bake something?! Nope. That’s a hard pass.
But dessert? Dessert is always a yes.
Which is why I’m full-blown obsessed with no bake dessert ideas right now.
They’re quick, they’re cool (literally), and some of them are even gluten-free, vegan, plant-based, dairy-free, or low carb/keto friendly—so everyone gets a sweet treat at the party.
YES PLEASE.
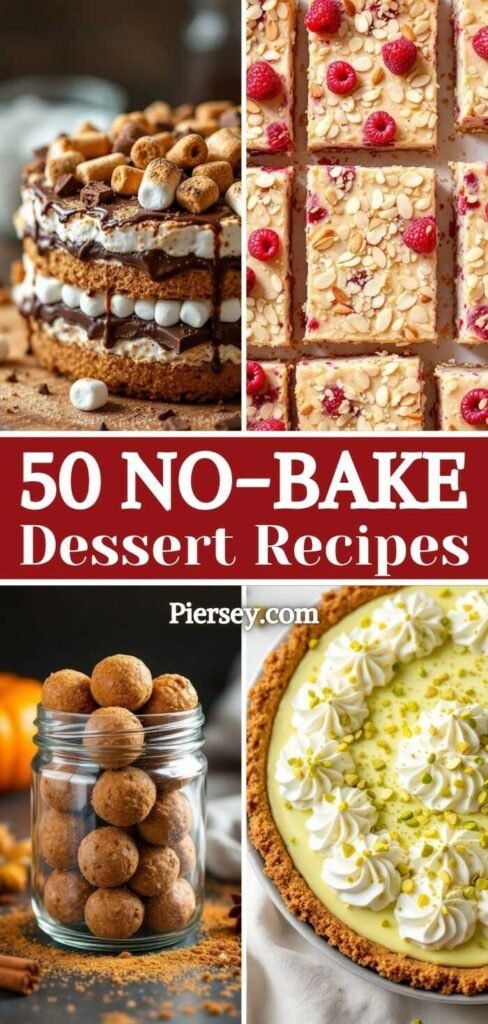
This list is bursting with dreamy no-bake goodies—from creamy puddings and frosty bars to fruity freezer bites and silky chocolate stacks.
No oven, no stress, no meltdowns (unless we’re talking about chocolate, of course).
Perfect for summer hangs, BBQs, poolside cravings, or those “oops I forgot dessert” moments.
Grab a spoon. We’re skipping the bake and going straight for the yum.

Why You’ll Love These No Bake Recipes
There’s a lot to love here, friend.
These no bake dessert ideas check every delicious box.
- No oven required. That means zero heat, zero hassle, and zero waiting for things to cool.
- Good for special diets. You’ll find gluten-free, dairy-free, vegan, plant-based, keto, and low carb options sprinkled in here and there.
- Perfect for hot days. These are the kind of desserts that chill while you chill—hello, peanut butter bites.
- Quick to make. Most of these come together in 20 minutes or less. Total lifesavers.
- Portable and party-ready. They’re perfect for picnics, backyard BBQs, or weeknight sweet tooth attacks.
Whether you’re treating yourself or feeding a crowd, these recipes are basically sunshine in dessert form.
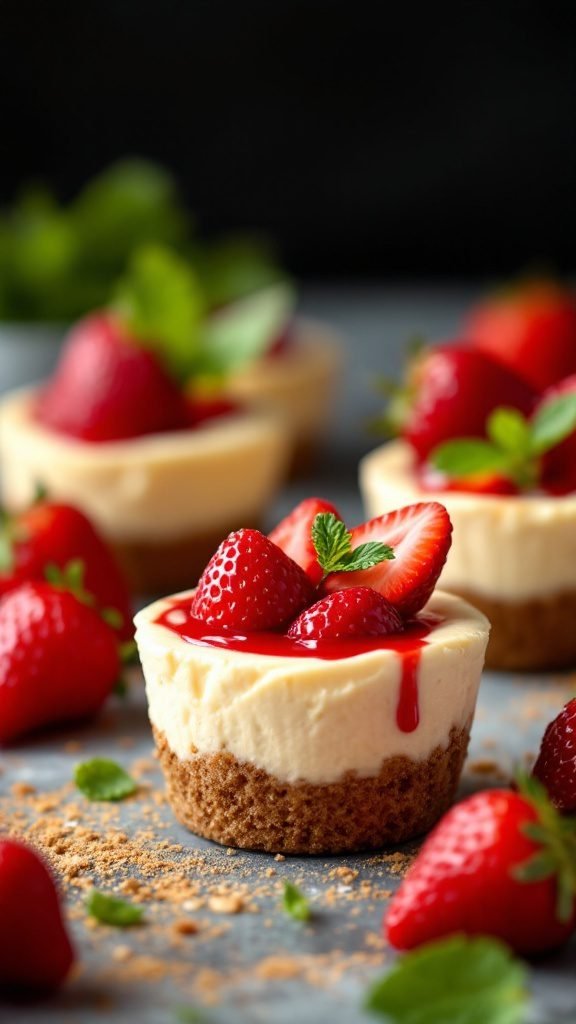
Strawberry Shortcake Cups
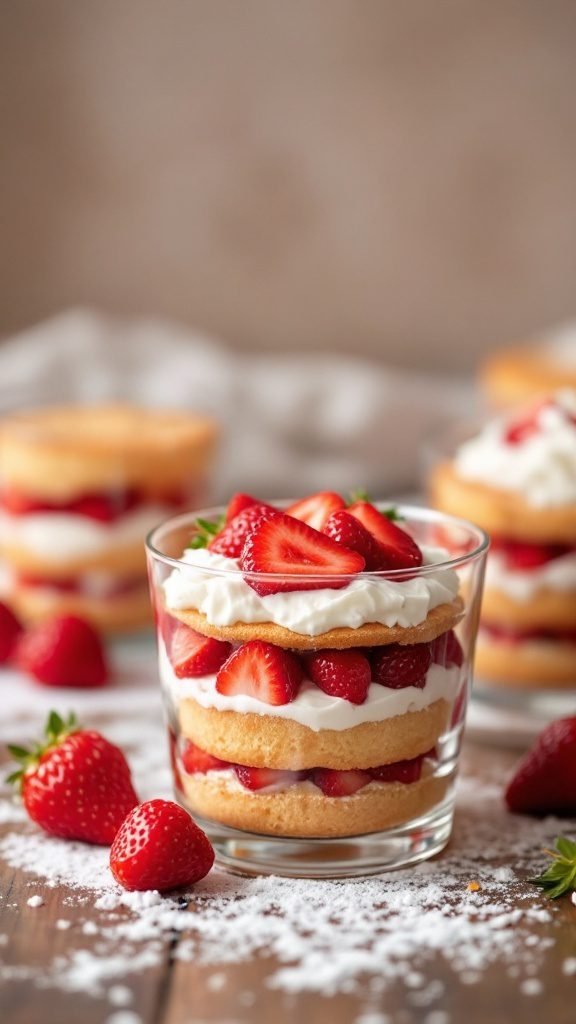
Strawberry shortcake cups are a delightful treat that combines fresh strawberries, fluffy whipped cream, and soft cake layers all in one easy-to-assemble dessert. This recipe is not only simple but also perfect for any occasion, be it a picnic, party, or just a sweet snack at home.
These cups are light and refreshing, making them a great choice for warm weather. With each bite, you get the sweetness of strawberries complemented by the creaminess of whipped topping, all layered beautifully. Plus, they can easily be adapted to fit various dietary lifestyles, including gluten-free and dairy-free options!
Ingredients
- 2 cups strawberries, hulled and sliced
- 1 cup heavy whipping cream
- 1/4 cup powdered sugar
- 1 teaspoon vanilla extract
- 2 cups gluten-free vanilla cake, crumbled (store-bought or homemade)
- Fresh mint leaves for garnish (optional)
Instructions
- Whip the Cream: In a mixing bowl, combine the heavy whipping cream, powdered sugar, and vanilla extract. Use an electric mixer to whip until soft peaks form.
- Prepare the Strawberries: In another bowl, mix the sliced strawberries with a tablespoon of sugar (optional) and let them sit for about 10 minutes to release their juices.
- Assemble the Cups: In individual serving cups, layer the crumbled cake, whipped cream, and strawberries. Repeat the layers until the cups are filled, finishing with a layer of whipped cream on top.
- Garnish: Top with additional strawberry slices and a mint leaf if desired. Serve immediately or refrigerate for a couple of hours before serving to let the flavors meld.
Banana Cream Parfait
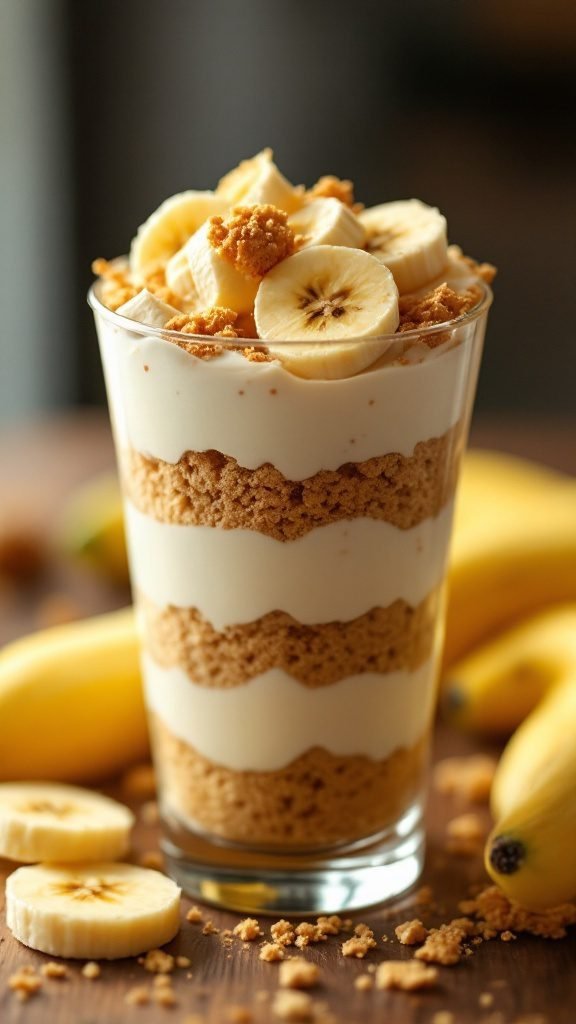
Banana Cream Parfait is a delicious and light dessert that combines layers of creamy goodness with the natural sweetness of bananas. This no-bake treat is perfect for any occasion, whether it’s a casual snack or a special meal. With its delightful textures and flavors, it’s sure to please everyone!
Making this parfait is simple and requires minimal effort. You can whip it up in no time, and it’s a great option for those following a vegetarian, gluten-free, or even a low-fat lifestyle. It’s a nutritious way to satisfy your sweet tooth while keeping things healthy!
Ingredients
- 2 ripe bananas, sliced
- 1 cup Greek yogurt (or dairy-free alternative for a vegan option)
- 1/2 cup granola (gluten-free if needed)
- 2 tablespoons honey or maple syrup (optional for sweetness)
- 1 teaspoon vanilla extract
Instructions
- In a bowl, mix Greek yogurt, honey (if using), and vanilla extract until well combined.
- In serving glasses, layer yogurt mixture, sliced bananas, and granola. Repeat layers until the glasses are filled.
- Top with additional banana slices and a sprinkle of granola for garnish.
- Chill in the refrigerator for about 30 minutes before serving for a refreshing treat.
Lemon Blueberry Tart
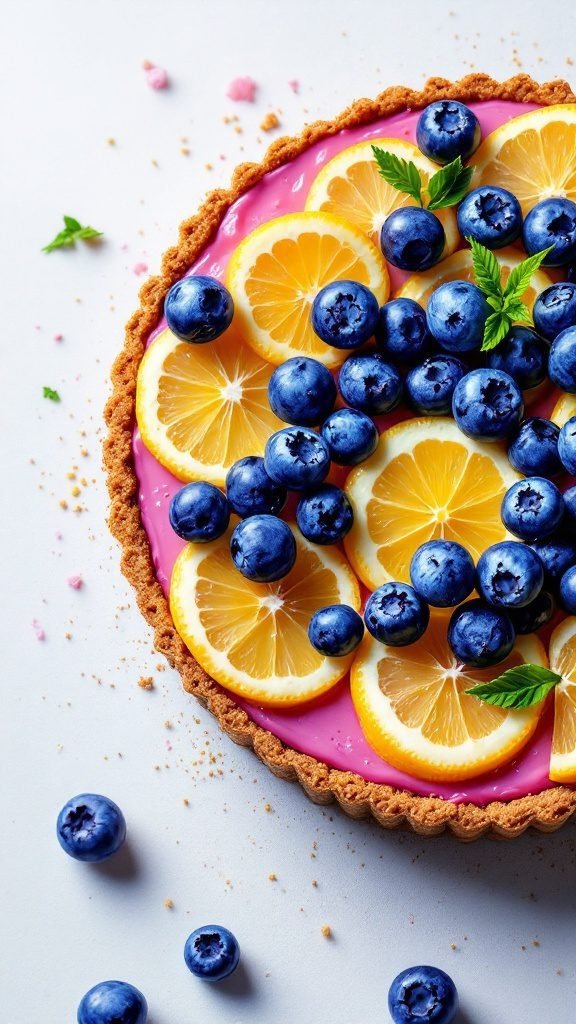
The Lemon Blueberry Tart is a refreshing no-bake dessert that’s perfect for warm days. With its bright citrus flavor and sweet blueberries, it balances tartness and sweetness beautifully. Plus, it’s simple to whip up, making it great for both novice and experienced bakers.
Whether you’re following a low-carb or plant-based lifestyle, this treat fits various dietary preferences. It’s gluten-free, dairy-free, and can even be made vegan. Perfect as a healthy snack or a light dessert, it’s a delightful way to enjoy seasonal fruits!
Ingredients
- 1 ½ cups almond flour
- ¼ cup coconut oil, melted
- 2 tablespoons maple syrup or agave nectar
- 1 cup fresh blueberries
- 1 cup coconut cream
- ½ cup fresh lemon juice
- ¼ cup honey or a sugar-free alternative
- 1 teaspoon vanilla extract
- Pinch of salt
Instructions
- Prepare the Crust: In a mixing bowl, combine almond flour, melted coconut oil, and maple syrup. Mix until a crumbly dough forms. Press the mixture into the bottom of a tart pan evenly.
- Make the Filling: In a blender, combine coconut cream, fresh lemon juice, honey, vanilla extract, and a pinch of salt. Blend until smooth.
- Assemble the Tart: Pour the lemon filling into the prepared crust and chill in the refrigerator for at least 2 hours until set.
- Top with Berries: Once set, remove the tart from the pan. Decorate the top with fresh blueberries before serving.
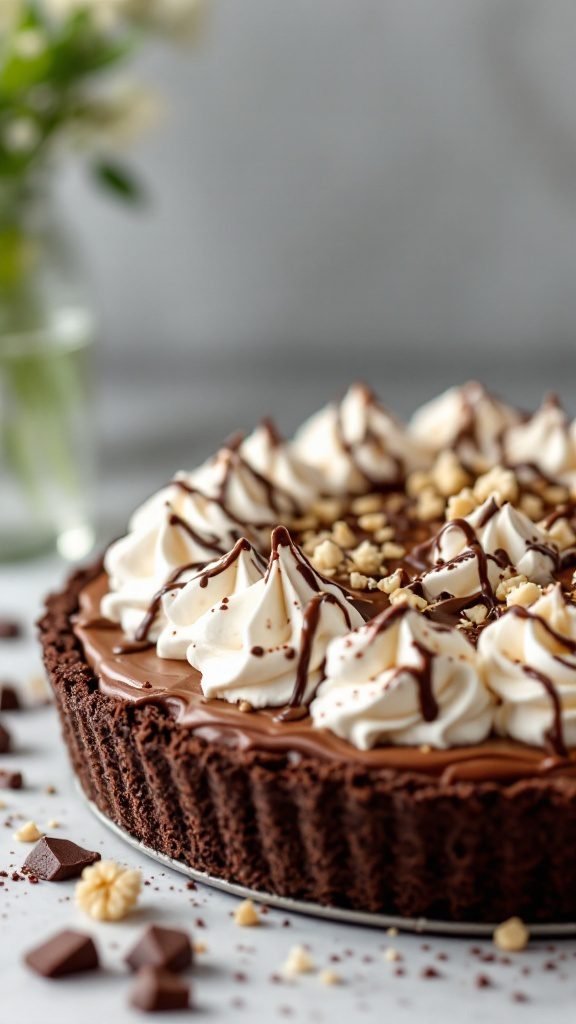
Chocolate Peanut Butter Pie
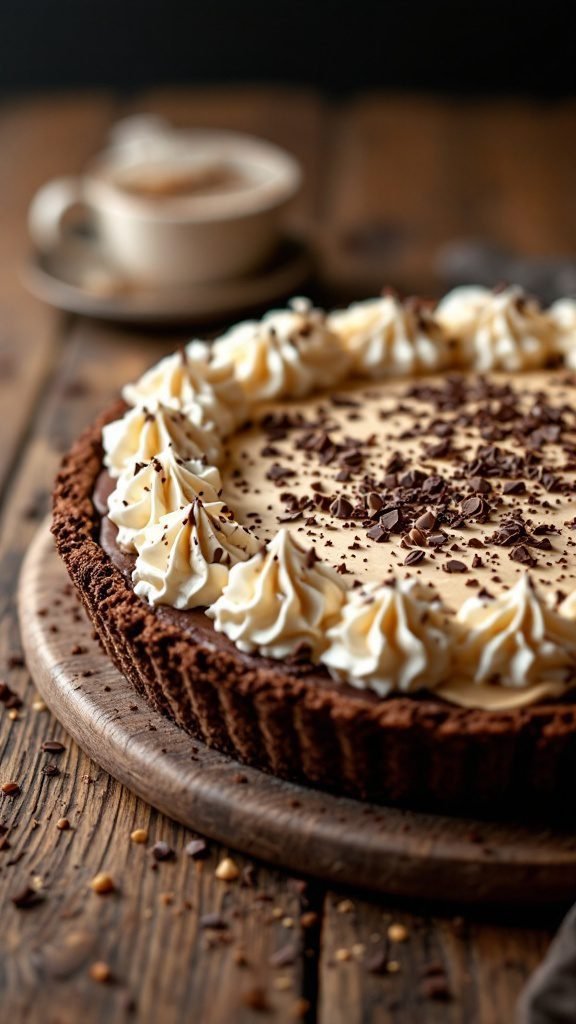
This no-bake Chocolate Peanut Butter Pie is a delightful treat that combines the rich flavors of chocolate and creamy peanut butter. It’s smooth, sweet, and has a light texture that will make it a favorite among dessert lovers. Plus, it’s super easy to whip up, making it ideal for any occasion or a simple weeknight snack.
This dessert not only satisfies your sweet tooth but can also cater to various dietary preferences. It can be made vegan, gluten-free, or low-carb, depending on the ingredients you choose. Whether you’re enjoying it as a quick dessert after dinner or serving it at a gathering, this pie is sure to impress!
Ingredients
- 1 ½ cups chocolate cookie crumbs
- ½ cup unsalted butter, melted
- 1 cup creamy peanut butter
- 1 cup powdered sugar
- 8 oz cream cheese, softened
- 1 cup whipped topping (or coconut whipped cream for a dairy-free option)
- 1 teaspoon vanilla extract
- Chopped chocolate or chocolate shavings for garnish
Instructions
- Prepare the Crust: In a mixing bowl, combine chocolate cookie crumbs and melted butter. Press the mixture into the bottom and sides of a pie pan to form a crust. Chill in the refrigerator while you prepare the filling.
- Make the Filling: In a large bowl, beat together the peanut butter, powdered sugar, cream cheese, whipped topping, and vanilla extract until smooth and creamy.
- Assemble the Pie: Pour the peanut butter filling into the chilled crust, spreading it out evenly. Use a spatula to smooth the top.
- Chill: Cover the pie and let it chill in the refrigerator for at least 4 hours or until set.
- Serve: Before serving, garnish with chopped chocolate or chocolate shavings for an extra touch of indulgence.
Mango Coconut Chia Pudding
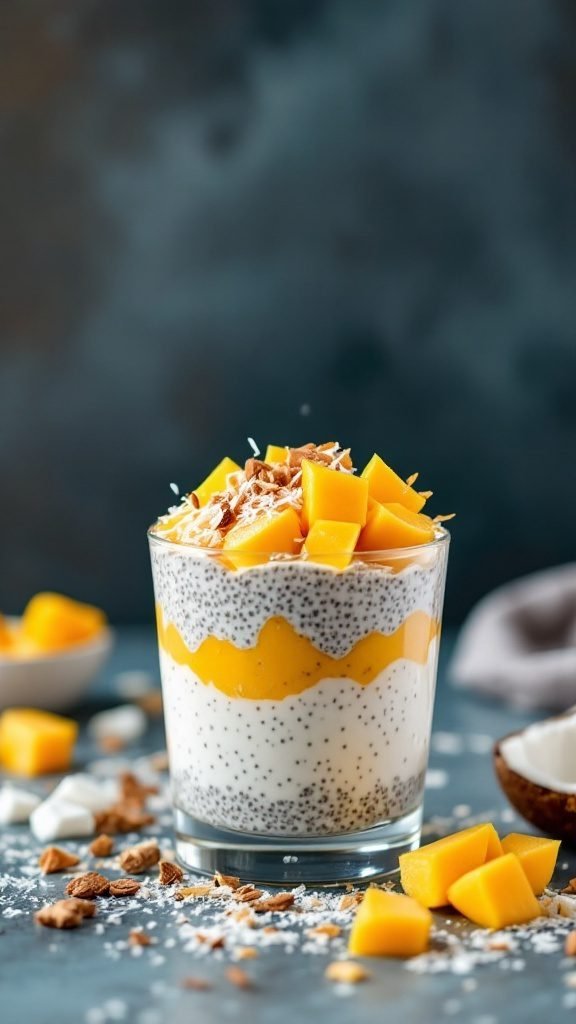
If you’re looking for a refreshing and nutritious treat, Mango Coconut Chia Pudding is a perfect choice! This no-bake dessert combines creamy coconut milk, nutritious chia seeds, and sweet, juicy mango for a delightful flavor. It’s simple to make and requires no cooking, making it an easy option for a healthy snack or dessert.
This vegan and gluten-free recipe is packed with protein and fiber, keeping you full and satisfied. Plus, it’s dairy-free and sugar-free, fitting seamlessly into a variety of dietary lifestyles, including keto and low carb. Enjoy it as a light meal or a sweet afternoon pick-me-up!
Ingredients
- 1/2 cup chia seeds
- 2 cups coconut milk
- 2 tablespoons maple syrup (or to taste)
- 1 ripe mango, diced
- 1/4 cup shredded coconut (unsweetened)
- Pinch of salt
Instructions
- Combine chia seeds, coconut milk, maple syrup, and salt in a bowl. Stir well to avoid clumping.
- Cover the mixture and refrigerate for at least 4 hours or overnight, allowing it to thicken.
- Once the chia pudding is set, layer it with diced mango in serving glasses.
- Top with shredded coconut and enjoy your delicious and healthy treat!
Chocolate Avocado Mousse
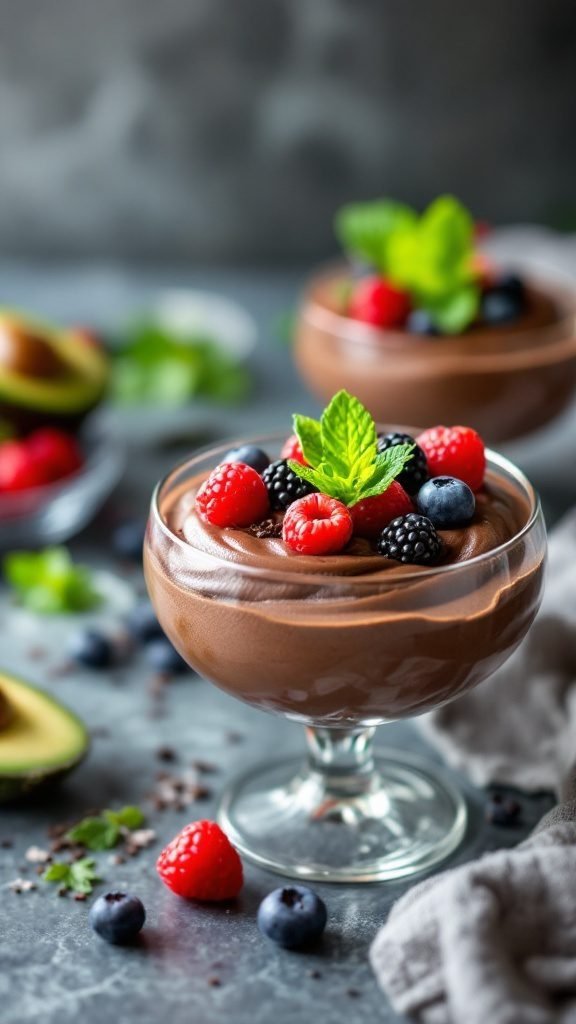
This chocolate avocado mousse is a delightful twist on a classic dessert. It’s rich, creamy, and surprisingly nutritious, making it a favorite for those who love indulgent treats without the guilt. The avocado adds a silky texture while keeping the recipe both vegan and gluten-free. Not only is it a crowd-pleaser, but it’s also super easy to whip up!
Perfect for any occasion, this mousse is a fantastic choice for a snack or a light dessert. Whether you follow a keto or plant-based diet, this recipe fits right in. Serve it chilled, topped with fresh berries for a pop of color and flavor.
Ingredients
- 2 ripe avocados
- 1/2 cup unsweetened cocoa powder
- 1/4 cup maple syrup or agave nectar
- 1/4 cup almond milk (or any non-dairy milk)
- 1 teaspoon vanilla extract
- A pinch of salt
- Fresh berries for topping
Instructions
- Blend the Ingredients: In a food processor, combine the ripe avocados, cocoa powder, maple syrup, almond milk, vanilla extract, and salt. Blend until smooth and creamy.
- Taste and Adjust: Check the sweetness and adjust if needed by adding more maple syrup.
- Chill the Mousse: Transfer the mousse into serving bowls and refrigerate for at least 30 minutes to let it set.
- Serve: Top with fresh berries just before serving for a fresh burst of flavor.
No-Bake Cheesecake with Berry Topping
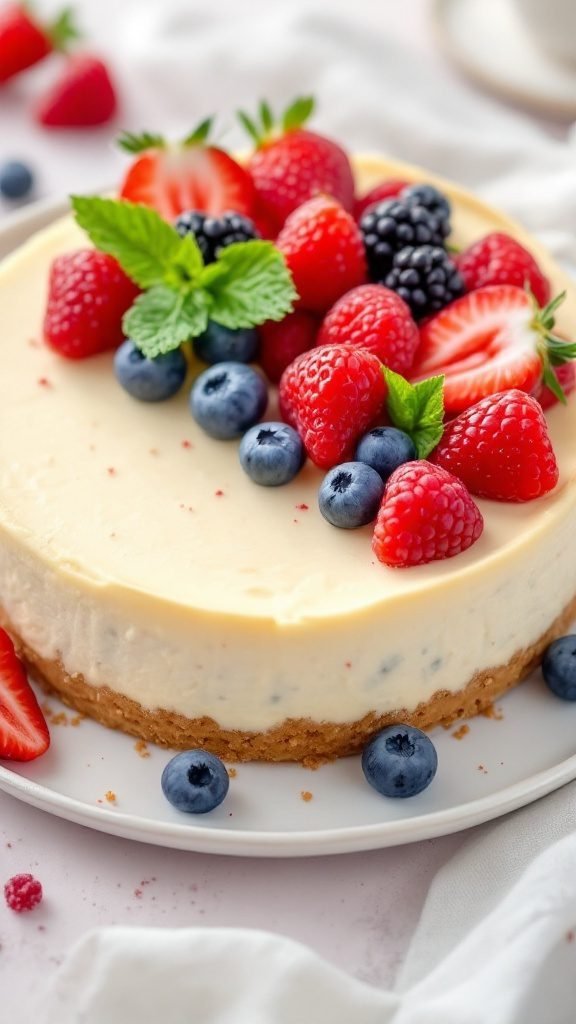
This no-bake cheesecake is a creamy, smooth delight that pairs perfectly with fresh berries for a refreshing dessert option. It’s simple to prepare, making it an ideal choice for anyone looking to whip up a sweet treat without turning on the oven.
With a delicious blend of cream cheese and a hint of vanilla, this dessert satisfies your sweet tooth while also remaining light. Perfect for any gathering or as a quick snack, it offers a nutritious twist with options for gluten-free, low carb, or even dairy-free variations.
Ingredients
- 1 ½ cups graham cracker crumbs (or gluten-free alternative)
- ½ cup unsalted butter, melted
- 2 cups cream cheese, softened
- 1 cup powdered sugar
- 1 teaspoon vanilla extract
- 1 cup heavy whipping cream
- 2 cups mixed berries (strawberries, blueberries, raspberries, blackberries)
Instructions
- Make the Crust: In a bowl, combine graham cracker crumbs and melted butter. Press the mixture firmly into the bottom of a springform pan to form a crust.
- Prepare the Filling: In a large mixing bowl, beat the softened cream cheese until smooth. Gradually mix in powdered sugar and vanilla extract until well combined.
- Whip the Cream: In another bowl, whip the heavy cream until stiff peaks form. Gently fold the whipped cream into the cream cheese mixture until fully incorporated.
- Assemble: Pour the cheesecake filling over the crust in the springform pan. Smooth the top with a spatula, then refrigerate for at least 4 hours or until set.
- Top and Serve: Once set, remove the cheesecake from the pan and top with fresh berries before serving.
Oreo Truffle Bites

Oreo Truffle Bites are a delightful no-bake dessert that combines the rich flavor of Oreos with creamy goodness. They’re coated in chocolate and are perfect for satisfying your sweet tooth with minimal effort. These truffles are not just tasty; they also cater to various lifestyles, being easy to make and a hit at any gathering.
With a deliciously sweet and slightly crunchy texture, these bites are sure to impress. They are versatile enough to fit into many dietary preferences, including being vegetarian and gluten-free. Enjoy them as a delightful snack or vegan treat!
Ingredients
- 1 package (15.35 oz) Oreo cookies
- 1 package (8 oz) cream cheese, softened
- 2 cups chocolate chips (dark or semi-sweet)
- 1 tablespoon coconut oil (optional, for smooth melting)
- Crushed Oreos or sprinkles for topping
Instructions
- Crush Oreos: In a food processor, crush the Oreo cookies until fine crumbs form. Reserve a small amount for topping.
- Mix Filling: In a bowl, combine the crushed Oreos with softened cream cheese until well blended.
- Shape Truffles: Use your hands to form small balls from the mixture and place them on a baking sheet lined with parchment paper.
- Chill: Refrigerate the truffle balls for about 30 minutes to firm up.
- Melt Chocolate: In a microwave-safe bowl, melt the chocolate chips and coconut oil (if using) in 30-second intervals, stirring in between until smooth.
- Coat Truffles: Dip each chilled truffle in the melted chocolate, using a fork to allow excess to drip off. Place back on the parchment paper.
- Add Toppings: While the chocolate is still wet, sprinkle crushed Oreos or sprinkles on top for decoration.
- Chill Again: Refrigerate the truffles until the chocolate is set, about 15-20 minutes before serving.
Fruit and Yogurt Parfait
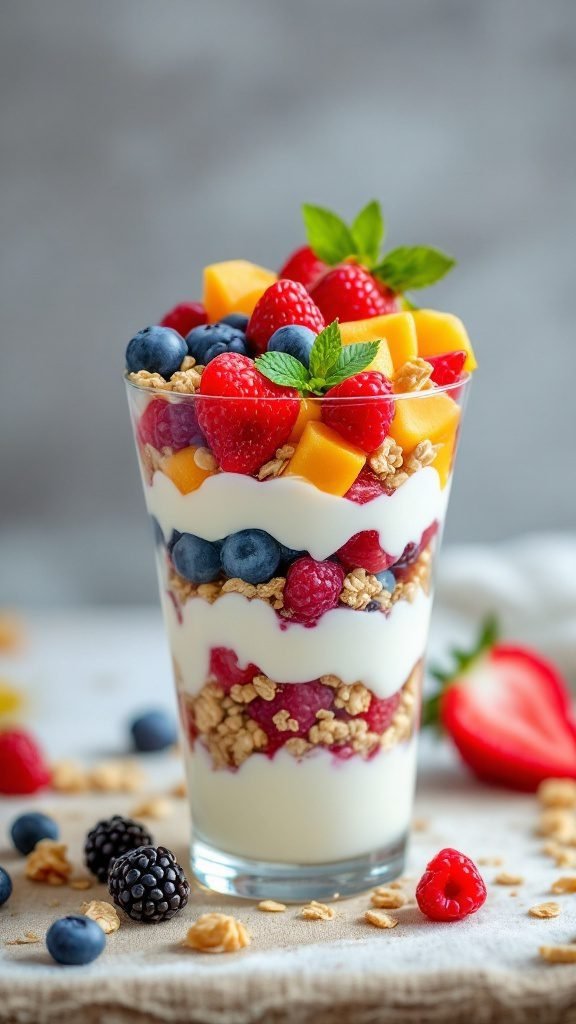
A fruit and yogurt parfait is a delightful no-bake dessert that combines layers of creamy yogurt, fresh fruits, and crunchy granola. This easy recipe not only tastes amazing but also lets you enjoy a healthy snack or dessert that feels indulgent without the guilt. The sweetness of the fruits pairs perfectly with the tangy yogurt, making each bite a refreshing treat.
Perfect for anyone following a vegan, low carb, or gluten-free lifestyle, this parfait is versatile and can be adapted to fit various dietary preferences. Whether you’re looking for a quick breakfast meal or a nutritious dessert, it’s a simple option that can be whipped up in minutes. Here’s how to make your very own fruit and yogurt parfait!
Ingredients
- 2 cups Greek yogurt (or dairy-free yogurt for a vegan option)
- 2 cups mixed fresh fruits (such as strawberries, blueberries, raspberries, and mango)
- 1 cup granola (gluten-free if needed)
- 1 tablespoon honey or maple syrup (optional)
- Mint leaves for garnish (optional)
Instructions
- Prepare the Yogurt: If you want a sweeter taste, stir in honey or maple syrup into the Greek yogurt until well blended.
- Layer the Parfait: In a glass or bowl, start with a layer of yogurt, followed by a layer of granola, and then a layer of mixed fruits. Repeat the layers until you fill the glass.
- Garnish: Top your parfait with a few extra fruits and a mint leaf for a fresh look.
- Serve: Enjoy immediately or chill for a bit in the fridge before serving for a cooler treat.
Mint Chocolate Chip Icebox Cake
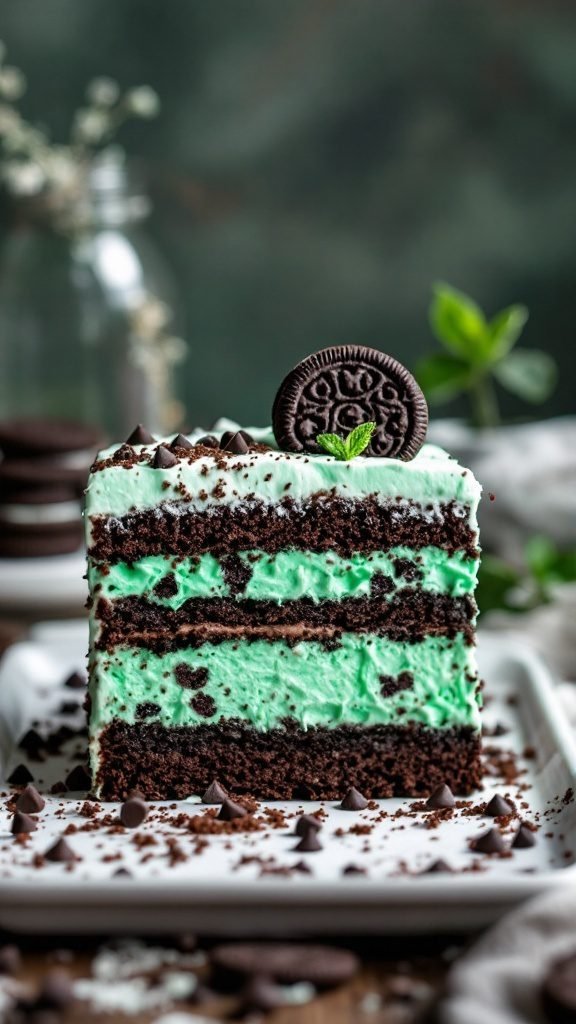
This Mint Chocolate Chip Icebox Cake is a delightful twist on a classic dessert. It combines layers of rich chocolate cake with a creamy, minty filling, creating a refreshing treat that’s perfect for any occasion. The combination of chocolate and mint offers a harmonious flavor that feels indulgent yet light.
The best part? It’s a no-bake recipe! This means you can whip it up without needing to turn on the oven, making it an ideal choice for warm days or quick gatherings. Plus, it can easily cater to various dietary needs—you can make it gluten-free or even dairy-free with simple ingredient swaps!
Ingredients
- 1 package chocolate cake mix (or make your own gluten-free version)
- 2 cups heavy whipping cream
- 1/2 cup powdered sugar
- 1 teaspoon peppermint extract
- 1 cup mint chocolate chips
- Chocolate cookies (for layering)
- Fresh mint leaves (for garnish)
Instructions
- Prepare the Cake: If using a cake mix, bake according to package instructions. Allow to cool completely, then slice into even layers.
- Make the Filling: In a large bowl, whip the heavy cream until soft peaks form. Gradually add powdered sugar and peppermint extract, continuing to whip until stiff peaks form. Gently fold in the mint chocolate chips.
- Assemble the Cake: In a rectangular dish, layer chocolate cookies at the bottom. Spread a layer of the mint filling over the cookies, then add another layer of cake. Repeat this process until all layers are used, finishing with the mint filling on top.
- Chill: Cover the dish and refrigerate for at least 4 hours or overnight to allow the flavors to meld.
- Serve: Garnish with fresh mint leaves and extra chocolate chips before slicing and serving.
Coconut Lime Mousse
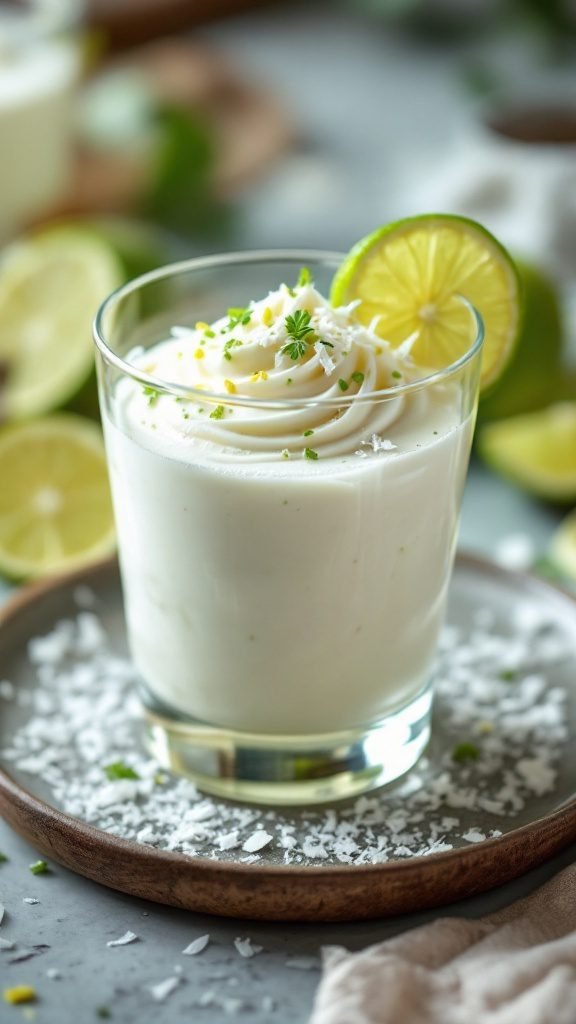
This Coconut Lime Mousse is a refreshing and light no-bake dessert that perfectly balances creamy coconut with a zesty lime kick. It’s simple to make and ideal for any occasion, whether you’re entertaining guests or just treating yourself at home. The mousse is light, fluffy, and offers a delightful tropical flavor that will make you feel like you’re on vacation.
Not only is this dessert delicious, but it’s also a nutritious option. It’s a great choice for those following a vegetarian or vegan lifestyle and can easily be made gluten-free and low-carb. Enjoy it as a guilt-free snack or a special meal finish!
Ingredients
- 1 cup coconut cream
- 1/2 cup Greek yogurt (or dairy-free yogurt for vegan option)
- 1/4 cup lime juice
- 2 tablespoons lime zest
- 1/4 cup honey or maple syrup (for vegan)
- 1 teaspoon vanilla extract
- 1 tablespoon gelatin (or agar-agar for vegan)
- 1/4 cup water
- Shredded coconut for garnish
- Lime slices for garnish
Instructions
- Prepare the Gelatin: In a small bowl, sprinkle gelatin over water and let it sit for 5 minutes until it blooms.
- Heat Gelatin: After blooming, heat the mixture gently until the gelatin dissolves. Remove from heat and let cool slightly.
- Mix the Base: In a mixing bowl, combine coconut cream, Greek yogurt, lime juice, lime zest, honey (or maple syrup), and vanilla extract. Whisk until smooth.
- Add Gelatin: Slowly mix the dissolved gelatin into the coconut mixture until fully incorporated.
- Chill: Pour the mousse into serving dishes and refrigerate for at least 2 hours or until set.
- Serve: Once set, garnish with shredded coconut and lime slices before serving.
Peanut Butter Cookie Dough Balls
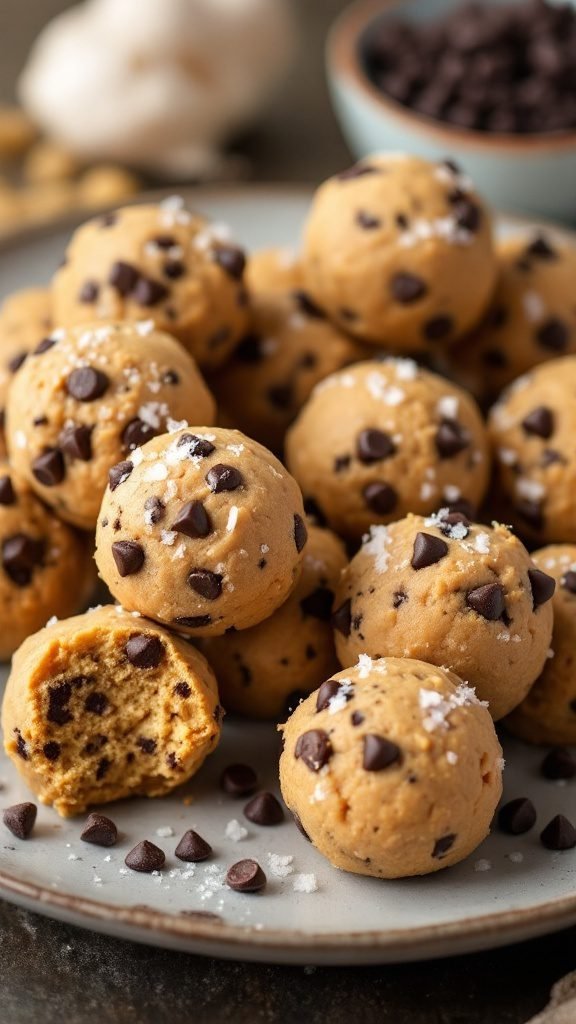
Peanut Butter Cookie Dough Balls are a delightful treat that combines the rich, creamy goodness of peanut butter with the sweetness of chocolate chips. These bites are perfect for satisfying your sweet cravings without the need to bake. Simple and quick to prepare, they make for an excellent snack or dessert that everyone will enjoy.
Not only are these cookie dough balls delicious, but they can also fit into various lifestyles. They can be made dairy-free, gluten-free, and even sugar-free, making them a versatile option for those following a keto or vegan diet. With their nutty flavor and chewy texture, they’re a fun, nutritious way to indulge your sweet tooth.
Ingredients
- 1 cup natural peanut butter
- 1/4 cup honey or maple syrup
- 1/4 cup coconut flour
- 1/4 cup chocolate chips (dairy-free if needed)
- 1/2 teaspoon vanilla extract
- 1/4 teaspoon salt
Instructions
- Mix Ingredients: In a large bowl, combine peanut butter, honey or maple syrup, coconut flour, vanilla extract, and salt. Stir until well combined.
- Add Chocolate Chips: Fold in the chocolate chips until evenly distributed throughout the mixture.
- Form Balls: Using your hands, scoop out small portions and roll them into balls. Place them on a parchment-lined baking sheet.
- Chill: Refrigerate for about 30 minutes to set and firm up the cookie dough balls.
- Enjoy: Serve chilled or store in an airtight container in the fridge for a tasty, healthy snack!
Chocolate Chip Cookie Dough Dip
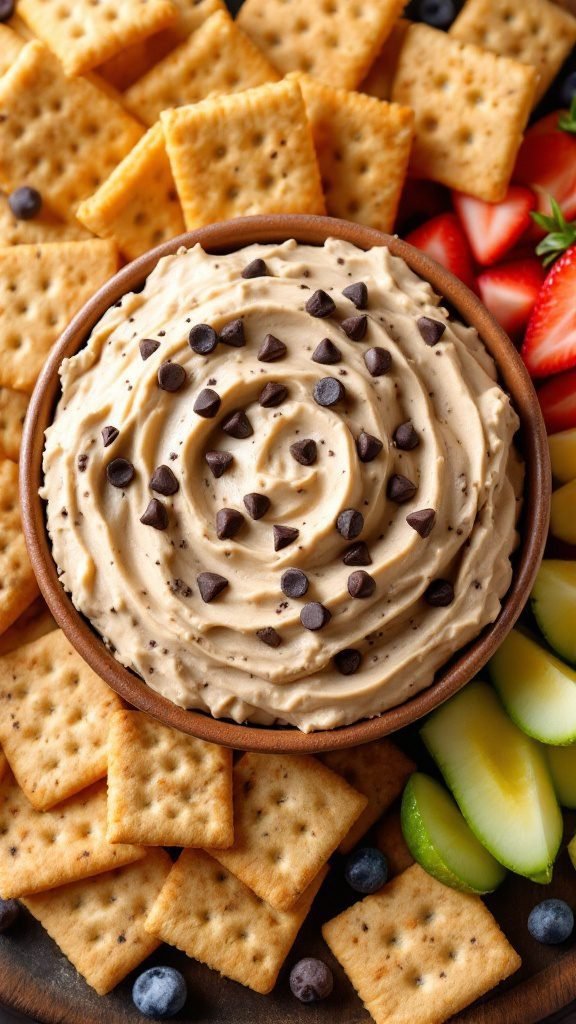
Chocolate Chip Cookie Dough Dip is a fun and sweet treat that captures all the flavors of classic cookie dough without the baking hassle. This creamy dip is rich, indulgent, and perfect for sharing at parties or enjoying as a late-night snack. It’s simple to whip up, making it a great quick dessert option when you want something sweet without much effort.
With a delightful balance of sweetness and a touch of saltiness, this dip pairs wonderfully with graham crackers, fresh fruit, or even pretzels. Whether you’re hosting a gathering or just treating yourself, this recipe is sure to be a hit!
Ingredients
- 1 cup cream cheese, softened
- 1/2 cup brown sugar
- 1/4 cup granulated sugar
- 1/2 cup all-purpose flour (heat-treated)
- 1 teaspoon vanilla extract
- 1/2 cup mini chocolate chips
- 1/4 cup milk (or dairy-free alternative for a vegan option)
Instructions
- In a mixing bowl, beat the softened cream cheese until smooth and creamy.
- Add the brown sugar and granulated sugar, mixing until well combined.
- Stir in the heat-treated flour and vanilla extract, and mix until fully incorporated.
- Gradually add the milk until you reach the desired dip consistency.
- Fold in the mini chocolate chips for that classic cookie dough feel.
- Serve immediately with your favorite dippers, or chill in the refrigerator for about 30 minutes for a firmer texture.
Pistachio Pudding Pie
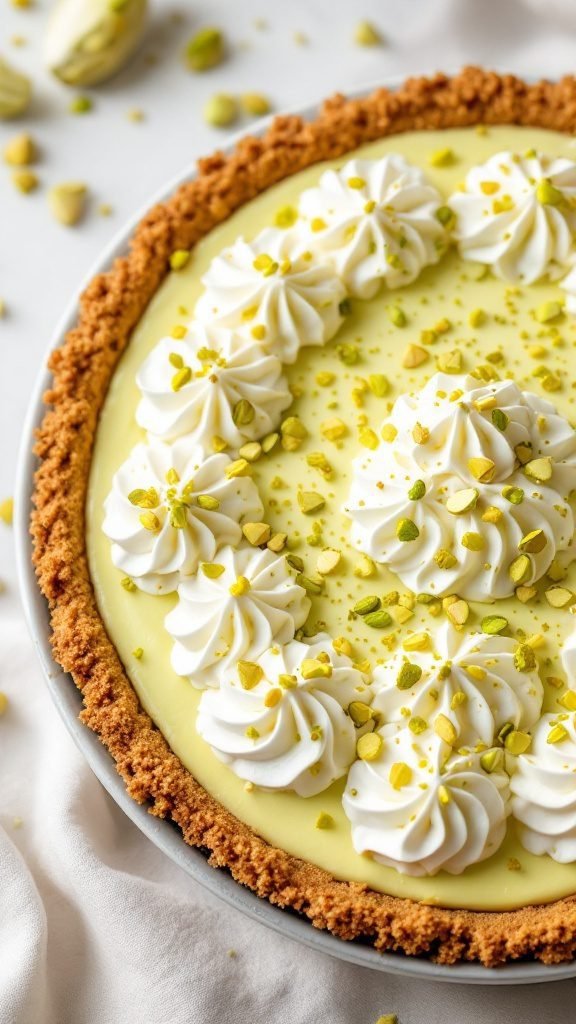
Pistachio Pudding Pie is a delightful no-bake dessert that brings a creamy, nutty flavor to your table. This easy recipe combines the rich taste of pistachio pudding with a crunchy graham cracker crust, making it a perfect treat for any occasion. The smooth and sweet filling along with the delightful crunch of the crust is sure to please everyone.
This dessert is not only simple to make but also offers a refreshing twist on traditional pies. It’s great for those living a gluten-free lifestyle and can easily be adjusted to fit vegetarian, dairy-free, or even vegan diets. Enjoy this indulgent yet nutritious dessert without the hassle of baking!
Ingredients
- 1 1/2 cups graham cracker crumbs
- 1/2 cup unsalted butter, melted
- 1 cup pistachio pudding mix
- 2 cups milk (or plant-based milk for dairy-free option)
- 1 cup whipped cream (or coconut whipped cream for vegan option)
- Chopped pistachios for garnish
Instructions
- Prepare the Crust: In a mixing bowl, combine graham cracker crumbs and melted butter. Press the mixture into the bottom and sides of a pie dish to form a crust.
- Mix the Pudding: In another bowl, whisk together the pistachio pudding mix and milk until combined. Allow it to thicken for about 5 minutes.
- Combine: Fold in the whipped cream until smooth and creamy. Pour the mixture into the prepared crust.
- Chill: Refrigerate the pie for at least 2 hours or until set.
- Garnish: Before serving, top with additional whipped cream and chopped pistachios.
No-Bake Pumpkin Cheesecake
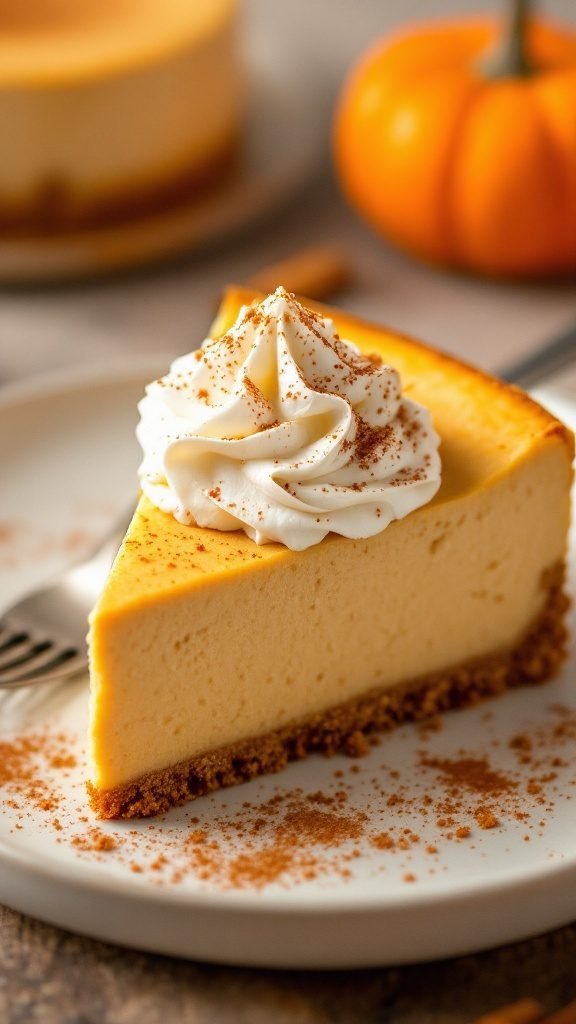
This no-bake pumpkin cheesecake is a delightful blend of creamy and spiced flavors, making it a perfect treat for any occasion. The smooth texture of the filling, combined with a crunchy crust, offers a satisfying contrast that everyone will love. Plus, it’s super simple to whip up, requiring no oven time at all!
Enjoying this dessert means embracing a slice of fall with each bite. Whether you’re hosting a gathering or just craving a sweet snack, this recipe checks all the boxes. Plus, it’s vegetarian and can be adapted to be gluten-free or low carb for those with dietary preferences.
Ingredients
- 1 ½ cups graham cracker crumbs
- ½ cup unsalted butter, melted
- 1 cup cream cheese, softened
- 1 cup pumpkin puree
- 1 cup powdered sugar
- 1 teaspoon vanilla extract
- 1 teaspoon pumpkin pie spice
- 1 cup whipped cream (for topping)
Instructions
- Make the Crust: In a mixing bowl, combine graham cracker crumbs and melted butter. Press the mixture into the bottom of a 9-inch pie dish to form an even crust.
- Prepare the Filling: In another bowl, beat the softened cream cheese until smooth. Add pumpkin puree, powdered sugar, vanilla extract, and pumpkin pie spice. Mix until well combined and creamy.
- Assemble the Cheesecake: Pour the pumpkin mixture into the prepared crust and spread evenly. Refrigerate for at least 4 hours, or until set.
- Serve: Before serving, top with whipped cream and an extra sprinkle of pumpkin pie spice if desired.
Raspberry Almond No-Bake Bars
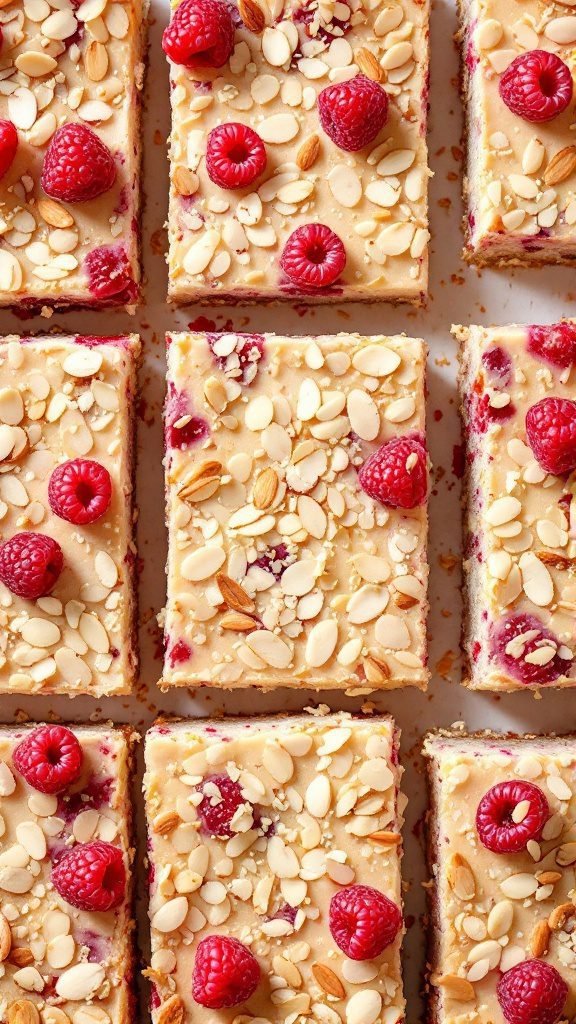
These Raspberry Almond No-Bake Bars are a delightful treat that combines the tartness of fresh raspberries with the nutty flavor of almonds. Perfect for a quick dessert, these bars are both healthy and satisfying, making them a great choice for a post-dinner snack or a midday pick-me-up.
With their creamy texture and refreshing taste, they are simple to whip up and require no baking, making them an ideal recipe for warm days or busy schedules. Plus, they’re gluten-free, vegan, and can easily fit into a low-carb or keto lifestyle.
Ingredients
- 1 cup almonds
- 1 cup medjool dates, pitted
- 1/2 cup almond butter
- 1 cup fresh raspberries
- 1/4 cup maple syrup
- 1 teaspoon vanilla extract
- 1/2 teaspoon sea salt
- 1/4 cup sliced almonds for topping
Instructions
- Prepare the Base: In a food processor, blend the almonds and medjool dates until they form a sticky dough. Press this mixture firmly into the bottom of a lined square baking dish.
- Make the Filling: In a bowl, mix almond butter, maple syrup, vanilla extract, and sea salt until smooth. Fold in the fresh raspberries gently to keep them whole.
- Layer the Filling: Pour the raspberry mixture over the almond base in the baking dish, spreading it evenly. Top with sliced almonds for an added crunch.
- Chill: Refrigerate the bars for at least 2 hours or until set. Once firm, cut into squares.
- Serve: Enjoy your delicious Raspberry Almond No-Bake Bars chilled or at room temperature!
Almond Joy No-Bake Bites
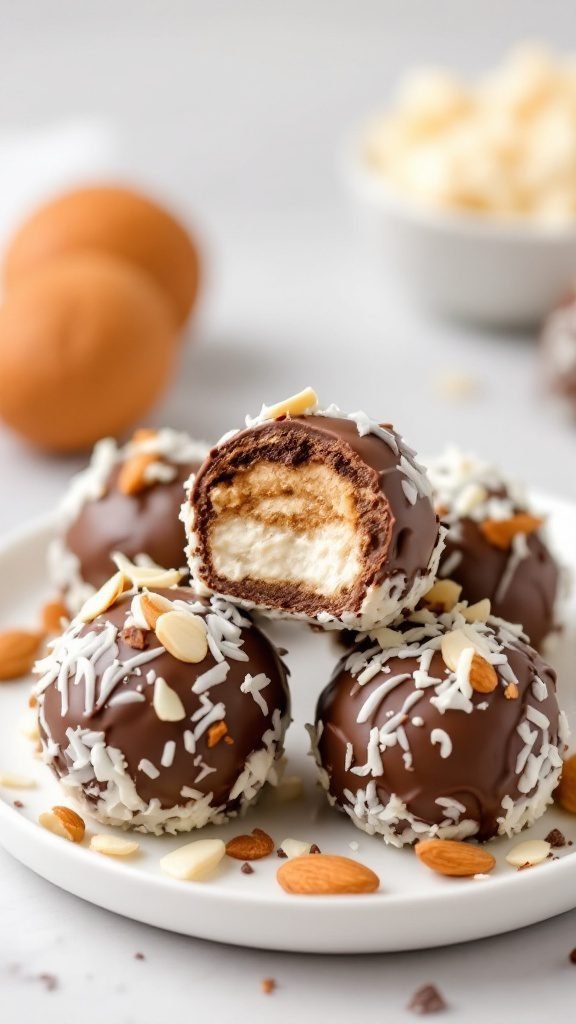
If you’re craving something sweet and satisfying, these Almond Joy No-Bake Bites are perfect for you! Combining chocolate, coconut, and almonds, they deliver a delightful taste reminiscent of the classic candy bar. Plus, they’re super simple to make, requiring no oven time at all.
These no-bake treats are a great option for a quick snack or dessert. They’re vegan, gluten-free, and can easily fit into a low-carb or keto lifestyle. Enjoy them as a guilt-free indulgence or share with friends—either way, they’re sure to please!
Ingredients
- 1 cup almond flour
- 1/2 cup shredded unsweetened coconut
- 1/4 cup maple syrup
- 1/4 cup almond butter
- 1/4 teaspoon vanilla extract
- 1/2 cup dark chocolate chips (dairy-free if needed)
- 1 tablespoon coconut oil
- Chopped almonds, for topping
Instructions
- In a bowl, mix together almond flour, shredded coconut, maple syrup, almond butter, and vanilla extract until well combined.
- Shape the mixture into small balls and place them on a parchment-lined tray.
- In a microwave-safe bowl, melt the dark chocolate chips and coconut oil together until smooth. Stir until combined.
- Dip each ball into the melted chocolate, making sure to coat evenly. Return to the tray.
- Sprinkle chopped almonds on top of the chocolate before it hardens.
- Chill in the refrigerator for about 30 minutes to set before serving.
Chocolate Hazelnut Mousse Cups
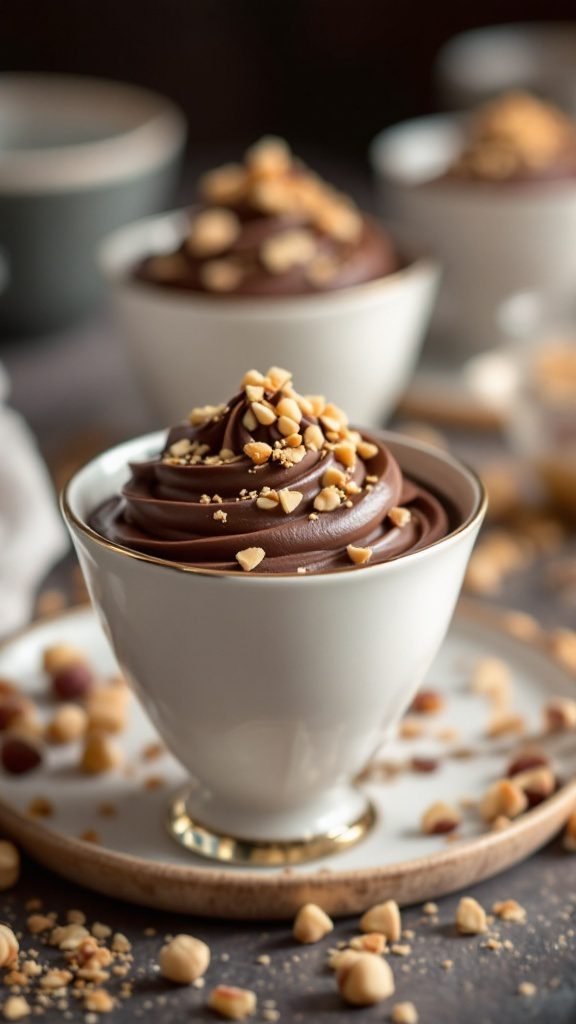
Chocolate Hazelnut Mousse Cups are a delightful treat that perfectly blends rich chocolate and nutty hazelnut flavors. These no-bake desserts are not only simple to whip up but also provide a satisfying and creamy texture that makes them a favorite among dessert lovers. The chocolate mousse is light, airy, and packed with flavor, making it a guilt-free indulgence for anyone looking for a sweet escape.
This recipe is fantastic for those following a low-carb or gluten-free lifestyle, as it uses ingredients that are both nutritious and delicious. Plus, with a few healthy swaps, you can easily make this dessert dairy-free or vegan. Perfect for dinner parties or a casual night in, these mousse cups are sure to impress!
Ingredients
- 1 cup heavy cream (or coconut cream for dairy-free)
- 1/2 cup chocolate hazelnut spread
- 1/4 cup cocoa powder
- 1/4 cup powdered sugar (or sugar-free alternative)
- 1 teaspoon vanilla extract
- 1/4 cup crushed hazelnuts (for topping)
- Optional: a pinch of sea salt
Instructions
- In a mixing bowl, whip the heavy cream until soft peaks form.
- In another bowl, mix together the chocolate hazelnut spread, cocoa powder, powdered sugar, and vanilla extract until smooth.
- Gently fold the whipped cream into the chocolate mixture until fully combined, taking care not to deflate the cream.
- Divide the mousse into serving cups and chill in the refrigerator for at least 30 minutes.
- Before serving, top with crushed hazelnuts and a sprinkle of sea salt if desired.
Chilled Mocha Tiramisu
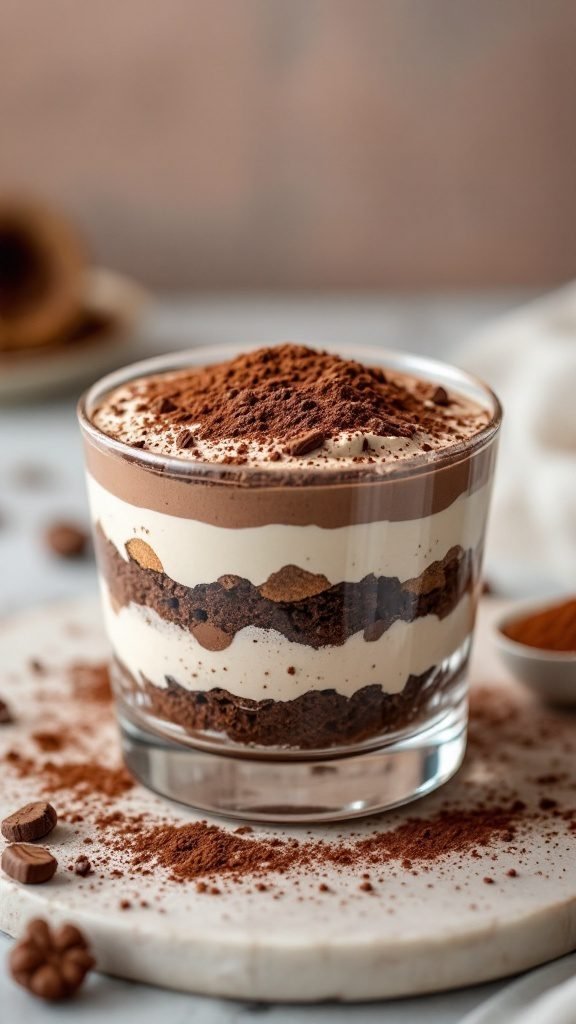
Chilled Mocha Tiramisu is a delightful no-bake dessert that brings together rich coffee flavors and creamy textures. This recipe is perfect for coffee lovers looking for a sweet treat that’s both simple and elegant. With layers of coffee-soaked cookies and a light mascarpone mixture, it’s a delicious way to satisfy your dessert cravings without turning on the oven.
This dessert is not only easy to make, but it can also be adapted to fit various dietary needs. Whether you’re following a gluten-free or vegan lifestyle, you can make substitutions to cater to your preferences. The result is a light, refreshing, and satisfying dessert that’s sure to impress at any gathering.
Ingredients
- 1 cup brewed coffee, cooled
- 2 tablespoons cocoa powder
- 8 ounces mascarpone cheese
- 1 cup heavy cream
- 1/2 cup powdered sugar
- 1 teaspoon vanilla extract
- 12-15 ladyfingers or gluten-free cookies
- Shaved chocolate or extra cocoa for garnish
Instructions
- Prepare the Coffee: Brew your favorite coffee and let it cool, then stir in cocoa powder until well combined.
- Make the Cream Mixture: In a bowl, whisk together mascarpone cheese, heavy cream, powdered sugar, and vanilla extract until smooth and fluffy.
- Layer the Dessert: Quickly dip each ladyfinger into the coffee mixture, then layer them in a serving dish. Spread a layer of the mascarpone mixture on top, and repeat the process until all ingredients are used.
- Chill: Cover the dessert and refrigerate for at least 4 hours, or overnight for the best flavor.
- Serve: Before serving, garnish with shaved chocolate or a dusting of cocoa powder.
Peach Melba Fool
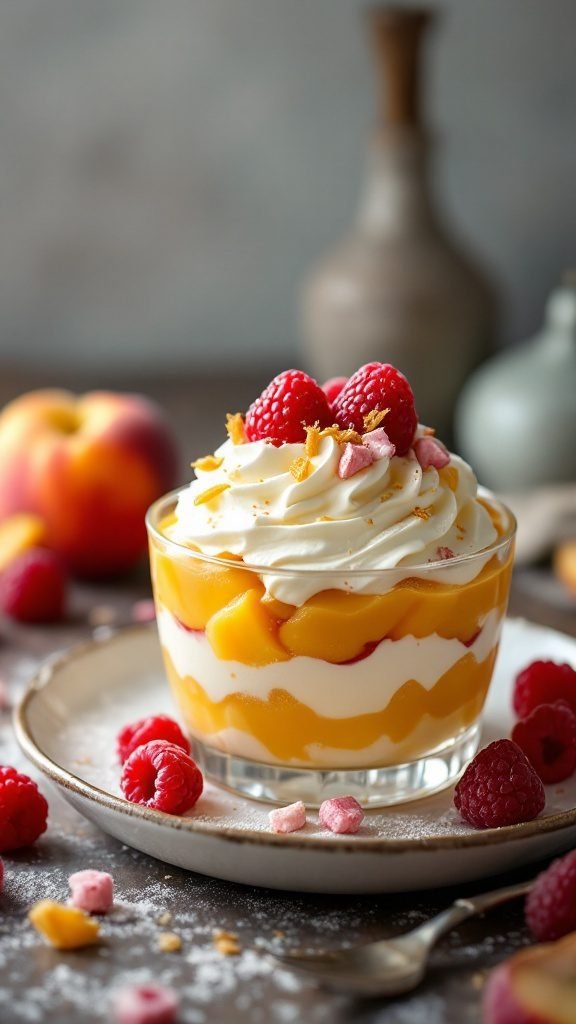
Peach Melba Fool is a delightful no-bake dessert that combines the sweetness of ripe peaches with the tartness of raspberries, all layered with creamy goodness. This dessert is not only visually appealing but also offers a refreshing taste that’s perfect for warm days. The combination of flavors makes it a hit for both kids and adults, and it’s simple enough for anyone to whip up.
With its luscious texture and bright colors, this Peach Melba Fool can easily fit into any healthy lifestyle, being naturally gluten-free and adaptable to various dietary preferences. You can even make it vegan by substituting the cream with a plant-based alternative. Enjoy it as a light snack or a satisfying dessert, and delight in its deliciousness without the hassle of baking!
Ingredients
- 2 cups ripe peaches, chopped
- 1 cup fresh raspberries
- 1 cup heavy cream (or coconut cream for a dairy-free option)
- 1/2 cup yogurt (plain or Greek for added protein)
- 2 tablespoons honey or maple syrup (adjust based on sweetness preference)
- 1 teaspoon vanilla extract
- Crushed meringues or granola for topping (optional)
Instructions
- Prepare the Fruit: In a bowl, mash half of the raspberries with a fork, and mix them with the chopped peaches. Set aside.
- Make the Cream Mixture: In another bowl, whip the heavy cream until soft peaks form. Gently fold in the yogurt, honey, and vanilla extract until well combined.
- Layer the Dessert: In serving glasses, start with a layer of the cream mixture, followed by a layer of the peach and raspberry mixture. Repeat until the glasses are filled, ending with the cream on top.
- Chill and Serve: Refrigerate for at least an hour before serving. Top with crushed meringues or granola if desired, and enjoy your Peach Melba Fool!
Vanilla Pudding Fruit Salad

This Vanilla Pudding Fruit Salad is a delightful and refreshing treat perfect for any occasion. It’s creamy, sweet, and bursting with the flavors of fresh fruit, making it a fantastic dessert or snack option. Not only is this recipe simple to whip up, but it also caters to various dietary lifestyles, whether you’re looking for something vegan, gluten-free, or low carb.
The combination of velvety vanilla pudding and vibrant fruits creates a satisfying dish that can easily become a staple in your home. It’s great for parties, picnics, or just a cozy evening snack. Plus, you can customize it with your favorite seasonal fruits for a twist on the classic recipe.
Ingredients
- 2 cups vanilla pudding (store-bought or homemade)
- 1 cup diced strawberries
- 1 cup blueberries
- 1 cup diced mango
- 1 cup raspberries
- 1 cup whipped topping (dairy-free if needed)
- 1 teaspoon vanilla extract (if making pudding from scratch)
Instructions
- Prepare the Vanilla Pudding: If using store-bought pudding, follow the instructions on the package. For homemade, combine milk and vanilla extract in a saucepan, bring to a simmer, and gradually stir in the pudding mix until thickened.
- Mix the Fruits: In a large bowl, gently combine the strawberries, blueberries, mango, and raspberries.
- Combine: Fold the prepared vanilla pudding into the mixed fruits until everything is evenly coated.
- Serve: Spoon the fruit salad into serving bowls and top with whipped topping for an added touch of creaminess.
- Chill: For best results, let the salad sit in the refrigerator for about 30 minutes before serving to allow the flavors to meld.
Caramel Apple Cheesecake Bars
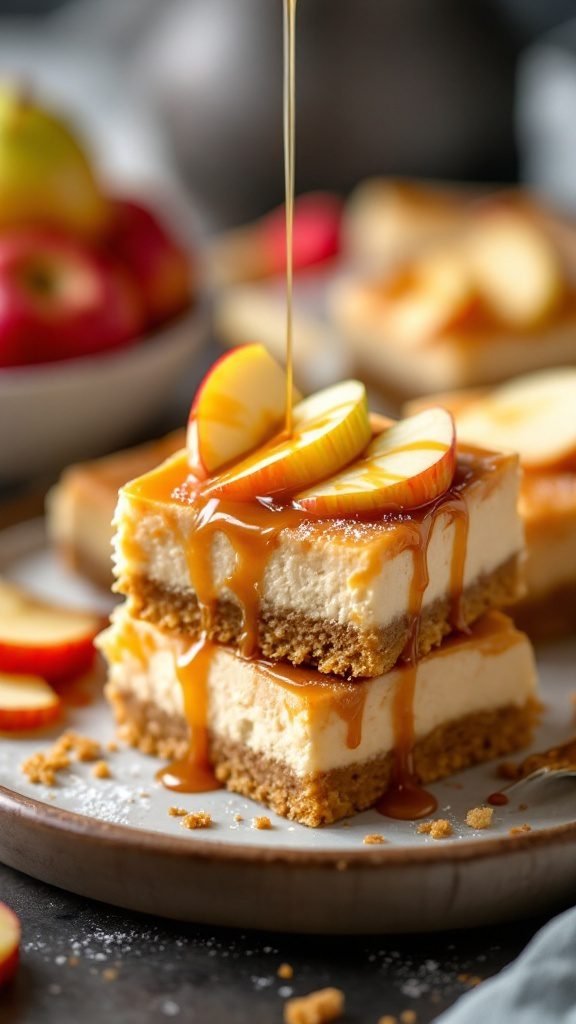
Caramel Apple Cheesecake Bars are a delicious no-bake treat that perfectly combines the sweetness of caramel and the tartness of apples with a creamy cheesecake layer. This recipe is simple to make and will satisfy your sweet cravings without the need for an oven. They’re a great snack for gatherings or a delightful dessert for any occasion.
The flavors blend beautifully, making each bite a creamy, crunchy, and sweet sensation. Plus, these bars are a fun way to enjoy seasonal apples. Whether you’re looking for a gluten-free, vegetarian, or even a low-carb option, this recipe can easily be adapted to fit various lifestyles and dietary needs.
Ingredients
- 1 1/2 cups crushed graham crackers
- 1/3 cup granulated sugar
- 1/2 cup unsalted butter, melted
- 2 cups cream cheese, softened
- 1 cup powdered sugar
- 1 teaspoon vanilla extract
- 2 cups diced apples (about 2 medium apples)
- 1 cup caramel sauce (store-bought or homemade)
- Optional: chopped nuts for topping
Instructions
- Prepare the Crust: In a mixing bowl, combine the crushed graham crackers, granulated sugar, and melted butter. Press the mixture firmly into the bottom of a 9×9-inch baking dish to form an even layer.
- Make the Cheesecake Layer: In another bowl, beat the cream cheese until smooth. Gradually mix in the powdered sugar and vanilla until well combined. Spread this mixture over the crust in the baking dish.
- Add the Apples: Evenly distribute the diced apples over the cheesecake layer. Drizzle with caramel sauce, reserving some for serving.
- Chill: Cover the dish with plastic wrap and refrigerate for at least 4 hours or until set. This helps the flavors meld and makes cutting easier.
- Serve: Once chilled, slice into bars and drizzle with extra caramel sauce. Optionally, top with chopped nuts for added crunch.
S’mores No-Bake Cake
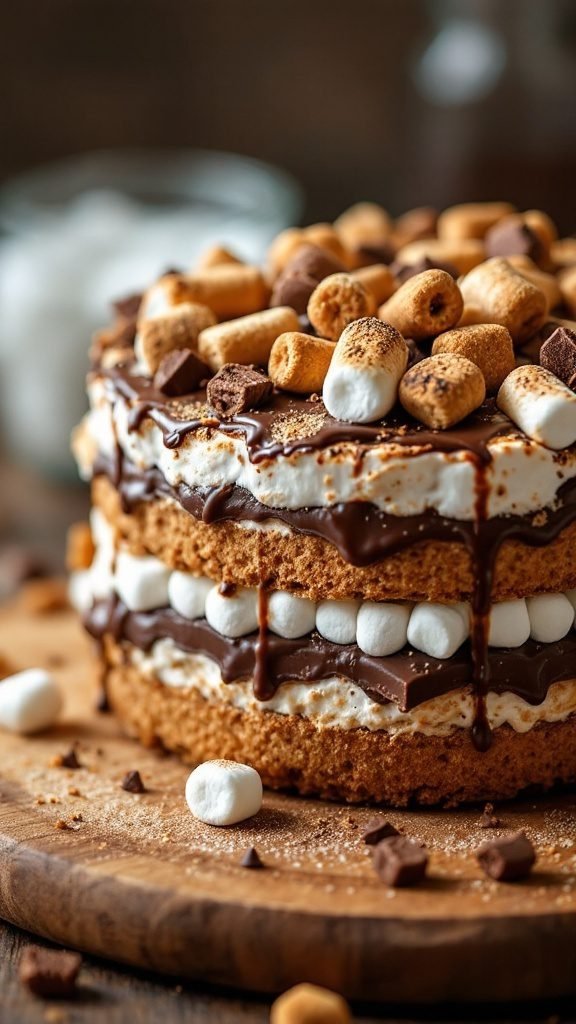
This S’mores No-Bake Cake is a delightful twist on the classic campfire treat. Combining layers of creamy marshmallow, rich chocolate, and crunchy graham crackers, it delivers the perfect balance of flavors and textures. Plus, it’s incredibly simple to whip up, making it a great choice for any occasion.
Whether you’re hosting a gathering or just looking for a sweet snack, this dessert will impress everyone with its no-bake ease and nostalgic taste. It’s a fun way to enjoy the s’mores experience indoors without needing a campfire!
Ingredients
- 2 cups graham cracker crumbs
- 1/2 cup unsalted butter, melted
- 1 cup heavy cream
- 1 cup marshmallow fluff
- 1 cup chocolate chips
- 1 teaspoon vanilla extract
- 1/2 cup mini marshmallows
- 1/2 cup chopped chocolate or chocolate shavings
Instructions
- Prepare the Crust: In a bowl, mix graham cracker crumbs and melted butter until combined. Press the mixture firmly into the bottom of a 9-inch springform pan to form the crust.
- Make the Filling: In a separate bowl, whip the heavy cream until soft peaks form. Fold in the marshmallow fluff and vanilla extract until smooth and creamy.
- Layer the Cake: Spread half of the marshmallow filling over the graham cracker crust. Sprinkle with half of the chocolate chips and mini marshmallows. Add the remaining filling and repeat the layering process.
- Chill: Cover the cake and refrigerate for at least 4 hours or until set.
- Serve: Once chilled, carefully remove the cake from the springform pan. Top with chopped chocolate or chocolate shavings before slicing and enjoying.
Chocolate Coconut Energy Balls
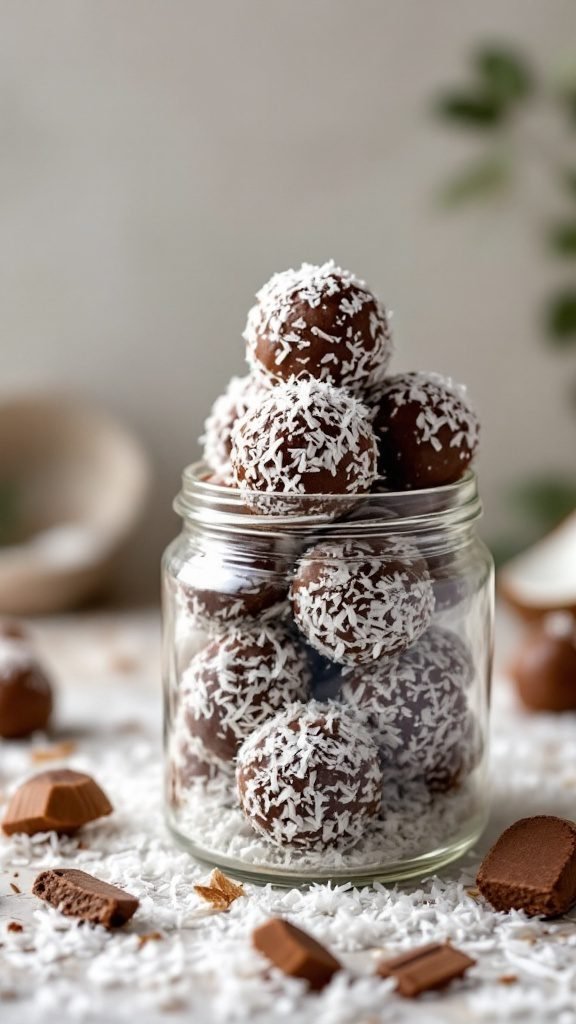
Chocolate Coconut Energy Balls are a delightful treat that packs a nutritious punch. These no-bake snacks are simple to whip up, making them perfect for anyone looking to satisfy their sweet tooth without the guilt. With a delicious blend of chocolate and coconut, they deliver a rich taste while being dairy-free, gluten-free, and low in carbs.
These energy balls are not only a great protein-packed snack but also fit well into a vegan or plant-based lifestyle. Whether you enjoy them as a quick meal option or a post-workout boost, they offer a tasty way to stay on track with your healthy eating goals. Plus, they are perfect for meal prep!
Ingredients
- 1 cup rolled oats
- 1/2 cup almond butter
- 1/4 cup honey or maple syrup
- 1/4 cup cocoa powder
- 1/2 cup shredded coconut
- 1/4 cup protein powder (optional)
- 1/4 teaspoon salt
- 1 teaspoon vanilla extract
- Extra shredded coconut for rolling
Instructions
- Mix Ingredients: In a large bowl, combine rolled oats, almond butter, honey (or maple syrup), cocoa powder, shredded coconut, protein powder (if using), salt, and vanilla extract. Stir until well combined.
- Chill: Cover the mixture and refrigerate for about 30 minutes to make it easier to handle.
- Form Balls: Once chilled, use your hands to roll the mixture into small balls, about 1 inch in diameter.
- Coat: Roll each ball in extra shredded coconut to coat them evenly.
- Store: Place the finished energy balls in an airtight container and store them in the fridge for up to a week.
Berry Swirl Gelato
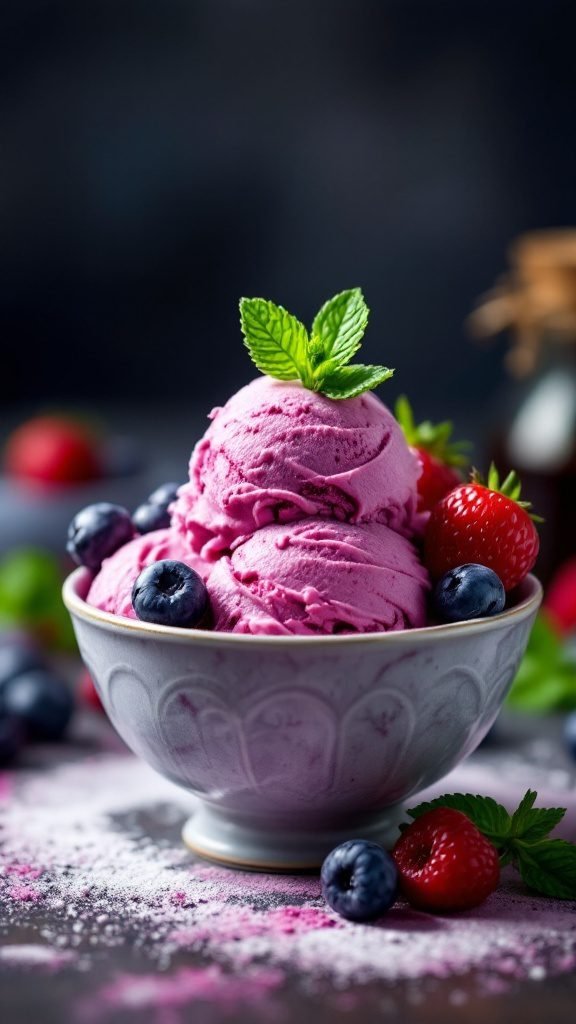
This Berry Swirl Gelato is a delightful no-bake dessert that perfectly captures the essence of summer fruits. It’s bursting with the flavors of fresh berries, creating a creamy and refreshing treat that everyone will love. Simple to whip up, this recipe is perfect for those hot days when you want something sweet without the fuss of baking.
The combination of berries adds a nutritious touch, making it a healthy choice for dessert. Plus, it’s vegan, dairy-free, and can easily fit into various diets, including keto and low-carb lifestyles. Whether you’re hosting a gathering or just looking for a snack, this gelato is sure to impress.
Ingredients
- 2 cups mixed berries (strawberries, blueberries, raspberries)
- 1 can (13.5 oz) coconut milk
- 1/2 cup maple syrup (or sweetener of choice)
- 1 teaspoon vanilla extract
- 1 tablespoon lemon juice
- Pinch of salt
Instructions
- Blend the Berries: In a blender, combine the mixed berries, coconut milk, maple syrup, vanilla extract, lemon juice, and a pinch of salt. Blend until smooth and creamy.
- Create Swirls: Pour half of the berry mixture into a bowl. Add the remaining mixture on top and gently stir with a spoon to create swirls. Be careful not to overmix.
- Freeze the Gelato: Transfer the mixture to an airtight container and freeze for about 4-6 hours, or until firm.
- Serve: When ready to enjoy, scoop into bowls and garnish with fresh berries or mint leaves if desired.
No-Bake Nutella Pie
No-bake Nutella pie is a delightful dessert that’s perfect for any occasion. With its rich, creamy filling and a crunchy base, this pie brings together the beloved taste of Nutella in a simple, fuss-free way. It’s a treat that not only satisfies your sweet tooth but also feels indulgent without the need for an oven.
Making this pie is a breeze, so even if you’re new to cooking or baking, you can whip it up in no time. The combination of flavors and textures makes it a favorite among friends and family. Plus, it can easily fit into various dietary lifestyles, whether you’re looking for something vegan, gluten-free, or just a delicious snack!
Ingredients
- 1 ½ cups chocolate cookie crumbs
- ½ cup unsalted butter, melted
- 1 cup Nutella
- 1 cup whipped cream or coconut cream for a dairy-free option
- 1 teaspoon vanilla extract
- ¼ cup powdered sugar (optional)
- Chopped hazelnuts for topping (optional)
- Chocolate sauce for drizzling (optional)
Instructions
- Prepare the Crust: In a bowl, mix chocolate cookie crumbs with melted butter until well combined. Press the mixture into the bottom and sides of a 9-inch tart pan. Chill in the refrigerator for about 10 minutes to set.
- Make the Filling: In a mixing bowl, combine Nutella, whipped cream, vanilla extract, and powdered sugar if using. Whisk until smooth and creamy.
- Assemble the Pie: Pour the Nutella filling into the chilled crust, spreading it evenly. Chill in the refrigerator for at least 2 hours, or until set.
- Serve: Once set, top with chopped hazelnuts and drizzle with chocolate sauce if desired. Slice and enjoy this delicious, no-bake dessert!
Butterscotch Pretzel Pie
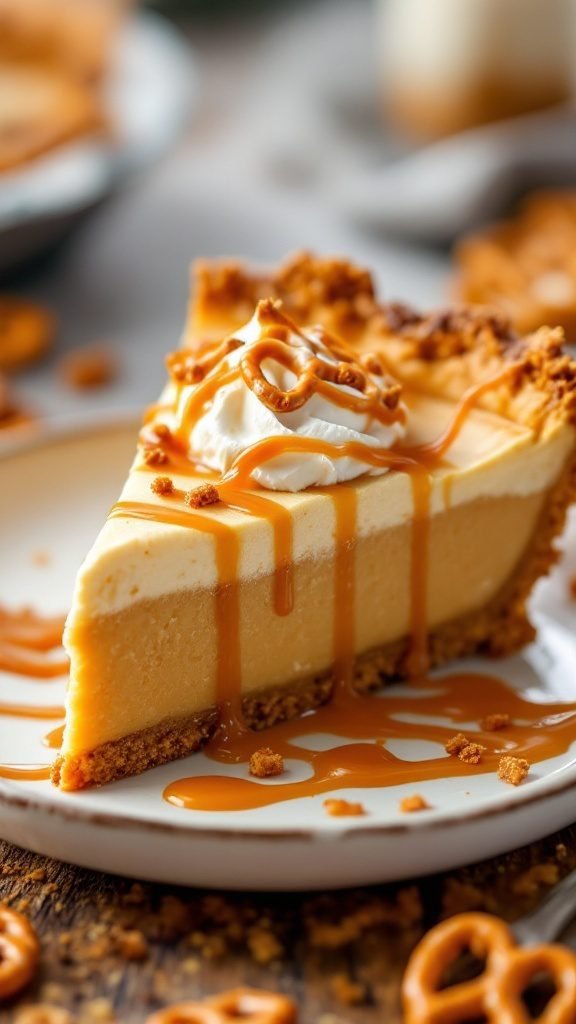
This Butterscotch Pretzel Pie is a delightful no-bake dessert that combines sweet and salty flavors in a creamy, smooth filling. The crunchy pretzel crust adds a fun twist, making it a perfect treat for any occasion. It’s simple to make and comes together quickly, making it ideal for both experienced bakers and kitchen novices.
With its rich butterscotch flavor and a hint of saltiness from the pretzels, this dessert is a crowd-pleaser. Plus, it can easily fit into various dietary preferences. It can be made gluten-free by using gluten-free pretzels and can also be tailored to be lower in sugar if needed. Enjoy this light, creamy treat any time you crave something sweet!
Ingredients
- 2 cups crushed pretzels
- 1/2 cup unsalted butter, melted
- 1/4 cup granulated sugar
- 1 package (3.4 oz) instant butterscotch pudding mix
- 2 cups cold milk
- 1 cup heavy whipping cream
- 1/4 cup powdered sugar
- 1 teaspoon vanilla extract
- Caramel sauce for drizzling
Instructions
- Prepare the Crust: In a bowl, combine crushed pretzels, melted butter, and granulated sugar. Press the mixture firmly into the bottom of a pie dish to form the crust. Place it in the refrigerator to set while preparing the filling.
- Make the Filling: In another bowl, whisk together the instant butterscotch pudding mix and cold milk until smooth. Let it sit for about 5 minutes to thicken.
- Whip the Cream: In a separate bowl, beat the heavy whipping cream with powdered sugar and vanilla extract until stiff peaks form.
- Combine: Gently fold the whipped cream into the butterscotch mixture until fully combined. Pour this filling into the prepared pretzel crust.
- Chill: Refrigerate the pie for at least 4 hours or overnight to allow it to set properly.
- Serve: Drizzle with caramel sauce before serving and enjoy your delicious Butterscotch Pretzel Pie!
Chocolate Raspberry Mousse
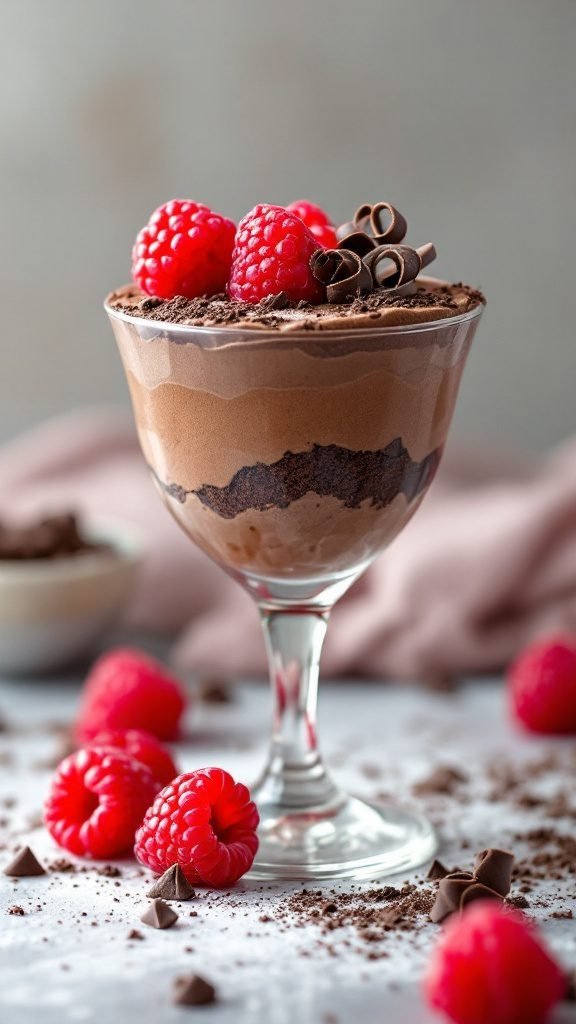
Chocolate Raspberry Mousse is a delightful dessert that combines the rich taste of chocolate with the tartness of fresh raspberries. This recipe is simple to prepare and doesn’t require baking, making it perfect for a quick treat on a warm day. The smooth, creamy texture of the mousse paired with the juicy raspberries offers a satisfying balance of flavors that will surely impress your guests.
This dessert is not only tasty but can also fit various dietary preferences. It can be made dairy-free and is a great option for those following a vegetarian or vegan lifestyle. Plus, it can easily be adapted to be low-carb or keto-friendly without sacrificing flavor. Enjoy this nutritious snack that feels indulgent yet is surprisingly healthy!
Ingredients
- 1 cup dairy-free dark chocolate chips
- 1 cup coconut cream
- 2 tablespoons maple syrup or sweetener of choice
- 1 teaspoon vanilla extract
- 1 cup fresh raspberries
- Chocolate shavings for garnish (optional)
Instructions
- Melt the chocolate: In a microwave-safe bowl, heat the dark chocolate chips in 30-second intervals, stirring until smooth.
- Whip the coconut cream: In a separate bowl, whip the coconut cream until light and fluffy. Add maple syrup and vanilla extract, mixing well.
- Combine: Gently fold the melted chocolate into the whipped coconut cream until fully combined, being careful not to deflate the mixture.
- Layer: In serving dishes, layer the mousse and fresh raspberries. Start with a layer of mousse, add a layer of raspberries, and repeat until the dishes are filled.
- Chill: Refrigerate for at least 1 hour before serving to let the mousse set.
- Serve: Garnish with chocolate shavings and additional raspberries, if desired. Enjoy your delicious Chocolate Raspberry Mousse!
Cinnamon Roll Dip
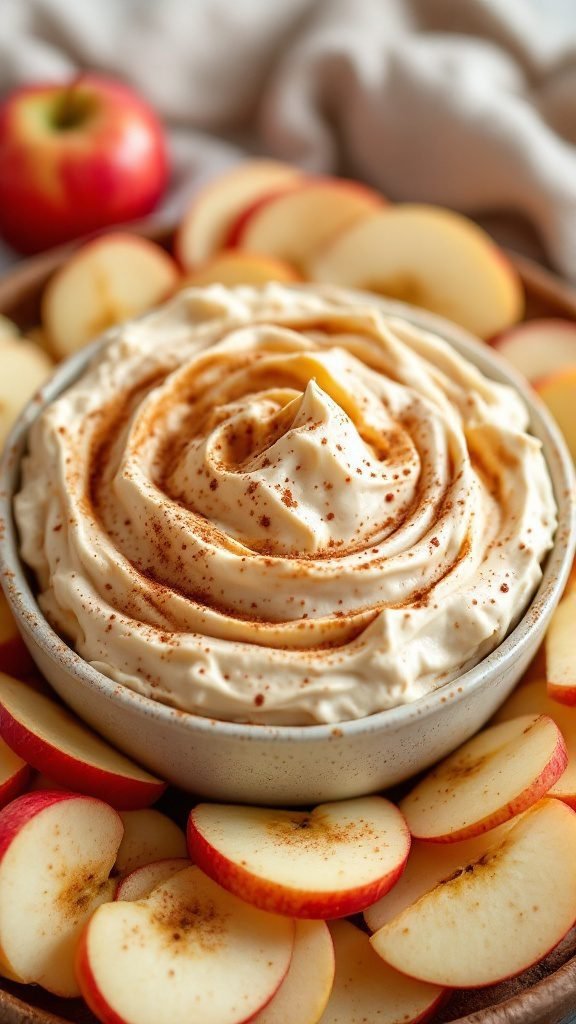
Cinnamon Roll Dip is a delightful dessert that captures the warm and comforting flavors of traditional cinnamon rolls without the need for baking. This no-bake recipe is creamy, sweet, and features a hint of cinnamon that makes every bite feel indulgent. It’s perfect for gatherings, as both kids and adults love dipping into this tasty treat!
Making this dip is incredibly simple, requiring just a few ingredients you probably already have at home. Serve it with fresh apple slices, graham crackers, or even pretzels for a fun and healthy snack option. Whether you’re looking for a quick dessert or a unique addition to your party spread, this cinnamon roll dip is sure to please everyone.
Ingredients
- 1 cup cream cheese, softened
- 1/2 cup powdered sugar
- 1 teaspoon vanilla extract
- 2 teaspoons ground cinnamon
- 1/4 cup Greek yogurt or sour cream
- 1/2 cup chopped pecans (optional)
- Apple slices, graham crackers, or pretzels for serving
Instructions
- In a mixing bowl, combine the softened cream cheese, powdered sugar, vanilla extract, and ground cinnamon. Beat until smooth and creamy.
- Fold in the Greek yogurt or sour cream until fully combined. If using, mix in the chopped pecans for added crunch.
- Transfer the dip to a serving bowl, and sprinkle a little extra cinnamon on top for garnish.
- Serve with apple slices, graham crackers, or pretzels, and enjoy!
Key Lime Pie Cups
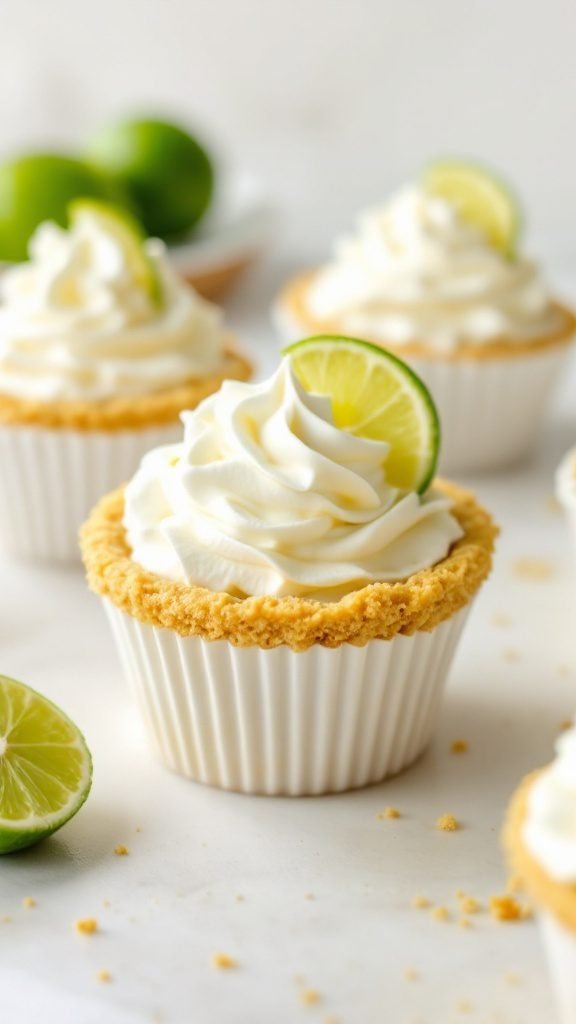
Key Lime Pie Cups are a fresh and tangy dessert that perfectly balances sweetness with a zesty punch. These delightful no-bake treats are made with a creamy lime filling nestled in a crunchy graham cracker crust, making them not only tasty but also simple to prepare. Ideal for warm days, they offer a refreshing end to any meal without heating up the kitchen.
These cups are a great option for various dietary lifestyles. They can be easily adapted to be gluten-free or dairy-free, catering to those who prefer healthier dessert options. Enjoy them as a light snack, a fancy party treat, or just a way to satisfy your sweet tooth. Here’s how to whip up these delicious Key Lime Pie Cups!
Ingredients
- 1 cup graham cracker crumbs
- 1/4 cup melted coconut oil or unsalted butter
- 2 tablespoons sugar or a sugar substitute
- 1 cup cream cheese, softened
- 1/2 cup sweetened condensed milk or a dairy-free alternative
- 1/4 cup fresh lime juice
- 1 tablespoon lime zest
- Whipped cream for topping (optional)
- Slices of lime for garnish (optional)
Instructions
- Prepare the Crust: In a mixing bowl, combine graham cracker crumbs, melted coconut oil or butter, and sugar. Mix until the crumbs are well coated. Press the mixture firmly into the bottom of small cups or ramekins to form the crust.
- Make the Filling: In another bowl, beat the softened cream cheese until smooth. Gradually add sweetened condensed milk, lime juice, and lime zest, mixing until well combined and creamy.
- Assemble the Cups: Pour the lime filling over the prepared crusts, smoothing the tops as needed. Refrigerate for at least 2 hours to allow the flavors to meld and the filling to set.
- Serve: Before serving, top with whipped cream and a slice of lime for a touch of flair. Enjoy these refreshing and easy Key Lime Pie Cups!
No-Bake Matcha Cheesecake
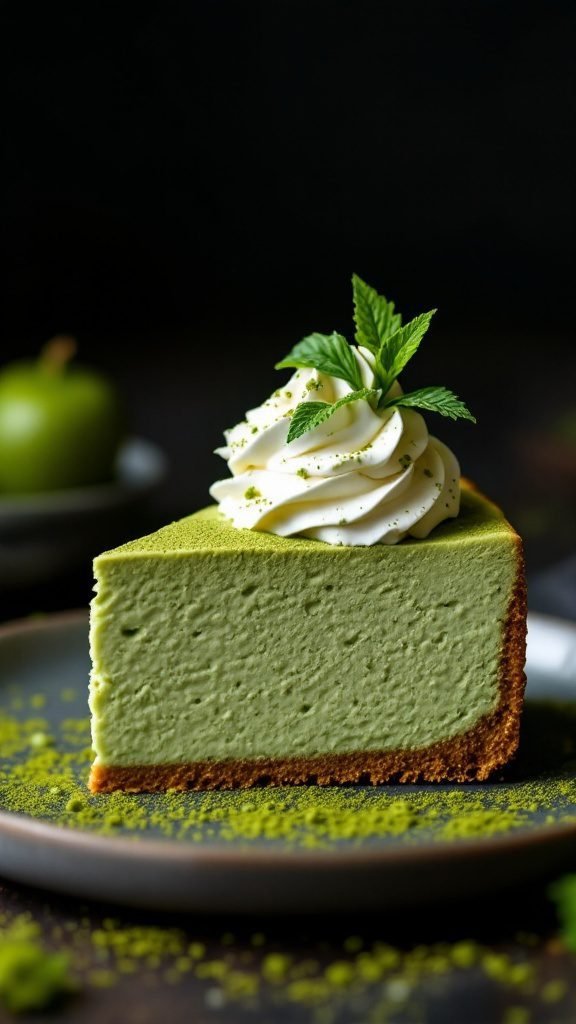
If you’re looking for a delightful dessert that’s both simple and satisfying, the No-Bake Matcha Cheesecake is a great choice. This cheesecake combines the unique flavor of matcha with a creamy texture, making it a refreshing treat. Plus, it’s vegan, gluten-free, and fits perfectly into a healthy lifestyle!
Creating this cheesecake doesn’t require any baking, which makes it perfect for warm weather or when you want to whip up something quick. The matcha adds a beautiful green hue and a hint of earthiness that pairs wonderfully with the sweet, creamy filling. It’s a dessert that impresses without much effort!
Ingredients
- 1 cup cashews (soaked for 4 hours)
- 1 cup coconut cream
- 1/4 cup maple syrup
- 1/4 cup matcha powder
- 1 teaspoon vanilla extract
- 1 tablespoon lemon juice
- 1 cup almond flour (for crust)
- 3 tablespoons coconut oil (melted)
- 2 tablespoons sweetener of choice (optional)
Instructions
- Prepare the Crust: In a bowl, mix almond flour and melted coconut oil. Press the mixture into the bottom of a springform pan to form the crust.
- Blend the Filling: Drain soaked cashews and place them in a blender. Add coconut cream, maple syrup, matcha powder, vanilla extract, and lemon juice. Blend until smooth and creamy.
- Combine: Pour the filling over the crust and smooth the top with a spatula. Refrigerate for at least 4 hours or until set.
- Serve: Once set, slice the cheesecake and top with fresh fruit or coconut whipped cream if desired. Enjoy your delicious and healthy dessert!
Tropical Fruit Tart
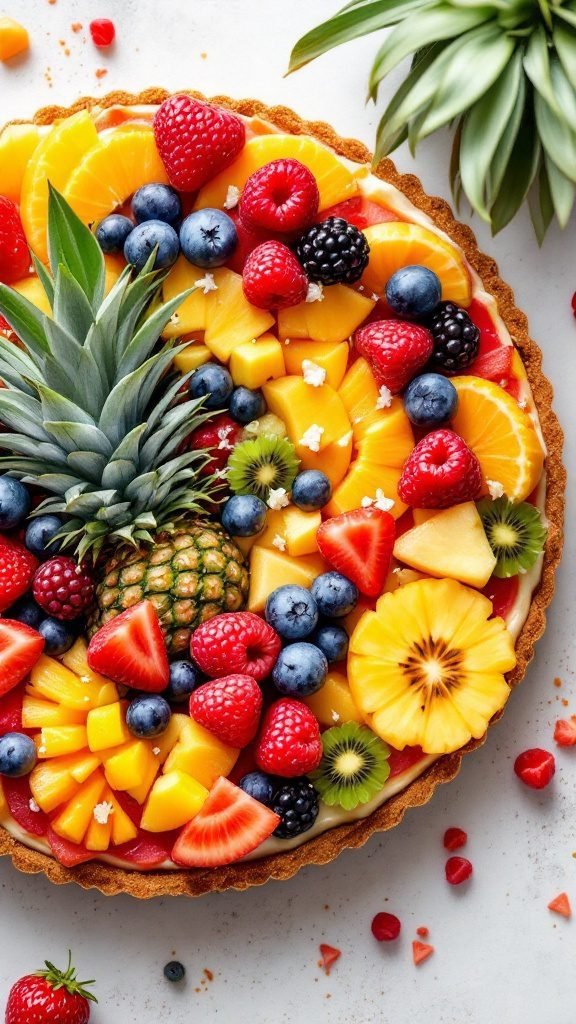
This Tropical Fruit Tart is a delightful no-bake dessert that bursts with flavor and freshness. It’s a perfect choice for warm days, combining the sweetness of ripe fruits with a creamy filling that’s both nutritious and satisfying.
As simple as it is delicious, this tart is great for all lifestyles, being vegetarian, gluten-free, and even vegan with a few tweaks. The vibrant colors and tropical taste make it a stunning centerpiece for any gathering, plus it’s low in fat and packed with vitamins!
Ingredients
- 1 ½ cups crushed graham crackers
- 1/3 cup coconut oil, melted
- 2 cups coconut yogurt or dairy-free yogurt
- 2 tablespoons maple syrup or agave nectar
- 1 teaspoon vanilla extract
- 2 cups mixed tropical fruits (pineapple, mango, kiwi, berries)
- 1 tablespoon shredded coconut (optional)
Instructions
- Make the Crust: In a bowl, mix crushed graham crackers with melted coconut oil. Press the mixture firmly into the bottom and up the sides of a tart pan to create a crust. Refrigerate for at least 30 minutes to set.
- Prepare the Filling: In a separate bowl, combine coconut yogurt, maple syrup, and vanilla extract. Mix until smooth and well combined.
- Assemble the Tart: Once the crust is set, spread the yogurt mixture evenly over the crust. Top with a colorful assortment of tropical fruits.
- Chill and Serve: Refrigerate the tart for at least another hour before serving. Garnish with shredded coconut if desired. Slice and enjoy your refreshing dessert!
Tiramisu Trifle
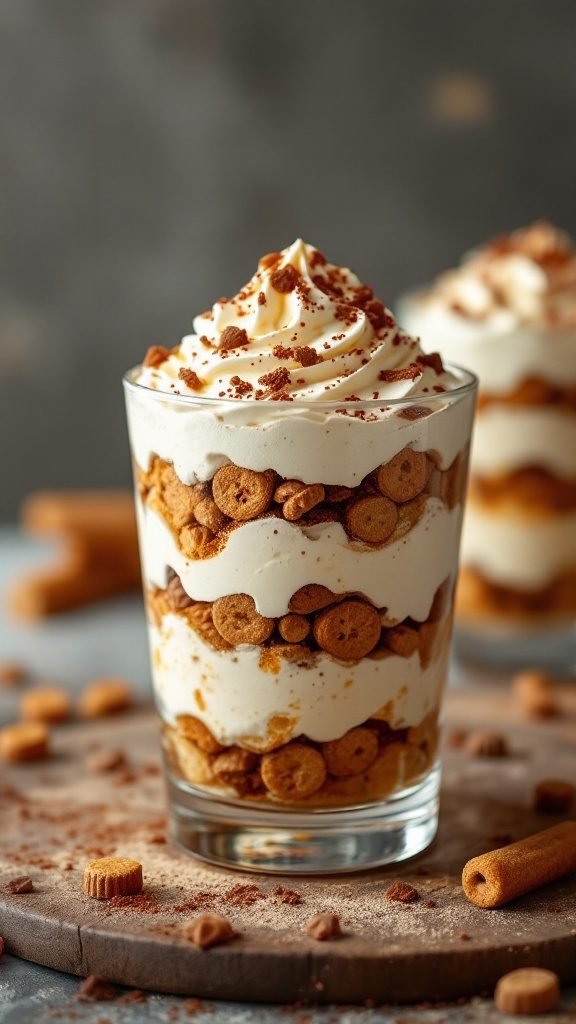
Tiramisu Trifle is a delightful no-bake dessert that combines layers of creamy mascarpone cheese, coffee-soaked cookies, and a hint of cocoa. It’s a treat that’s not only delicious but also simple to whip up, making it perfect for any occasion. The rich flavors and smooth textures come together to create a dessert that feels indulgent yet comforting.
This recipe allows for customization; you can easily make it gluten-free or incorporate a sugar-free alternative. Whether you’re following a keto lifestyle or just looking for a quick dessert, this tiramisu trifle fits the bill. Enjoy it as a healthy snack or a satisfying meal ender!
Ingredients
- 1 cup strong brewed coffee, cooled
- 2 cups mascarpone cheese
- 1 cup heavy cream
- 1/2 cup powdered sugar
- 1 teaspoon vanilla extract
- 2 packages ladyfinger cookies
- Cocoa powder for dusting
Instructions
- Start by preparing the coffee and allowing it to cool to room temperature.
- In a mixing bowl, combine mascarpone cheese, heavy cream, powdered sugar, and vanilla. Whip until soft peaks form.
- Dip each ladyfinger into the cooled coffee for a few seconds until slightly softened, then layer them in the bottom of a glass or trifle dish.
- Add a layer of the mascarpone mixture over the ladyfingers, smoothing it out.
- Repeat the layering process until you’ve used all the ingredients, finishing with a layer of mascarpone on top.
- Dust the top with cocoa powder. Chill in the refrigerator for at least 2 hours before serving to let the flavors meld.
Chocolate Lava Cake Cups
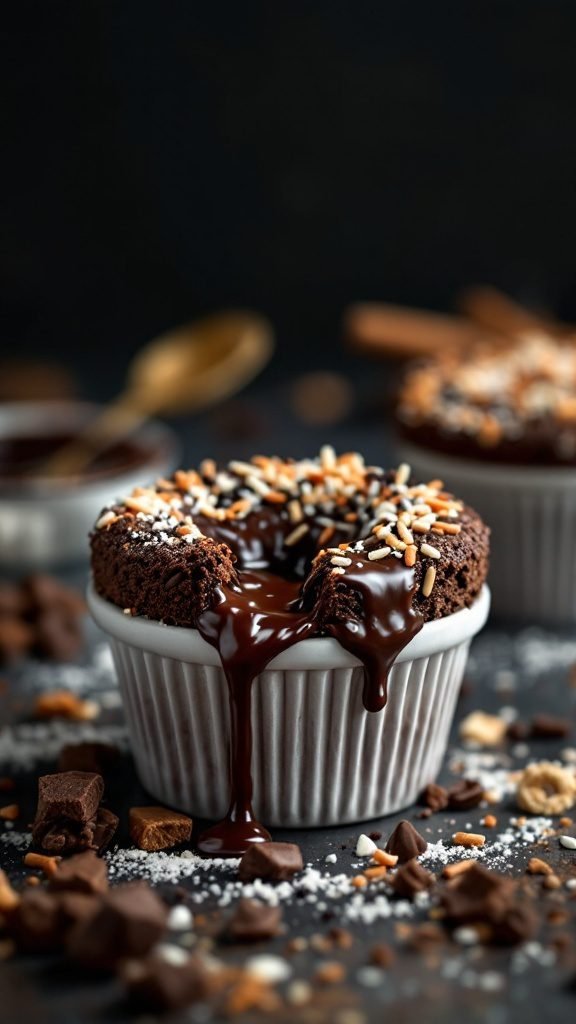
Chocolate lava cake cups are a delightful treat that brings indulgence without the hassle of baking. With their rich, gooey center, these cups provide a mouthwatering chocolate experience perfect for any dessert lover. They’re a simple recipe, making it easy to whip up a batch in no time.
These dessert cups fit beautifully into a variety of diets, like keto and low carb, while still being a fun and satisfying snack. Not only are they delicious, but they can also be made dairy-free or vegan for those following plant-based lifestyles, ensuring everyone can enjoy this sweet delight!
Ingredients
- 1 cup dark chocolate chips (or dairy-free chips)
- 1/2 cup coconut oil
- 1/4 cup maple syrup (or agave for vegan)
- 2 large eggs (or flax eggs for vegan)
- 1/4 cup almond flour
- 1/4 teaspoon baking powder
- 1/2 teaspoon vanilla extract
- Pinch of salt
Instructions
- Melt the chocolate and coconut oil together in a microwave-safe bowl, heating in short bursts until smooth.
- In another bowl, whisk together the maple syrup, eggs, vanilla extract, and salt until combined.
- Add the melted chocolate mixture to the egg mixture and stir until well combined.
- Fold in the almond flour and baking powder until just mixed.
- Grease your ramekins and divide the batter evenly among them.
- Chill in the refrigerator for at least 30 minutes before serving.
- When ready to enjoy, microwave each cup for about 30-40 seconds until the edges are set but the center is still soft.
- Serve warm, optionally topped with whipped cream or fresh berries!
Frozen Banana Bites
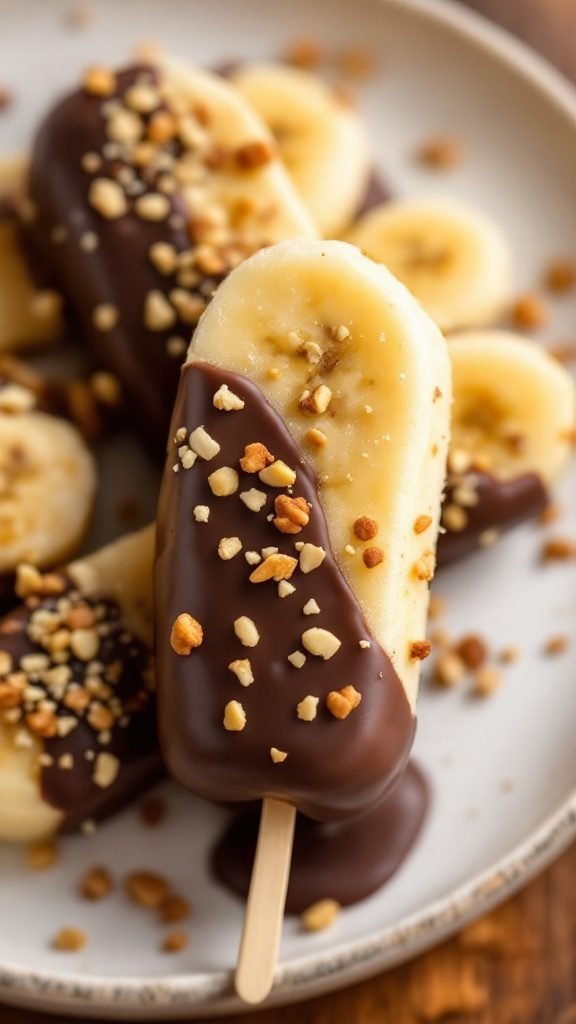
Frozen banana bites are a delightful treat that combines creamy bananas with a satisfying chocolate coating. These snacks are not only simple to make but also cater to various dietary preferences, being vegan, gluten-free, and low-fat. The sweet yet subtly healthy flavor of bananas paired with rich chocolate creates a perfect balance that’s irresistible.
In just a few easy steps, you can whip up these tasty snacks, making them a great option for a quick dessert or a nutritious snack. They’re fun to make and even better to eat, perfect for warm days or anytime you crave something sweet without the guilt!
Ingredients
- 2 ripe bananas
- 1 cup dark chocolate chips (or dairy-free chocolate for a vegan version)
- 1 tablespoon coconut oil
- Chopped nuts (like almonds or peanuts) for topping
Instructions
- Prepare the Bananas: Peel the bananas and cut them into bite-sized chunks or slices. Place them on a parchment-lined baking sheet.
- Melt the Chocolate: In a microwave-safe bowl, combine dark chocolate chips and coconut oil. Microwave in 30-second intervals, stirring in between, until melted and smooth.
- Coat the Bananas: Dip each banana piece into the melted chocolate, ensuring it’s fully covered. Tap off any excess chocolate and place it back on the baking sheet.
- Add the Toppings: While the chocolate is still soft, sprinkle the chopped nuts over the top of each banana bite.
- Freeze: Place the baking sheet in the freezer for at least 1-2 hours, or until the chocolate is set and the banana pieces are firm.
- Serve: Once frozen, enjoy your delicious frozen banana bites straight from the freezer!
Pumpkin Spice Energy Bites
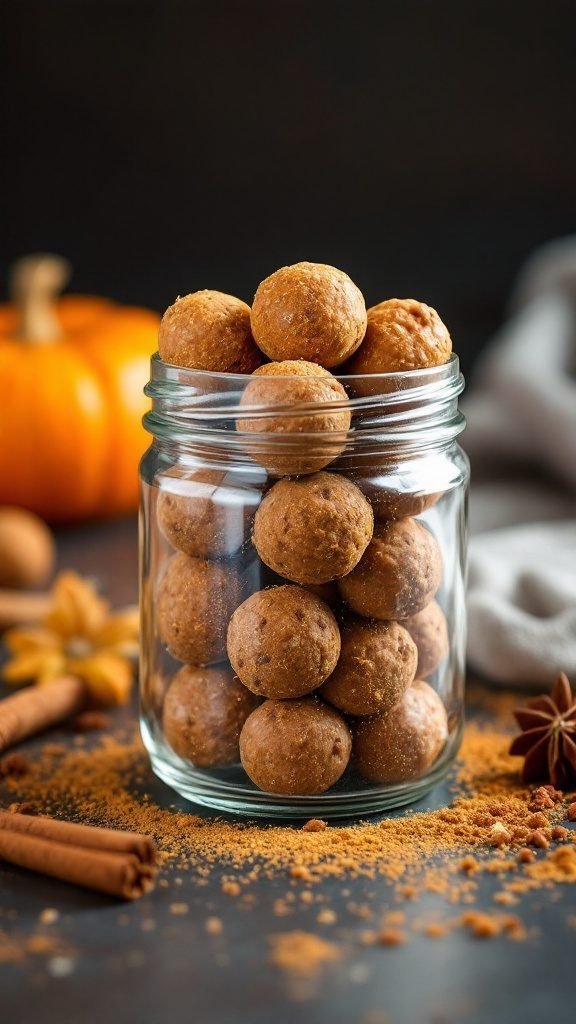
These Pumpkin Spice Energy Bites are the perfect treat for anyone looking for a quick snack that’s both nutritious and delicious. Packed with protein and a hint of autumn spices, these no-bake bites are a great way to satisfy your sweet tooth without the guilt. They’re incredibly easy to make, requiring just a few simple ingredients that come together in no time.
Ideal for a busy lifestyle, these energy bites are gluten-free, vegan, and can easily fit into a keto or sugar-free diet. With a delightful blend of pumpkin flavor and spices, they make for a healthy snack or dessert that everyone will love!
Ingredients
- 1 cup rolled oats
- 1/2 cup pumpkin puree
- 1/2 cup almond butter (or peanut butter)
- 1/4 cup maple syrup
- 1 teaspoon vanilla extract
- 1 teaspoon pumpkin spice
- 1/4 teaspoon salt
- 1/4 cup chocolate chips (optional)
Instructions
- Mix Ingredients: In a large bowl, combine rolled oats, pumpkin puree, almond butter, maple syrup, vanilla extract, pumpkin spice, and salt. Stir until well mixed.
- Add Chocolate Chips: If desired, fold in chocolate chips for an extra treat.
- Form Bites: Using your hands, roll the mixture into small balls, about 1 inch in diameter.
- Chill: Place the bites on a baking sheet lined with parchment paper and refrigerate for at least 30 minutes to firm up.
- Store: Once chilled, transfer the energy bites to an airtight container and store in the fridge for up to a week.
Caramel Pecan Pie Cups
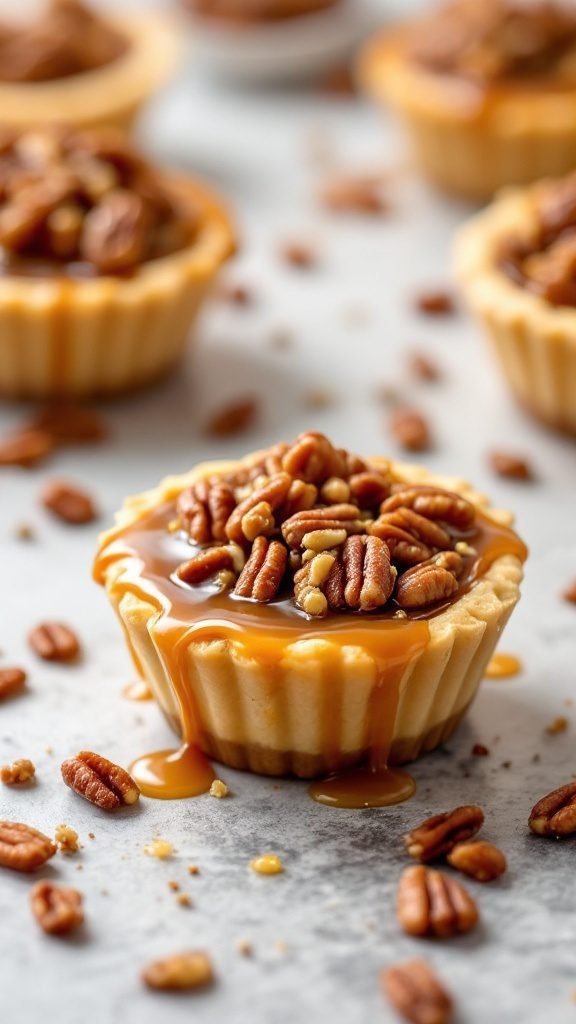
Caramel Pecan Pie Cups are a delightful no-bake dessert that brings the classic flavors of pecan pie into a fun, handheld treat. These cups offer a creamy filling with a rich caramel flavor, perfectly complemented by crunchy pecans on top. They’re not only delicious but also simple to make, making them a great choice for any occasion.
Perfect for those who follow a vegetarian or gluten-free lifestyle, these little cups can also be made keto-friendly with a few adjustments. They are the kind of treat that feels indulgent without the guilt, fitting right into a healthy eating plan. Give these a try for your next gathering, and watch everyone enjoy this sweet and nutty snack!
Ingredients
- 1 cup crushed graham crackers (or gluten-free alternative)
- 1/4 cup melted coconut oil
- 1/2 cup cream cheese, softened
- 1 cup powdered sugar
- 1 teaspoon vanilla extract
- 1/2 cup caramel sauce
- 1 cup pecans, chopped
Instructions
- Prepare the crust: In a bowl, combine crushed graham crackers and melted coconut oil. Mix until well combined. Press this mixture into the bottom of small cups or muffin tins to form a crust.
- Make the filling: In a separate bowl, beat together cream cheese, powdered sugar, and vanilla extract until smooth and creamy. Spoon this mixture evenly into the cups over the crust.
- Add caramel and pecans: Drizzle caramel sauce over the cream cheese filling and top with chopped pecans.
- Chill: Place the cups in the refrigerator for at least 2 hours to set before serving. Enjoy your delicious Caramel Pecan Pie Cups!
Coconut Lime Energy Balls
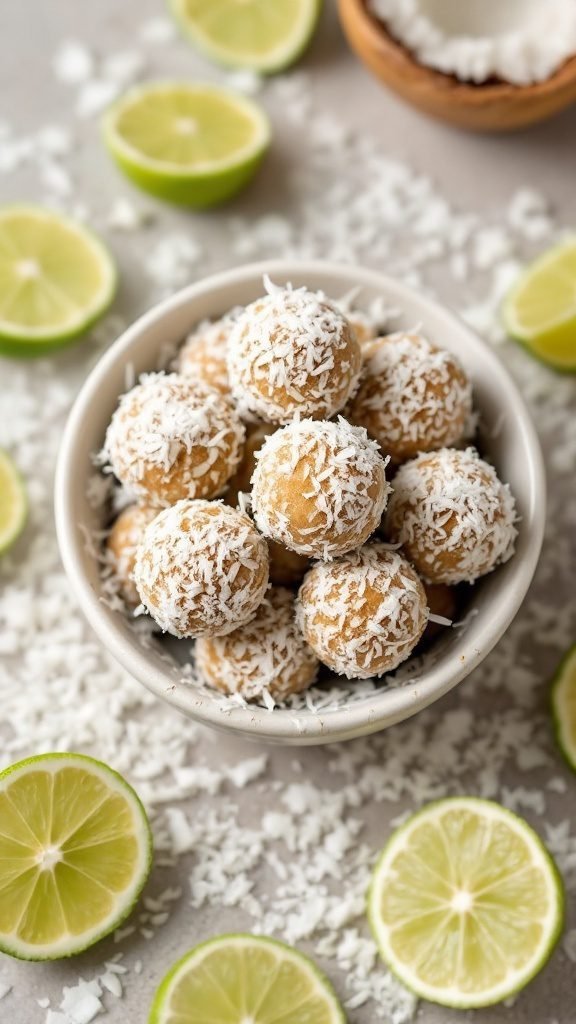
Coconut Lime Energy Balls are a delightful and refreshing no-bake treat. They combine zesty lime with the rich creaminess of coconut, resulting in a snack that’s both tangy and slightly sweet. These little bites are perfect for satisfying cravings without guilt, making them a great addition to any healthy lifestyle.
Easy to make and packed with protein, these energy balls can fit into various diets, including vegan and gluten-free. With just a few ingredients and no oven required, they’re a quick and nutritious snack option for any time of day.
Ingredients
- 1 cup rolled oats
- 1/2 cup almond butter or peanut butter
- 1/4 cup honey or maple syrup
- 1/2 cup shredded coconut
- Zest of 1 lime
- 2 tablespoons lime juice
- 1 teaspoon vanilla extract
- 1/4 cup chia seeds (optional)
Instructions
- In a large mixing bowl, combine rolled oats, almond butter, honey, shredded coconut, lime zest, lime juice, and vanilla extract. Mix until well combined.
- If using, fold in chia seeds for added texture and nutrition.
- Once the mixture is thoroughly combined, use your hands to roll it into small balls, about 1 inch in diameter.
- Roll each ball in additional shredded coconut for a nice coating.
- Place the energy balls on a baking sheet lined with parchment paper and refrigerate for at least 30 minutes to firm up.
- Store in an airtight container in the fridge for up to a week or freeze for longer storage.
Chocolate Mint No-Bake Cookies
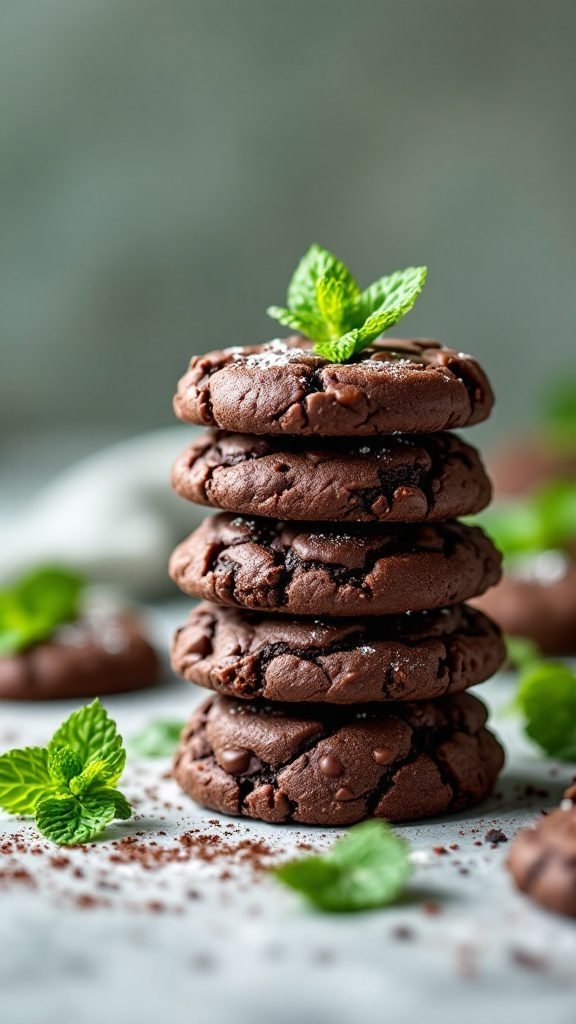
Chocolate Mint No-Bake Cookies are a delightful treat that combines rich chocolate flavor with a refreshing hint of mint. These cookies are incredibly simple to make, requiring no oven, which is perfect for those warmer days when you want something sweet without heating up your kitchen.
With a chewy texture and a burst of minty freshness, these cookies are a fantastic option for a quick dessert, snack, or even a healthy meal addition. They can easily fit into various diets, including vegan and gluten-free, making them a versatile choice for anyone looking to satisfy their sweet tooth with a nutritious twist.
Ingredients
- 1 cup rolled oats
- 1/2 cup almond butter (or any nut butter)
- 1/3 cup cocoa powder
- 1/4 cup maple syrup
- 1 teaspoon vanilla extract
- 1/2 teaspoon peppermint extract
- Pinch of salt
- 1/4 cup dark chocolate chips (optional)
Instructions
- Mix Ingredients: In a mixing bowl, combine rolled oats, almond butter, cocoa powder, maple syrup, vanilla extract, peppermint extract, and salt. Stir until well mixed.
- Add Chocolate Chips: If using, fold in the dark chocolate chips for extra indulgence.
- Form Cookies: Use your hands to form small balls or drop spoonfuls onto parchment paper, flattening them slightly.
- Chill: Place the cookies in the refrigerator for about 30 minutes to set.
- Enjoy: Once firm, serve and enjoy your delicious Chocolate Mint No-Bake Cookies!
Chocolate Coconut Cream Cups
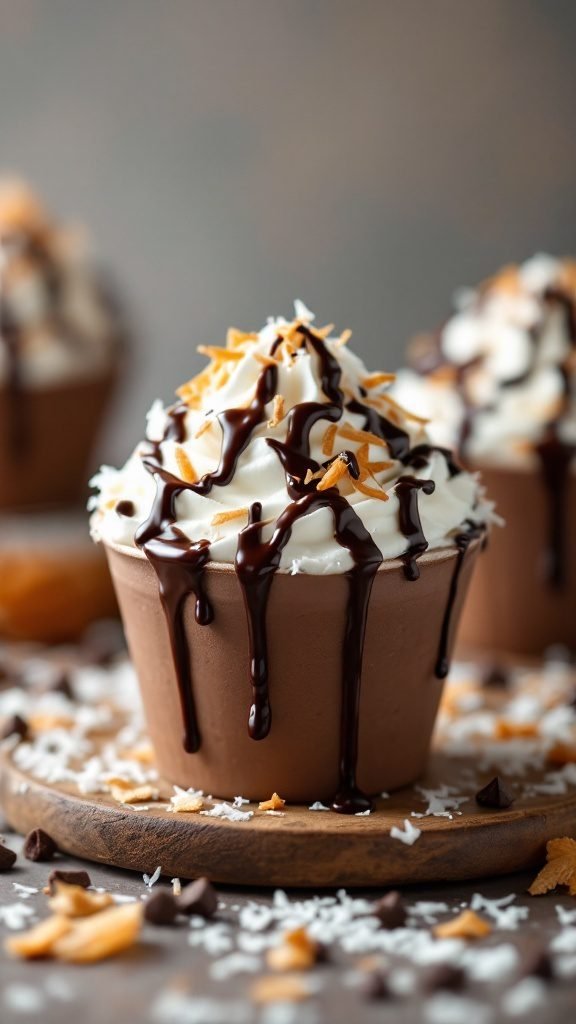
Chocolate Coconut Cream Cups are a delightful treat that perfectly combines the rich flavors of chocolate and coconut. These no-bake desserts are not only simple to whip up, but they also offer a creamy texture that melts in your mouth. Ideal for satisfying your sweet tooth, they make a delicious snack or dessert for any occasion.
With a mix of chocolate, whipped cream, and shredded coconut, these cups cater to various dietary preferences. They are gluten-free, vegetarian, and can easily be made dairy-free and vegan by substituting a few ingredients. Enjoy these nutritious and healthy treats as part of a balanced diet, or simply indulge when you’re craving something sweet!
Ingredients
- 1 cup dark chocolate chips
- 1 cup coconut cream, chilled
- 1/4 cup powdered sugar
- 1 teaspoon vanilla extract
- 1/2 cup shredded coconut, toasted
- Chocolate syrup for drizzling
Instructions
- Melt the dark chocolate chips in a microwave-safe bowl, stirring every 30 seconds until smooth. Allow to cool slightly.
- In a mixing bowl, whip the chilled coconut cream until fluffy. Gradually add in powdered sugar and vanilla extract, mixing until well combined.
- Spoon a layer of melted chocolate into the bottom of each cup. Let it set in the fridge for about 10 minutes.
- Add a layer of the coconut cream mixture on top of the chocolate layer. Repeat the layers until the cups are filled, finishing with a layer of coconut cream.
- Drizzle chocolate syrup on top and sprinkle with toasted shredded coconut. Chill for at least an hour before serving.
Fruit Pizza with Cream Cheese Frosting
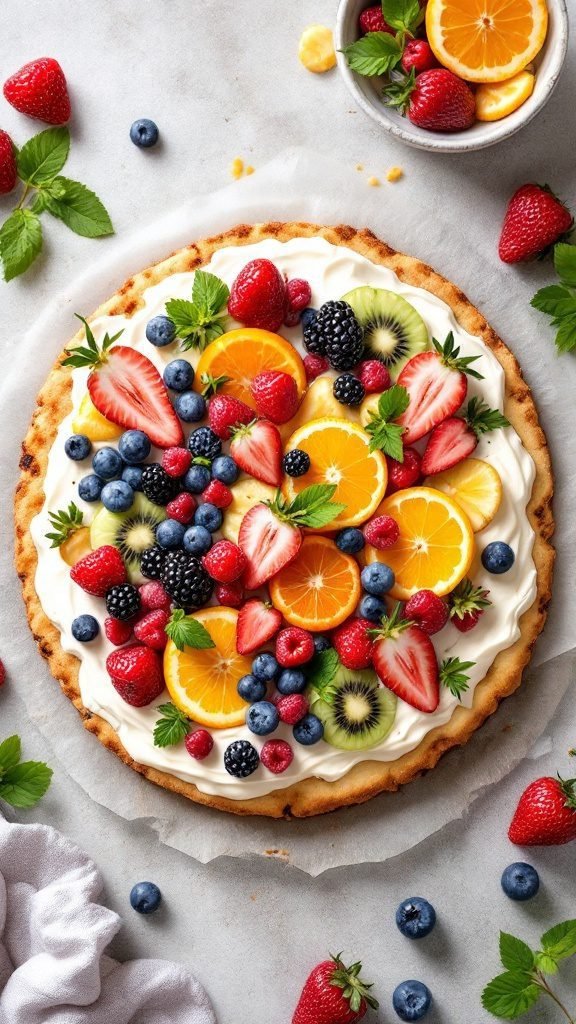
This Fruit Pizza with Cream Cheese Frosting is a delightful treat that’s perfect for any occasion! It combines a soft, sweet crust with a creamy frosting and a vibrant array of fresh fruits. The taste is a wonderful balance of sweet and tangy, making it a refreshing dessert that’s loved by both kids and adults alike.
Not only is this recipe simple to whip up, but it’s also a no-bake option, which is great for those hot summer days. You can customize it with your favorite fruits, making it a versatile choice for a healthy snack or a special meal. It’s suitable for various diets, including vegetarian and gluten-free, so everyone can enjoy a slice!
Ingredients
- 1 pre-made sugar cookie dough or gluten-free cookie dough
- 8 oz cream cheese, softened
- 1/2 cup powdered sugar
- 1 teaspoon vanilla extract
- 2 cups mixed fresh fruits (strawberries, blueberries, kiwi, raspberries, etc.)
- Mint leaves for garnish (optional)
Instructions
- Prepare the Crust: Preheat your oven according to the cookie dough package instructions. Roll out the dough into a large circle on a baking sheet lined with parchment paper. Bake according to package directions until golden brown. Allow it to cool completely.
- Make the Frosting: In a mixing bowl, combine softened cream cheese, powdered sugar, and vanilla extract. Beat until smooth and creamy.
- Assemble the Pizza: Once the cookie crust is cool, spread the cream cheese frosting evenly over the top. Arrange your fresh fruits in a colorful pattern on top of the frosting.
- Garnish and Serve: Add mint leaves for a pop of color if desired. Slice into wedges and serve immediately or refrigerate until ready to enjoy.
Frozen Yogurt Bark

Frozen yogurt bark is a delightful, easy-to-make dessert that combines creamy yogurt with crunchy toppings. This no-bake treat is not only refreshing but also customizable. You can adjust the toppings to fit your taste, making it a fun activity for everyone!
Packed with protein and made from wholesome ingredients, this frozen yogurt bark is perfect for a healthy snack or a satisfying dessert. It’s vegan, dairy-free, and can easily be made sugar-free if you prefer. Enjoy the combination of fruity flavors and textures while sticking to your dietary lifestyle!
Ingredients
- 2 cups dairy-free yogurt
- 1/4 cup honey or maple syrup (optional for sweetness)
- 1 cup mixed berries (strawberries, blueberries, raspberries)
- 1/4 cup chopped nuts (almonds or walnuts)
- 1 tablespoon chia seeds (optional)
Instructions
- Prepare the Yogurt Base: In a mixing bowl, combine the dairy-free yogurt and honey or maple syrup. Stir until well mixed.
- Spread Yogurt: Line a baking sheet with parchment paper. Pour the yogurt mixture onto the sheet, spreading it evenly to about 1/2 inch thick.
- Add Toppings: Sprinkle the mixed berries, chopped nuts, and chia seeds evenly over the yogurt.
- Freeze: Place the baking sheet in the freezer for about 2-4 hours or until fully set.
- Cut and Serve: Once frozen, remove from the freezer, cut into pieces, and enjoy your nutritious snack!
No Bake Strawberry Cheesecake Cups
No Bake Strawberry Cheesecake Cups are a delightful treat that’s both creamy and fruity. These individual desserts are perfect for anyone who loves the classic cheesecake flavor without the fuss of baking. The combination of tangy cream cheese, fresh strawberries, and a crunchy cookie base creates a mouthwatering snack that feels indulgent yet is easy to prepare.
Not only are these cups incredibly simple to make, but they also cater to a variety of dietary needs. They can be adjusted to be gluten-free, low carb, or even vegan, ensuring everyone can enjoy this delicious dessert. Perfect for parties or a sweet snack at home, they’re sure to impress!
Ingredients
- 1 cup graham cracker crumbs (or gluten-free alternative)
- 1/4 cup melted coconut oil or butter
- 2 cups cream cheese, softened
- 1/2 cup powdered sugar (or sugar-free alternative)
- 1 teaspoon vanilla extract
- 1 cup heavy cream (or coconut cream for dairy-free)
- 1 cup fresh strawberries, chopped
- Strawberry sauce for drizzling (optional)
Instructions
- Prepare the Base: In a bowl, mix the graham cracker crumbs with melted coconut oil until combined. Divide the mixture evenly among small cups and press down to form a crust.
- Make the Cheesecake Filling: In another bowl, beat the softened cream cheese, powdered sugar, and vanilla extract until smooth. In a separate bowl, whip the heavy cream until stiff peaks form. Gently fold the whipped cream into the cream cheese mixture until fully combined.
- Assemble the Cups: Spoon the cream cheese filling over the crust in each cup, smoothing the tops. Refrigerate for at least 2 hours to set.
- Serve: Top with fresh strawberries and a drizzle of strawberry sauce before serving. Enjoy your delicious no-bake cheesecake cups!
Caramel Chocolate Pretzel Treats
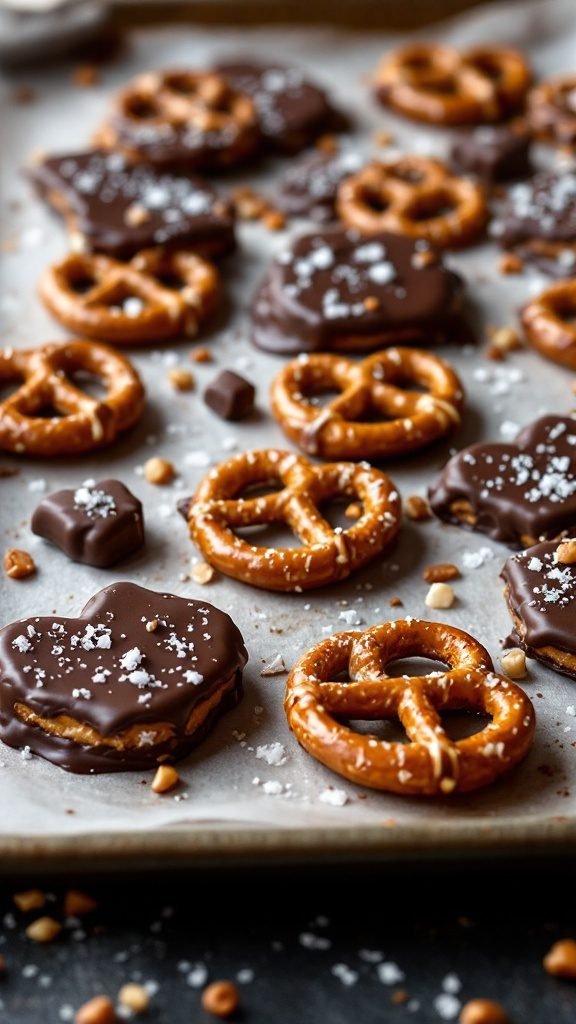
Caramel Chocolate Pretzel Treats are a delightful blend of sweet and salty flavors that make for a perfect no-bake dessert. With a crunchy pretzel base coated in creamy chocolate and topped with a hint of sea salt, these treats are simply irresistible. They’re quick and easy to prepare, making them a great option for parties or a satisfying snack at home.
This recipe is not only delicious but also versatile. You can easily make it gluten-free by using suitable pretzels, and it’s a fun treat for those following a vegetarian or even a low-carb lifestyle. Enjoy these treats without the guilt, as they can fit into various dietary preferences!
Ingredients
- 2 cups pretzels (gluten-free if desired)
- 1 cup caramel sauce (store-bought or homemade)
- 1 ½ cups semi-sweet or dark chocolate chips
- 1 tablespoon coconut oil (optional, for smoother melting)
- Sea salt flakes, for topping
Instructions
- Prepare the Pretzels: Lay out the pretzels on a baking sheet lined with parchment paper.
- Add Caramel: Drizzle or spoon the caramel sauce over the pretzels, ensuring they are well-coated.
- Melt the Chocolate: In a microwave-safe bowl, combine the chocolate chips and coconut oil (if using). Microwave in 30-second intervals, stirring in between until melted and smooth.
- Coat the Pretzels: Dip the caramel-coated pretzels into the melted chocolate, covering them completely. Place them back on the parchment paper.
- Add Toppings: Sprinkle a pinch of sea salt on each pretzel before the chocolate sets.
- Chill: Refrigerate the treats for about 30 minutes or until the chocolate is firm. Enjoy your delicious Caramel Chocolate Pretzel Treats!
Mango Lassi Popsicles
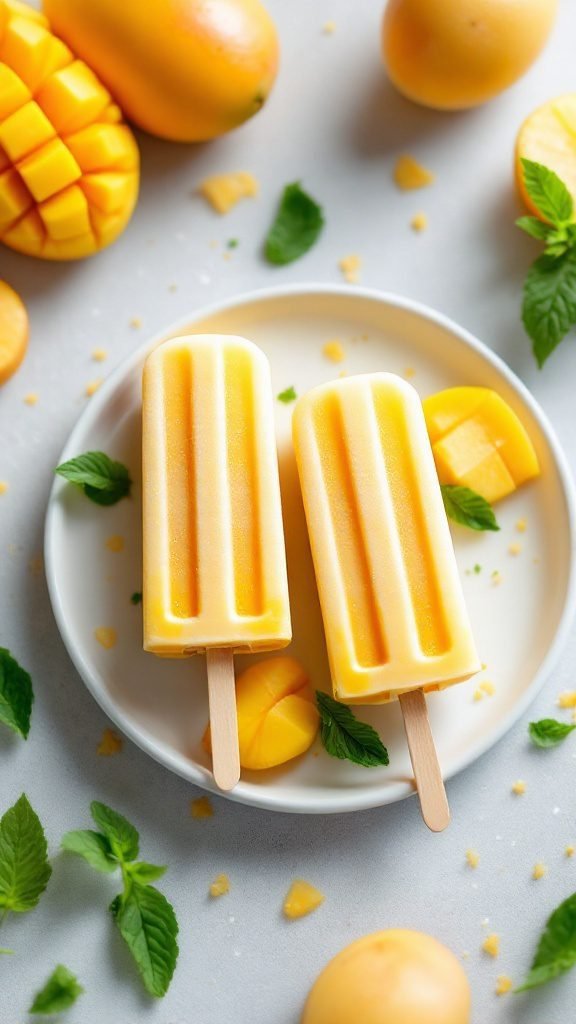
Mango Lassi Popsicles are a delightful twist on the traditional Indian drink, combining creamy yogurt and sweet mangoes into a refreshing frozen treat. These popsicles are not only simple to make, but they also offer a delicious way to enjoy the tropical flavors of mango along with the tang of yogurt. Perfect for hot days, they are a great healthy snack or dessert option that everyone will love.
These popsicles are low in fat and can easily fit into a low-carb or vegan lifestyle. With a few ingredients and minimal effort, you can whip up a batch in no time, making them a fun treat for any occasion. So grab your blender and let’s get started!
Ingredients
- 2 ripe mangoes, peeled and diced
- 1 cup unsweetened yogurt (dairy or plant-based)
- 1/4 cup honey or maple syrup (adjust to taste)
- 1/2 teaspoon ground cardamom (optional)
- 1 tablespoon lime juice
- Pinch of salt
Instructions
- Blend Ingredients: In a blender, combine the diced mangoes, yogurt, honey or maple syrup, cardamom, lime juice, and salt. Blend until smooth.
- Pour Mixture: Pour the blended mixture into popsicle molds, leaving a little space at the top for expansion.
- Add Sticks: Insert popsicle sticks into the molds and carefully tap them on the counter to remove any air bubbles.
- Freeze: Place the molds in the freezer and freeze for at least 4-6 hours, or until completely solid.
- Unmold: To remove the popsicles, run warm water over the outside of the molds for a few seconds. Gently pull out the popsicles and enjoy!
Peanut Butter Banana Smoothie Bowl
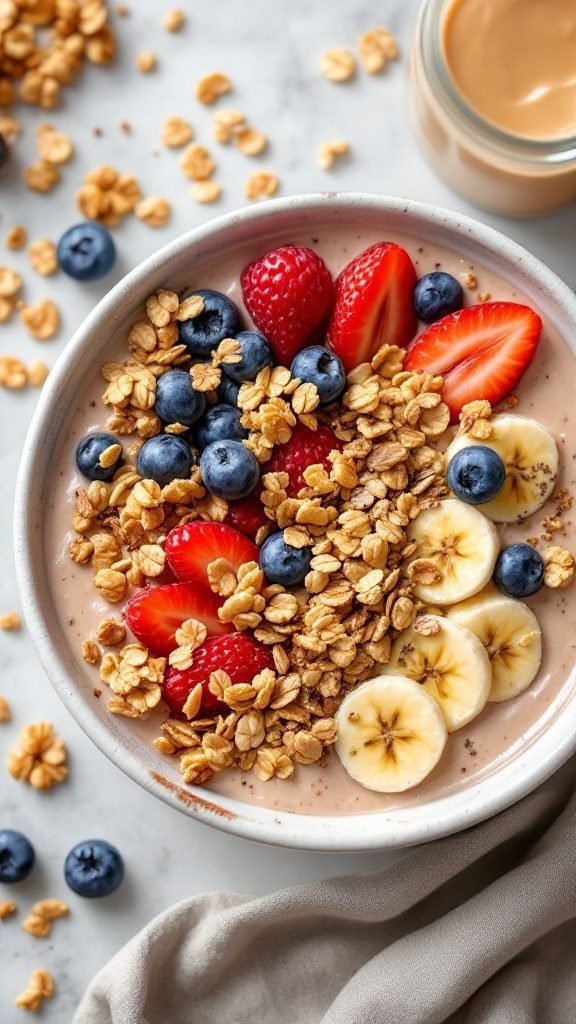
This Peanut Butter Banana Smoothie Bowl is an easy, tasty treat that combines the rich flavors of peanut butter and ripe bananas. It’s not only satisfying but also packed with nutrients, making it a great option for a quick snack or a light meal. With its creamy texture and natural sweetness, it’s perfect for those who want something delicious without the fuss of baking.
Loaded with protein and fiber, this no-bake dessert fits well into various dietary lifestyles, including vegan, vegetarian, and gluten-free. You can easily customize it with your favorite toppings, like fresh fruit or granola, to add some crunch and flavor!
Ingredients
- 2 ripe bananas
- 1 cup almond milk (or your preferred milk)
- 1/4 cup peanut butter
- 1 tablespoon honey (or maple syrup for a vegan option)
- 1/2 teaspoon vanilla extract
- Toppings: sliced bananas, granola, fresh berries, or nuts
Instructions
- Blend the Bananas: In a blender, combine the ripe bananas, almond milk, peanut butter, honey, and vanilla extract. Blend until smooth and creamy.
- Adjust Consistency: If the mixture is too thick, add a little more almond milk until you reach your desired consistency.
- Serve: Pour the smoothie into a bowl and add your favorite toppings. Think fresh banana slices, a sprinkle of granola, and a few berries for a colorful finish.
- Enjoy: Dive in with a spoon and relish this nutritious, satisfying snack!
Peanut Butter Banana Oat Bars
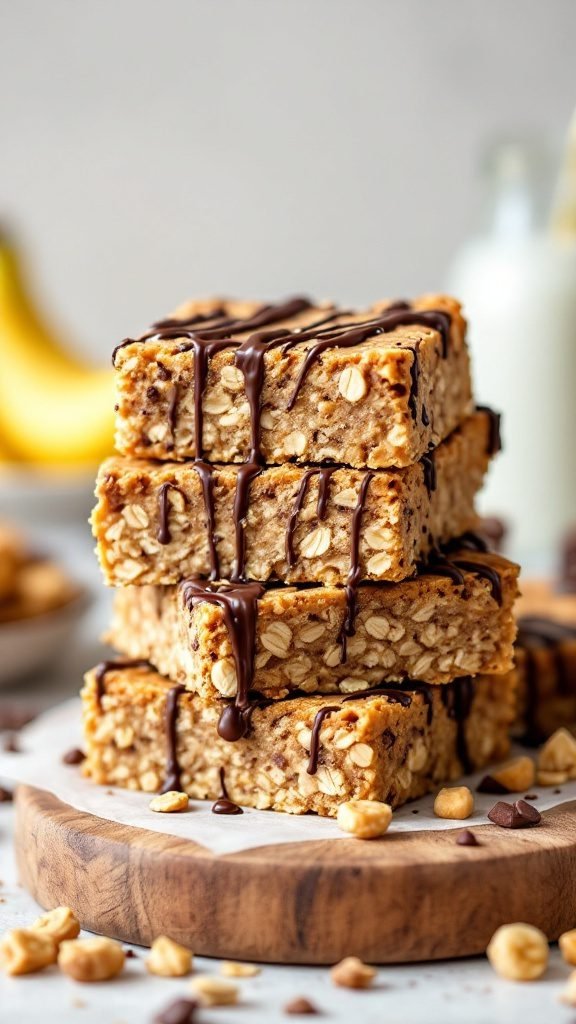
These Peanut Butter Banana Oat Bars are a delightful treat that perfectly combines the flavors of peanut butter and ripe bananas. They offer a chewy texture and a hint of sweetness that makes them a great snack or dessert. Plus, they’re easy to prepare, requiring no baking, which means you can whip them up in no time!
Ideal for those following a vegetarian or plant-based lifestyle, these bars are packed with protein and are naturally gluten-free. They make a nutritious option for a meal or snack, providing a good source of energy. Enjoy them as a quick breakfast on the go or a sweet treat after dinner!
Ingredients
- 2 cups rolled oats
- 1 cup mashed ripe bananas (about 2 large bananas)
- 1/2 cup peanut butter (or any nut butter of your choice)
- 1/4 cup honey or maple syrup
- 1/2 teaspoon vanilla extract
- 1/4 teaspoon salt
- 1/2 cup dark chocolate chips (optional)
Instructions
- In a large mixing bowl, combine the mashed bananas, peanut butter, honey (or maple syrup), vanilla extract, and salt. Mix well until smooth.
- Add the rolled oats to the mixture and stir until all the oats are evenly coated.
- If using, fold in the dark chocolate chips for added sweetness.
- Line an 8×8-inch baking dish with parchment paper, leaving some overhang for easy removal. Press the oat mixture firmly into the bottom of the dish, ensuring an even layer.
- Refrigerate for at least 1 hour until set. Once firm, lift the bars out using the parchment paper and cut into squares.
- Store in an airtight container in the fridge for up to a week.
Coconut Lime Energy Bites
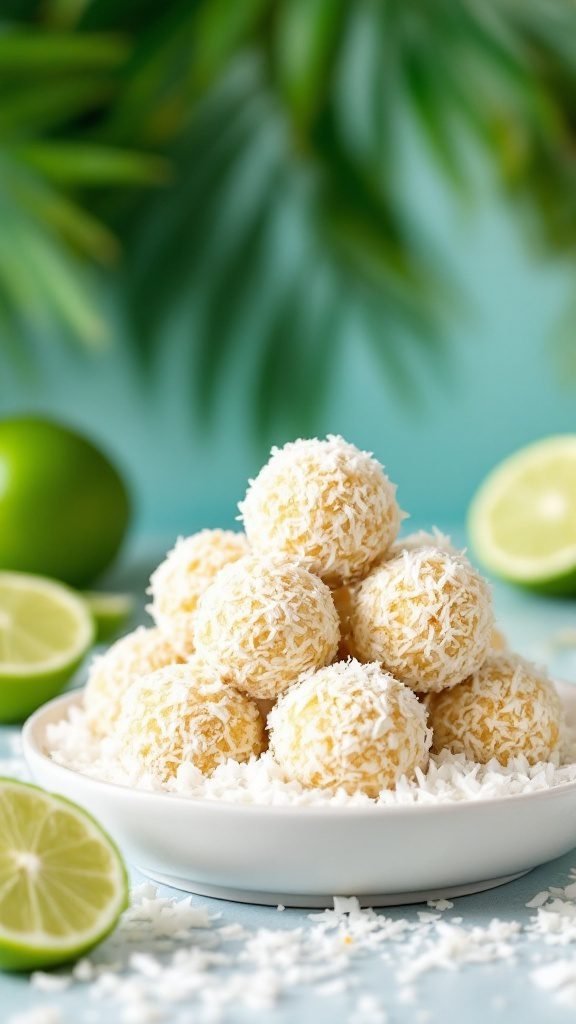
Coconut Lime Energy Bites are a refreshing and nutritious treat. They offer a delightful balance of creamy coconut and zesty lime flavors, making them a perfect snack for any time of the day. These bites are not only vegan and gluten-free, but they are also keto-friendly, low carb, and sugar-free, catering to various dietary lifestyles.
Preparing these bites is super simple. Just mix your ingredients in a bowl, roll them into bite-sized balls, and chill them in the fridge. In no time, you’ll have a delicious and healthy snack that’s perfect for curbing cravings and keeping your energy levels up!
Ingredients
- 1 cup unsweetened shredded coconut
- 1/2 cup almond flour
- 1/4 cup maple syrup or agave nectar
- 1/4 cup coconut oil, melted
- 1 teaspoon lime juice
- 1 teaspoon lime zest
- 1/2 teaspoon vanilla extract
- Pinch of salt
- Extra shredded coconut for rolling
Instructions
- In a mixing bowl, combine the shredded coconut, almond flour, maple syrup, melted coconut oil, lime juice, lime zest, vanilla extract, and a pinch of salt. Stir until well combined.
- Using your hands, scoop out small amounts of the mixture and roll them into balls, about 1 inch in diameter.
- Roll each ball in extra shredded coconut until fully coated.
- Place the coconut lime energy bites on a parchment-lined tray and refrigerate for at least 30 minutes to firm up.
- Enjoy these bites as a quick snack or a nutritious dessert!
Chocolate Coconut Chia Pudding
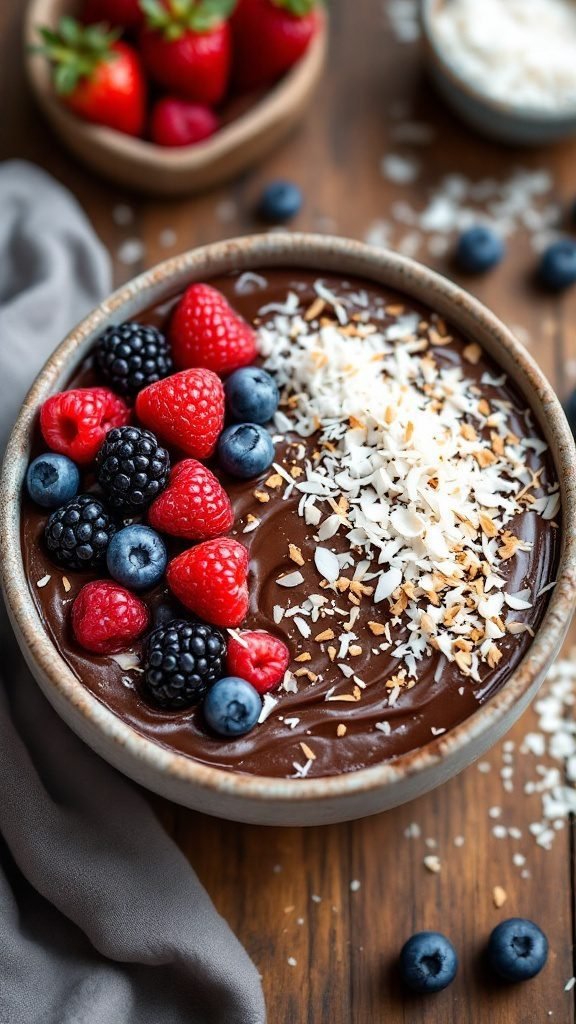
If you’re looking for a quick and satisfying dessert, Chocolate Coconut Chia Pudding is a fantastic choice. This no-bake treat is not only delicious but also packed with nutrients. The rich chocolate flavor pairs wonderfully with the creamy coconut, making it a delightful option for anyone with a sweet tooth.
Perfect for a healthy lifestyle, this dessert is vegan, gluten-free, and low in sugar. It’s a simple recipe that provides a good source of protein and fiber, while also being a great snack for any time of day. You can easily customize the toppings to suit your taste or diet preferences!
Ingredients
- 1/2 cup chia seeds
- 2 cups coconut milk (or any plant-based milk)
- 1/4 cup unsweetened cocoa powder
- 1/4 cup maple syrup or agave nectar
- 1 teaspoon vanilla extract
- Pinch of salt
- Shredded coconut and fresh berries for topping
Instructions
- In a bowl, whisk together chia seeds, coconut milk, cocoa powder, maple syrup, vanilla extract, and salt until well combined.
- Let the mixture sit for about 5 minutes, then whisk again to prevent the chia seeds from clumping.
- Cover the bowl and refrigerate for at least 2 hours, or overnight, until the pudding has thickened.
- Once set, stir the pudding again and serve it in bowls, topped with shredded coconut and fresh berries.
- Enjoy your nutritious and delicious dessert!
Frozen Yogurt Bark with Berries
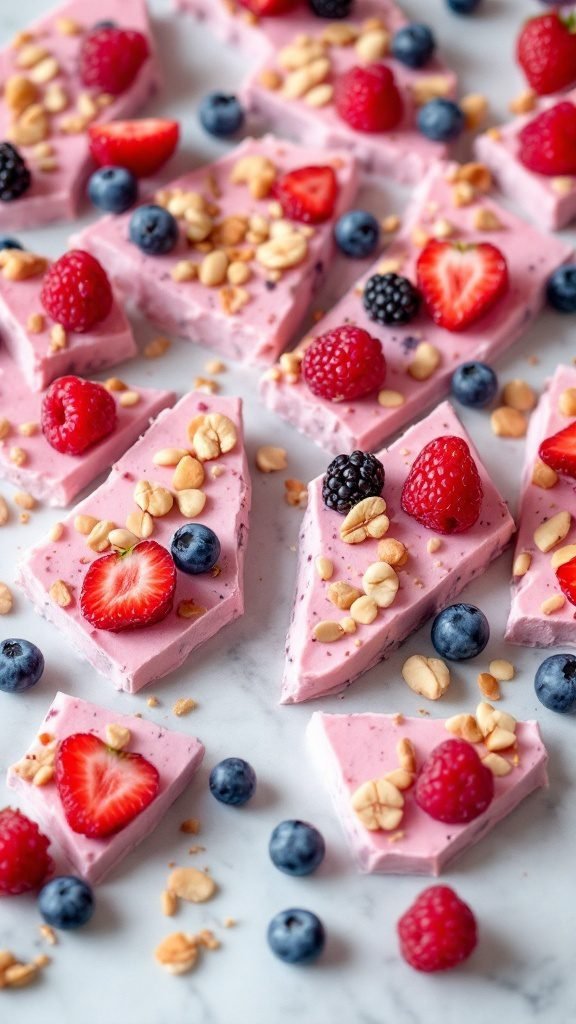
Frozen yogurt bark with berries is a delightful and healthy treat that’s perfect for warm days or a quick snack. This no-bake recipe combines creamy yogurt with fresh, colorful fruits, creating a refreshing dessert that’s both nutritious and satisfying. The sweetness of the berries pairs beautifully with the tangy yogurt, making it a delicious option for anyone looking for a guilt-free indulgence.
Not only is this dessert simple to make, but it’s also customizable! You can choose your favorite berries and add toppings like nuts or granola for an extra crunch. It’s a great way to incorporate more fruits into your diet while enjoying a delicious snack. Plus, it’s vegan, gluten-free, and fits well into various dietary lifestyles.
Ingredients
- 2 cups plain yogurt (you can use dairy-free or Greek yogurt)
- 2 tablespoons honey or maple syrup (optional for sweetness)
- 1 cup mixed berries (strawberries, blueberries, raspberries, or blackberries)
- 1/4 cup chopped nuts (almonds or peanuts)
- 1 teaspoon vanilla extract
Instructions
- Line a baking sheet with parchment paper for easy removal.
- In a bowl, mix the yogurt, honey (if using), and vanilla extract until well combined.
- Spread the yogurt mixture evenly on the prepared baking sheet, about 1/2 inch thick.
- Scatter the mixed berries and chopped nuts on top of the yogurt.
- Freeze for at least 3 hours or until solid.
- Once frozen, break the bark into pieces and enjoy!
- Store any leftovers in the freezer.

Chill & Indulge: No-Bake Desserts That Steal The Show
So, what do we think?
Icebox cakes, chilled bites, no-churn wonders… these no bake dessert ideas seriously bring their A game.
And honestly, once you’ve tried a silky cashew cream tart or a stack of peanut butter chocolate bites that didn’t require even a second in the oven, it’s kind of impossible to go back.
If you’re planning a warm-weather bash or just looking to beat the heat in the sweetest way possible, these treats pair perfectly with your fave BBQ Food Ideas and will round out any spread alongside these crowd-pleasing Summer Dessert Recipes.
Save your energy. Skip the sweat. Dessert’s handled.


